

Table of Contents:
- Why Use SharePoint for Policy Management?
- Planning Your Policy Management Hub
- Building Your Policy Center (Step-by-Step)
- Why It’s Smart to Use Metadata Instead of Folders
- Automating Your Policy Lifecycle with Power Automate
- How to Secure Your System with Permissions
- Publishing Policies and Tracking Acknowledgment
Last Updated on October 9, 2025
Are you making the most of the tools you already own?
In this guide, you will learn how to transform a standard SharePoint site into a powerful, automated system for managing your company’s policies.
Let’s get started.
Many companies already have SharePoint through Microsoft 365, but often use it as a simple shared drive.
This is a missed opportunity, as SharePoint can be a powerful tool for managing company policies when set up correctly.
Using it this way creates a “single source of truth” where every employee accesses the same, most current version of any policy.
This central hub ends the confusion of outdated versions saved in different email chains or personal folders and is key for reducing risk.
Sign up for exclusive updates, tips, and strategies
Planning Your Policy Management Hub
A common mistake is jumping straight into SharePoint without a clear structure, which often leads to a system that’s hard to use and secure.
Define Your Structure First
Start by talking to the main people involved, such as representatives from HR, Legal, IT, and any compliance teams.
Together, you should define who does what in the policy lifecycle:
- Who writes the policies?
- Who needs to review and approve them?
- Who is just a reader?
Answering these questions first will help you design a better system.
Team Site vs. Communication Site (Difference)
SharePoint offers two main types of sites that are perfect for managing policies, and they serve very different purposes:
- Team site: For collaboration and drafting
- Communication site: For publishing and sharing
A team site is a private, collaborative workspace for a small group to create and review policies behind the scenes.
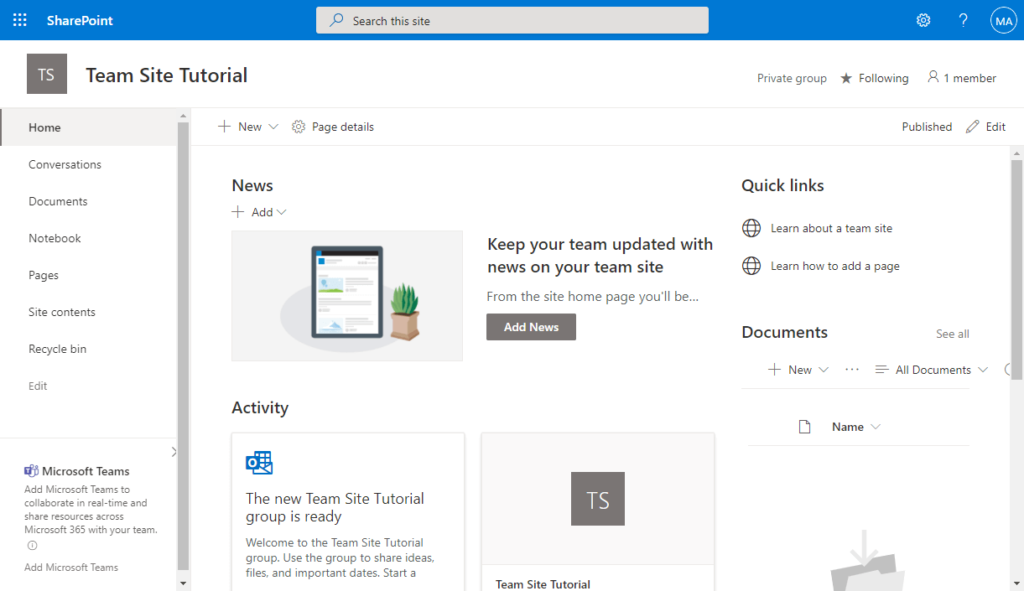
In contrast, a communication site is a public portal designed to share final, approved policies with the entire organization.
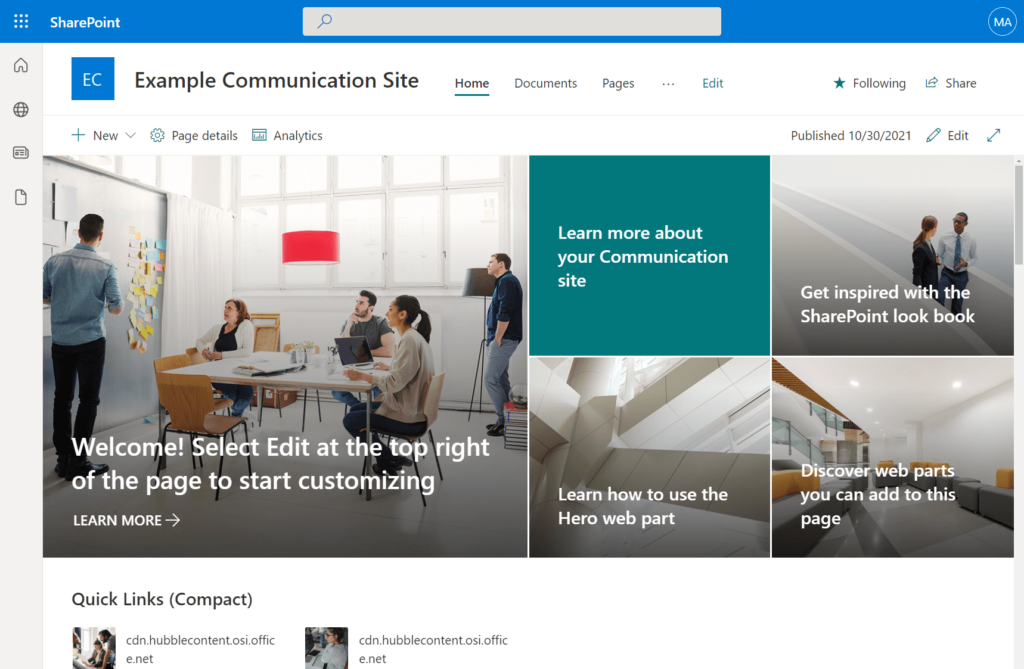
Best Practice: The Two-Site Model
The best approach is to use both typesof sites.
This “two-site model” creates a clear separation between works-in-progress and official documents:
- Private team site: Serves as a secure “policy workspace” for drafting and collaboration
- Public communication site: Acts as the official “corporate policy center” for publishing
Using a private site for drafting allows authors to collaborate on edits without employees seeing unfinished work.
The public site is then used to publish only the final, approved policies, which improves security and keeps the portal clean and easy to navigate.
Building Your Policy Center (Step-by-Step)
With a plan in place, you can start building the structure in SharePoint.
Here are the steps to create your public-facing policy portal and the main document library:
Creating the Public-Facing Communication Site
A site administrator can create the main policy hub by following these steps:
Go to the SharePoint start page and click Create site.

Choose the Communication site template.

Give your site a clear name, like “Corporate Policy Center,” and add a brief description.
Assign at least one person as a site owner.
Click Finish.
Setting Up the “Published Policies” Document Library
Now that you have a site, you need a library to hold the official policies.
On your new site’s homepage, click the New dropdown menu.
Select Document library.

Name the library with something clear, like “Published Policies.”
This library will become the single source of truth for all final company policies.
Essential Library Settings for Compliance
To make a standard library powerful enough for policy management, you need to configure a few key settings.
You can find these by going to the library, clicking the Settings gear icon, and selecting Library settings.

First is versioning.
Go to Versioning settings and select Create major and minor (draft) versions.
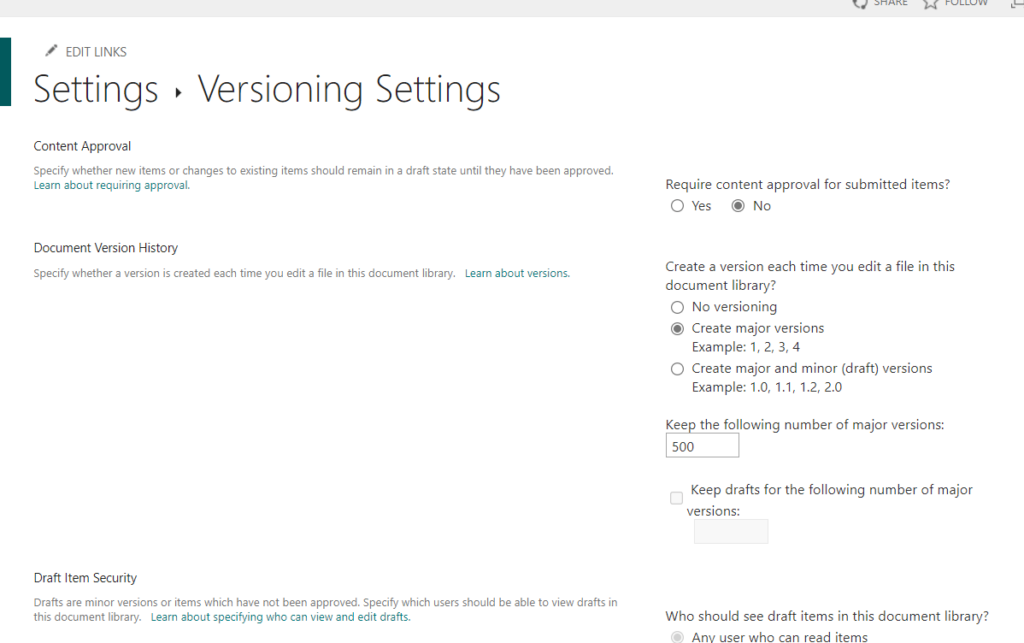
This is the most important setting as it allows you to work on drafts (e.g., version 1.1, 1.2) that are invisible to regular employees.
Only published “major” versions (e.g., 1.0, 2.0) are visible to everyone, which creates a clean audit trail of changes.
The second is content approval.
In the same settings menu, set Require content approval for submitted items? to Yes.
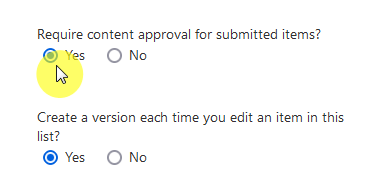
This adds a formal approval step.
When a new policy is ready, it remains in a “Pending” state, hidden from view, until a designated approver formally approves it for publishing.
The last setting I want to recommend is check-out/check-in.
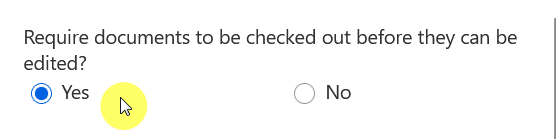
For additional control, you can require documents to be “checked out” before editing.
This locks the file so two people cannot make conflicting changes at the same time.
Why It’s Smart to Use Metadata Instead of Folders
The most important decision you can make when designing your system is to use metadata instead of folders.
While folders are familiar, they are rigid and create more problems than they solve in a dynamic system like SharePoint.
Why Folders Fail for Policy Management
Relying on a deep structure of nested folders is a common mistake.
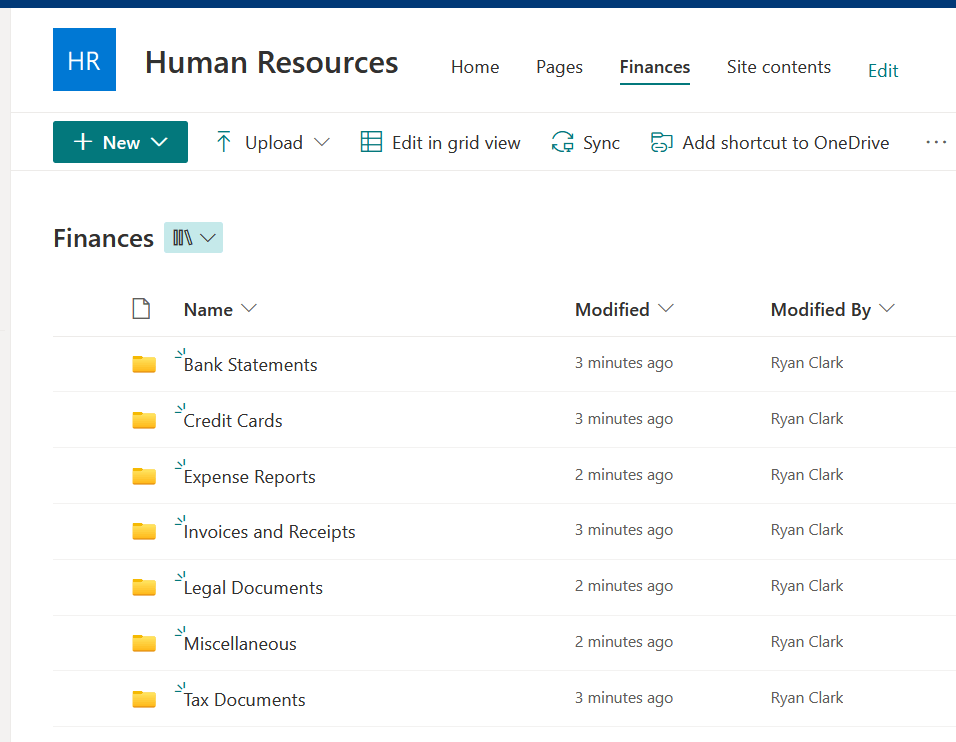
It forces you to make a choice: Does a policy that applies to both “HR” and “Finance” go in the HR folder or the Finance folder?
If you create a copy, you’ve destroyed your single source of truth.
Folders also make it difficult for employees to find what they need, and moving a file can easily break any links pointing to it.
How Metadata Creates a Dynamic System
Metadata is simply data about your documents.
Instead of putting a policy in a folder, you “tag” it with useful information.

You can tag a document with the department it belongs to, the person who owns it, and its current status.
This allows you to keep all your policies in one library and let users instantly filter and sort to find exactly what they need.
For example, an employee can click a filter to see all policies owned by the “IT Department.”
Key Metadata Columns for Your Policy Library
You can add them by going to the library and selecting Add column.
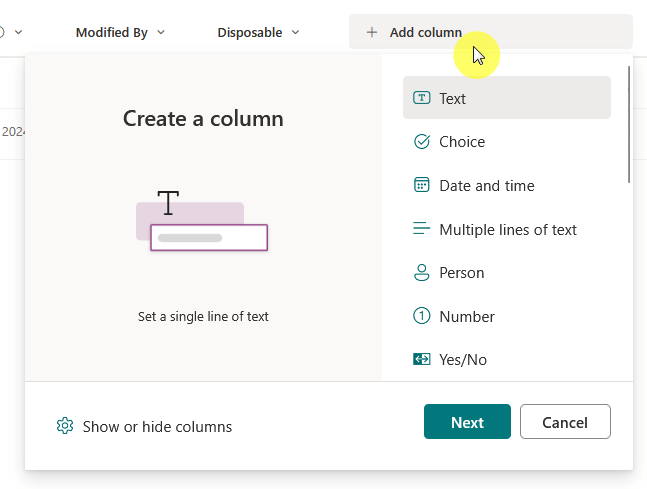
Here are the most important metadata columns to add to your policy library:
| Metadata Column | SharePoint Column Type | Purpose & Business Value |
| Policy ID | Single line of text | A unique code for each policy, making it easy to reference. |
| Policy Owner | Person or Group | Assigns a clear owner for accountability and approval workflows. |
| Department | Managed Metadata | Categorizes the policy by business unit (e.g., HR, IT, Finance). |
| Status | Choice | Tracks where the policy is in its lifecycle (e.g., Draft, In Review, Approved). |
| Approval Date | Date and Time | Records when the policy was last officially approved. |
| Next Review Date | Date and Time | Sets the date for the next required review, which can trigger reminders. |
| Policy Category | Managed Metadata | Allows for further classification (e.g., Security, Compliance, Health & Safety). |
A Quick Guide to Using the Term Store for Consistency
For columns like “Department” or “Policy Category,” it’s important that everyone uses the same terms.
SharePoint’s Term Store allows you to create a central, managed list of terms.
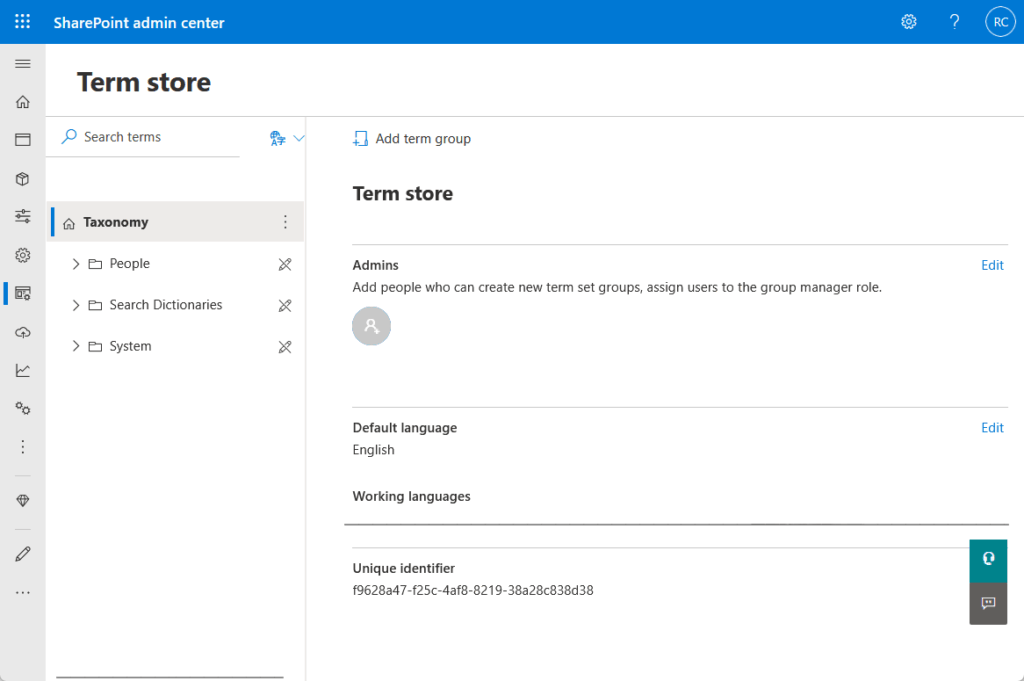
This ensures users must pick from a predefined list (e.g., “Human Resources”) and can’t enter their own variations.
Examples would be “HR” or “People Team,” which keeps your filtering and reporting accurate.
Automating Your Policy Lifecycle with Power Automate
Automation is what transforms a policy repository from basic storage into an active management system.
Microsoft Power Automate lets you build workflows that simplify processes, reduce errors, and ensure compliance steps are always followed.
Workflow 1: Building a Dynamic Approval Process
This workflow automatically sends a policy for formal approval before it can be published.
You can build this by describing it to Power Automate’s Copilot feature:
"When a file's properties are changed in a SharePoint library, check if the 'Status' column is 'Ready for Review'. If it is, start an approval process and assign it to the person in the 'Policy Owner' column. If the outcome is 'Approve', update the file's 'Status' to 'Approved', set the content approval status to Approved, and record the date in the 'Approval Date' column. If the outcome is 'Reject', update the 'Status' to 'Needs Revision' and email the file creator with the rejection comments."
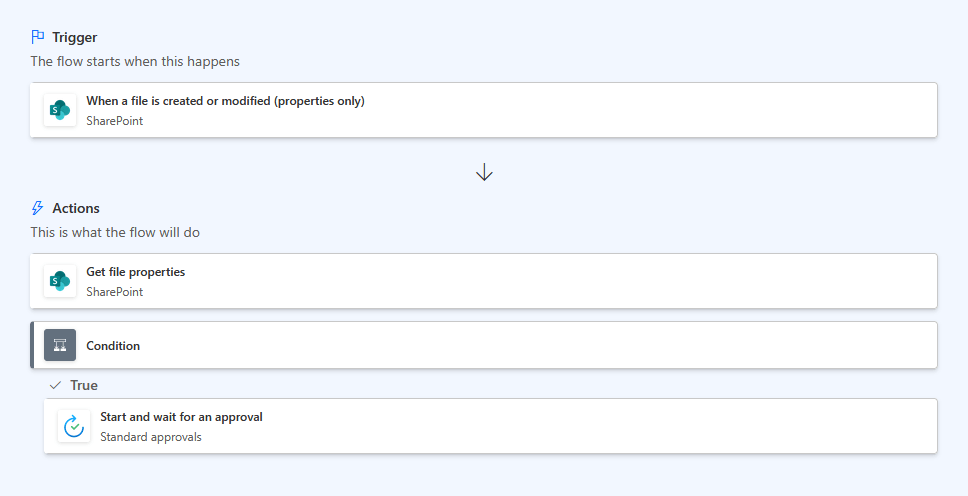
The key steps in the flow are the following:
- The trigger (when a file is modified and status is “Ready for Review”)
- The action (start an approval)
- The condition (what to do if approved or rejected)
Workflow 2: Creating Automated Review Date Reminders
This workflow ensures policies are reviewed regularly and don’t become outdated.
Here’s a prompt you can use:
"Every day, get all items from a SharePoint library. Filter the items to find anywhere the 'Next Review Date' is within the next 30 days. For each of those items, send an email to the person in the 'Policy Owner' column to remind them to review the document, including the document title in the email."
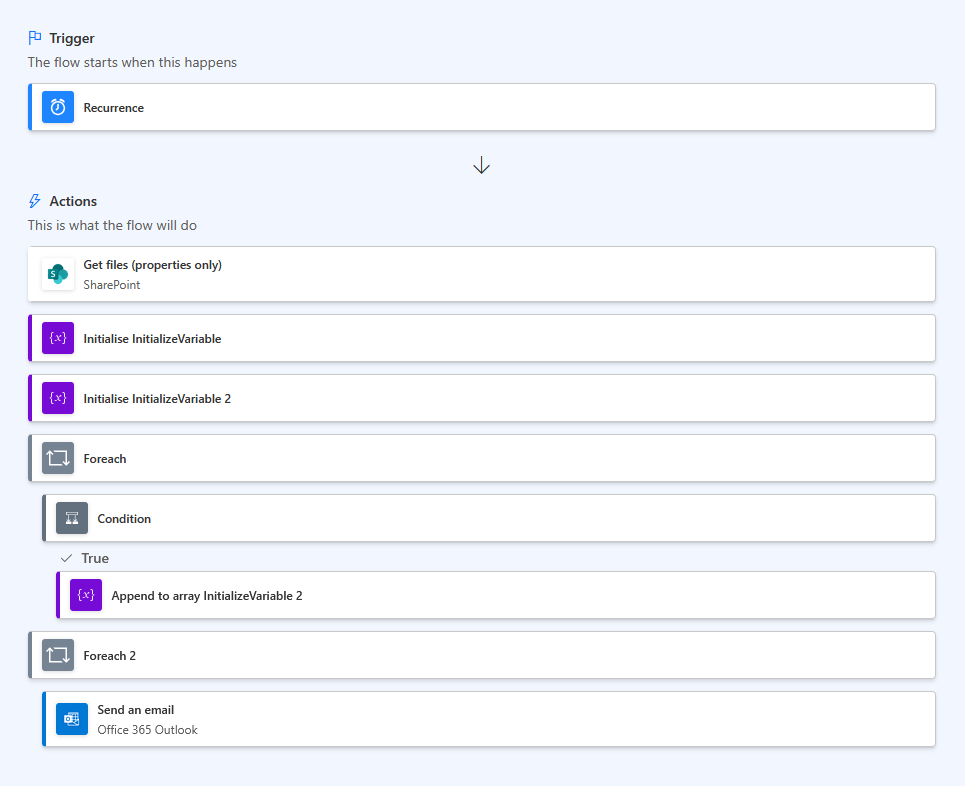
This flow uses a scheduled trigger to run daily, gets all the policies, and filters for those needing a review soon.
It also sends a notification to the correct owner.
Planning for Reality with Absences and Bottlenecks
A simple workflow that assigns a task to a single person can be a problem if that person is on vacation or leaves the company.
To build more resilient workflows, assign approval tasks to a Microsoft 365 Group instead of an individual.
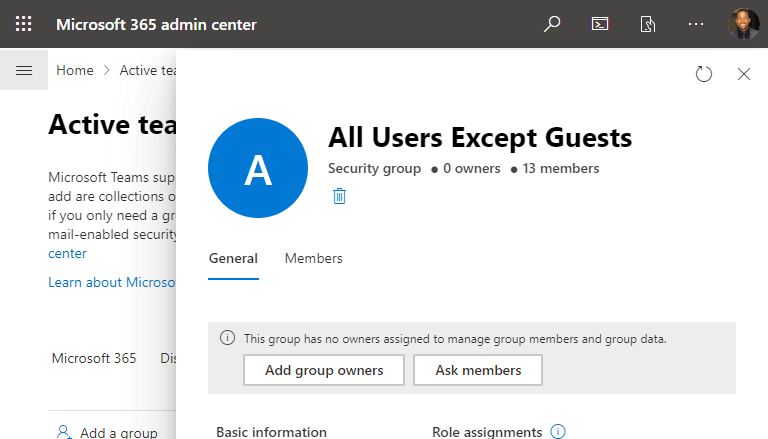
This way, any member of the group can handle the approval and prevent a single person from becoming a bottleneck.
How to Secure Your System with Permissions
A well-designed security model is essential for protecting the integrity of your policies.
Fortunately, SharePoint’s permissions system is flexible, but it should be configured using the principle of least privilege.
The Principle of Least Privilege
This security concept is simple: give users only the minimum level of access they need to do their jobs.
This means most employees only need to read final policies, while a much smaller group of people needs to create and edit them.
This approach minimizes the risk of accidental edits or deletions.
Setting Up Permissions for Your Two Audiences
You need to configure permissions differently for your private workspace and your public portal.
For the public portal or communication site, I recommend you grant the “Everyone except external users” group Read permissions.

This allows all employees to view and download final policies.
Then, grant a specific, smaller group of administrators and policy owners contribute or edit permissions so they can publish new documents.
For the private workspace or team site, it should be private.
Only add the specific policy authors, reviewers, and committee members as members of the site.
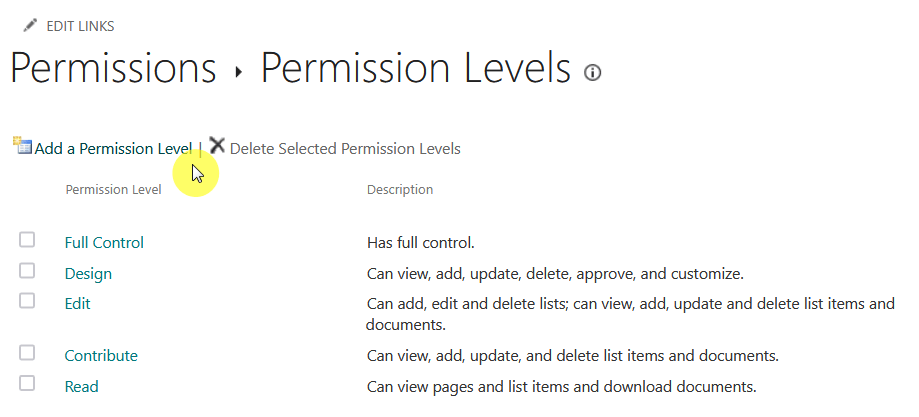
They will automatically get Edit permissions, allowing them to collaborate on drafts.
But don’t add general employees to this site.
SharePoint’s “Share” button makes it easy to quickly share a link to a document.

However, this can undermine your carefully planned permissions by creating unique sharing links that are hard to track.
It’s a good practice to restrict ad-hoc sharing at the site level so that only site owners can share content.
This forces users to follow the formal process of granting access, keeping your security model intact.
Publishing Policies and Tracking Acknowledgment
The final steps of the process involve publishing the official policy and, for many companies, tracking that employees have read and understood it.
What To Remember When Publishing A Final Policy
Once a policy is approved, make sure to save the final version as a PDF first.
That will preserve the formatting and make it a read-only document, which prevents easy edits.
Then, in SharePoint, use the publish command.
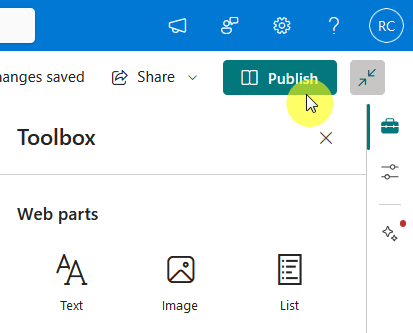
This promotes the document to the next major version (e.g., from v1.3 to v2.0) and makes it visible to all readers.
When publishing, add comments summarizing the changes for a clear audit trail.
The Attestation Gap: Proving Employees Have Read a Policy
For some organizations, a key compliance step is attestation – proving that an employee has read and acknowledged a policy.
Native SharePoint doesn’t have a built-in feature for this, but you can bridge this gap with a few different methods.
- Simple approach: Use Microsoft forms for a basic acknowledgment checkbox
- Integrated approach: Build a custom power app for a more seamless user experience
- Enterprise approach: Use a dedicated third-party tool for robust, audit-ready compliance
For low-risk policies, a simple Microsoft Form connected to a Power Automate flow can create a basic tracking log.
For a better user experience, a custom Power App can handle acknowledgments within the same interface.
Companies in highly regulated industries often need dedicated third-party tools.
Those provide out-of-the-box features like tracking dashboards, reminders, and detailed audit reports.
Anyway, do you have questions about how to use SharePoint to manage company policies? Let me know.
For any business-related queries or concerns, contact me through the contact form. I always reply. 🙂