
Last Updated on August 18, 2025
Tired of chasing document approvals in SharePoint?
In this guide, let’s talk about workflow examples, from simple sign-offs to complex, multi-stage automation.
Let’s get started.
The Problem with Email and Manual Tracking
Chasing approvals through email is a familiar pain.
You send a document, wait for replies, and try to track who has seen what version.
It’s messy:
- Files get lost in long email chains.
- The approval status is never clear
- There’s no official record of who signed off and when.
This manual approach is slow, prone to human error, and a headache for compliance.
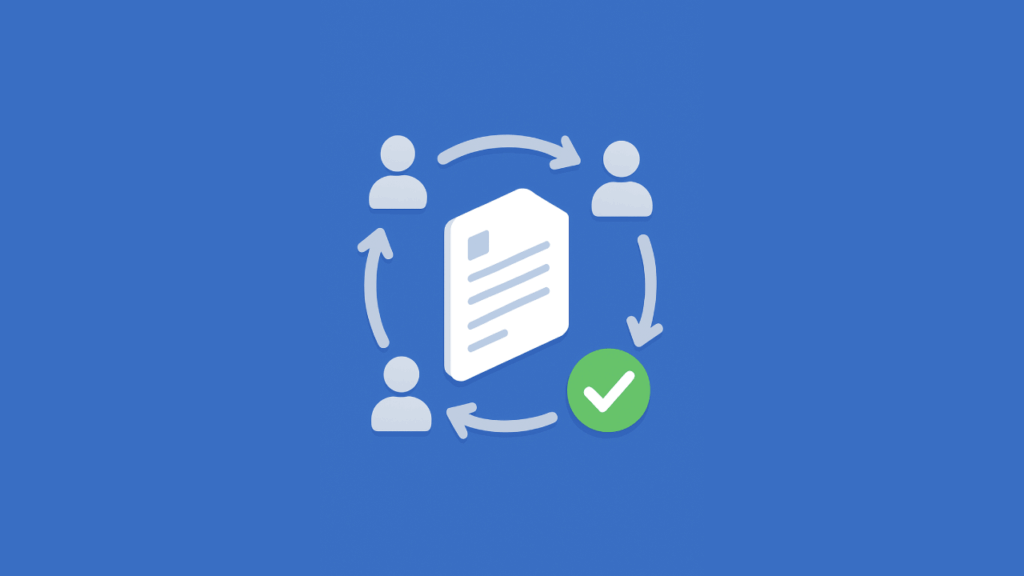
A SharePoint workflow solves these problems as it automates the entire review process.
A workflow routes the document to the right people, sends reminders, and tracks every step.
It brings order to the chaos by giving you a consistent, efficient, and auditable system for managing approvals.
Sign up for exclusive updates, tips, and strategies
Before Power Automate became the standard, SharePoint had its own set of built-in workflows.
You might still see these in older SharePoint environments.
They’re simple and get the job done for basic tasks within a single SharePoint library, but they don’t connect to other apps.
Example 1: The Standard Approval Workflow (Sequential vs. Parallel)
This is the most basic approval workflow.
It sends a document to one or more people for them to either approve or reject.
The key choice here is how it routes the tasks:
- Sequential approval: Tasks are sent to reviewers one by one, following a specific order.
- Parallel approval: Tasks are sent to all reviewers at the same time for faster decisions.
Sequential is best for hierarchical processes that require a specific chain of command.
Parallel is ideal for collaborative reviews where the order of feedback isn’t important.
Choosing the right one depends entirely on how your team needs to make decisions.
Example 2: The Collect Feedback Workflow
This workflow is used to gather comments, not formal approvals.
It routes a document to a group of people and consolidates their feedback for the owner.
Here’s how it typically works:
- An author starts the workflow.
- Reviewers are assigned a feedback task.
- All comments are compiled for the author.
- The workflow ends when feedback is complete.
This process keeps all the suggestions organized in one place, avoiding confusing email threads.
It’s best used for early-stage drafts where broad input is more valuable than a simple yes or no.
This ensures collaborative documents are well-vetted before they move to a final decision stage.
Example 3: The Three-State Workflow
This workflow is designed to track the status of an item as it moves through three specific phases.
It’s a simple way to manage processes that have a clear beginning, middle, and end.
The workflow relies on a “Choice” column in SharePoint with values that represent each state, such as:
- State 1: Draft
- State 2: In Review
- State 3: Approved
When a user changes the item’s status, the workflow can assign a task and send a notification.
This is useful for managing high volumes of items like project tasks or support issues.
It provides a straightforward, visual way to see where every item is in its lifecycle.
Modern Examples Using Microsoft Power Automate
Today, Microsoft Power Automate is the standard for creating workflows in SharePoint and across Microsoft 365.
It’s a powerful tool that lets you connect to hundreds of other applications, making it far more flexible than the classic workflows.
Example 4: The Simple Ad-Hoc Approval with “Request Sign-off”
This is the quickest and most user-friendly way to get an informal approval.
It’s already built into the SharePoint library menu for users to trigger manually.
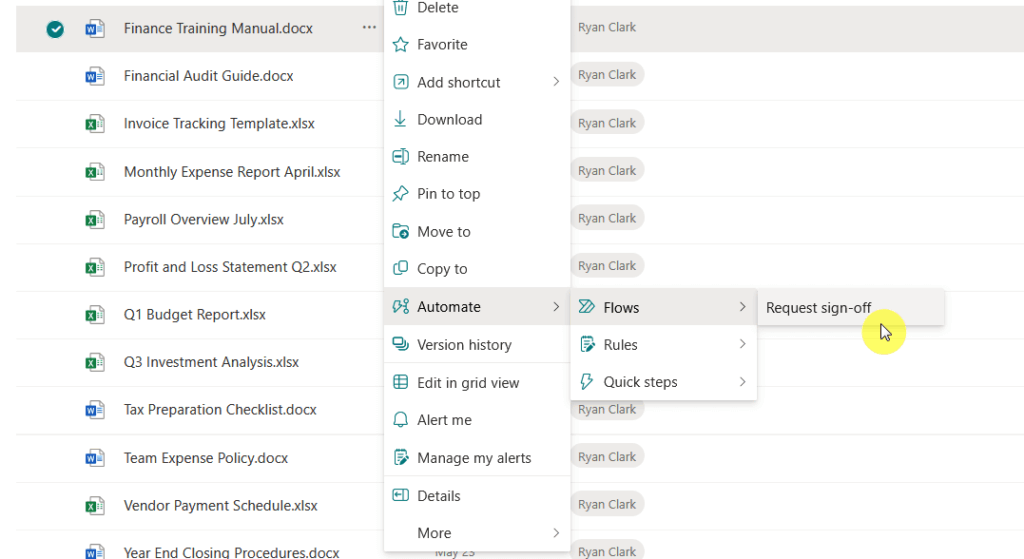
Here’s the basic flow:
- A user selects a file in SharePoint.
- They click Automate > Request sign-off.
- They enter the approver’s name and a message.
- The approver gets a notification in Teams and Outlook.
The experience is seamless for both the sender and the approver.
SharePoint automatically adds a “Sign-off status” column to the library, so everyone can see the document’s progress.
This is the best choice for one-off approvals that don’t need a rigid, formal process.
Example 5: A Custom Sequential Approval for Chain of Command
When you need a formal review process that follows a specific order, you can build a custom sequential flow.
This ensures proper document review flow, e.g., manager approval before director review.
The key components are:
- Trigger: The flow starts when a file’s properties are modified.
- Approval 1: An approval task is sent to the first person (e.g., manager).
- Condition: The flow checks if the first task was approved.
- Approval 2: If yes, an approval task is sent to the second person (e.g., director).
This structure enforces a chain of command that cannot be altered by users.
It provides a clear audit trail showing who approved the document and in what order.
This is essential for processes that require multiple levels of sign-off before completion.
Try it with Copilot:
When a file's status in a SharePoint library is changed to 'Submitted for Review', start an approval and assign it to my manager. If they approve, start a second approval and assign it to their manager. If either person rejects, send an email to the file's creator.

Example 6: A Dynamic Parallel Approval for Team Reviews
For situations where speed is key and multiple teams need to review a document at the same time, a parallel workflow is the answer.
For example, the Legal and Finance teams can review a contract simultaneously, rather than waiting on each other.
Here’s how to structure it:
- Trigger: The flow starts when a file is submitted.
- Parallel Branch: The workflow splits into two or more paths.
- Branch A: An approval task is assigned to Team A.
- Branch B: An approval task is assigned to Team B.
The workflow won’t continue until all branches are complete, ensuring all parties have given their input.
A critical setting is whether to wait for the first response or for all responses from each team.
For processes requiring consensus, waiting for all responses is the correct approach.
Try it with Copilot:
When a file is created in SharePoint, start two approvals at the same time. Assign the first approval to the 'Legal Team' Office 365 Group. Assign the second approval to the 'Finance Team' Office 365 Group. Wait for all responses before sending an email to the file creator with the outcomes.

Example 7: An Advanced State Machine for Complex Lifecycles
Some business processes aren’t linear, as a document might need to go from legal review back to the author for changes.
A simple sequential flow can’t handle this back-and-forth movement, but a state machine can.
The core architecture uses two main controls:
- Do Until Loop: The workflow runs continuously until a status column is set to a final value, like “Approved.”
- Switch Control: Inside the loop, a switch checks the current status and runs actions specific to that state (e.g., ‘Legal Review’, ‘Needs Rework’).
When an approver makes a decision, the flow simply updates the status property in SharePoint.
The loop then runs again, and the switch directs the document to the next correct state based on the new status.
This allows the document to move forwards and backwards between stages as needed.
Try it with Copilot:
I need a workflow for a SharePoint library with a choice column named 'Document Status' with the options 'Draft', 'Dept Review', 'Legal Review', and 'Approved'. The workflow should run until the status is 'Approved'. Use a switch control to check the current status. If the status is 'Dept Review', start an approval with the department manager. If the status is 'Legal Review', start an approval with the legal team.

Enterprise-Grade Examples with Third-Party Tools
For very complex or mission-critical processes, some organizations turn to powerful third-party platforms like Nintex.
These tools often provide more advanced features for mapping, managing, and analyzing workflows on a large scale.
Example 8: A Nintex Workflow with a Visual State Machine
Nintex is known for its user-friendly, visual workflow designer that simplifies complex processes.
It abstracts away some of the manual setup required in other tools, like Power Automate.
A key feature is its dedicated State Machine action, which allows you to visually map out a process:
- Drag the State Machine action onto the canvas.
- Define each state (e.g., ‘Team A Review’, ‘Rework’).
- Draw transition lines between states.
- Configure actions within each state.
This visual approach makes the workflow’s logic clear and much easier to maintain.
You can see the entire process flow at a glance, which helps in troubleshooting and making future changes.
It’s a top-down approach to process design that many business analysts prefer.
Example 9: A K2 (Nintex) Process with SmartForms and File Movement
The K2 platform, now part of Nintex, excels at creating applications that tightly integrate data, forms, and workflows.
Its SmartForms feature allows you to build powerful, custom forms with advanced logic.
A typical K2 process might look like this:
- A user uploads a contract, triggering the workflow.
- A reviewer receives a task with a link to a SmartForm.
- The form displays document data and an embedded viewer.
- The workflow moves the file to a new library upon approval.
This creates a much richer user experience than standard SharePoint forms can offer.
The workflow can also perform system tasks like updating metadata and moving the file to a final “Executed Contracts” library.
This seamless integration between the user interface and the backend automation is K2’s primary strength.
How to Make Your Workflow Successful
Building a workflow is more than just a technical task.
A good workflow starts with a good plan.
Here are a few tips on how you can make this happen:
1. Plan Your Process on a Whiteboard First
Before you open any workflow tool, map out your process.
- Who is involved?
- What are the steps?
- What decisions need to be made?
- What should happen if a document is approved versus rejected?
Answering these questions on a whiteboard or piece of paper first will save you a lot of time and prevent confusion later.
A clear plan is the foundation of a good workflow. 🙂
Avoid hardcoding information like approver email addresses directly into your workflow.
What happens when that person leaves the company?
Instead:
- Use SharePoint’s metadata columns.
- Create a “Person” column for the approver or a “Choice” column for the status.
Your workflow can then dynamically pull this information from the document’s properties.
This makes your workflow flexible.
To change an approver, you just update the SharePoint list, not the workflow itself.
3. Test Everything, Plan for Errors, and Get Feedback
Treat your workflow like any other piece of software.
Test every possible path—not just the “happy path” where everything gets approved.
- What happens on rejection?
- What if a required piece of information is missing?
Build in error handling to notify an administrator if something goes wrong.
After you launch, listen to feedback from the people who use it.
A workflow should evolve to meet the changing needs of your business.
Choosing the Right Workflow
SharePoint offers a range of options for automating document reviews.
The best choice depends on your specific need:
- For a quick, one-time approval, the built-in “Request sign-off” feature is perfect.
- For processes with custom business logic, Power Automate provides a powerful and flexible platform.
- For highly complex, enterprise-wide needs, third-party tools like Nintex offer advanced capabilities.
The key is to start with the simplest solution that gets the job done and build from there.
Do you have any questions about the document review workflow examples here? Let me know!
For any business-related queries or concerns, contact me through the contact form. I always reply. 🙂


