

Table of Contents:
Last Updated on September 9, 2025
Tired of manually copying and pasting information from forms into spreadsheets?
In this guide, I’ll show you three distinct methods for connecting Microsoft Forms with SharePoint.
Let’s get started.
Microsoft Forms and SharePoint Lists are designed to work in tandem.
Forms is the friendly front door for collecting information, while SharePoint is where that information is stored.
The Easy-to-Use Data Capture Tool
Think of Microsoft Forms as the clipboard of your digital workplace.
It’s a straightforward tool for creating surveys, quizzes, and registration pages.
Its main job is to make data entry easy for everyone, regardless of their technical skill, as you can build and share a form in minutes.
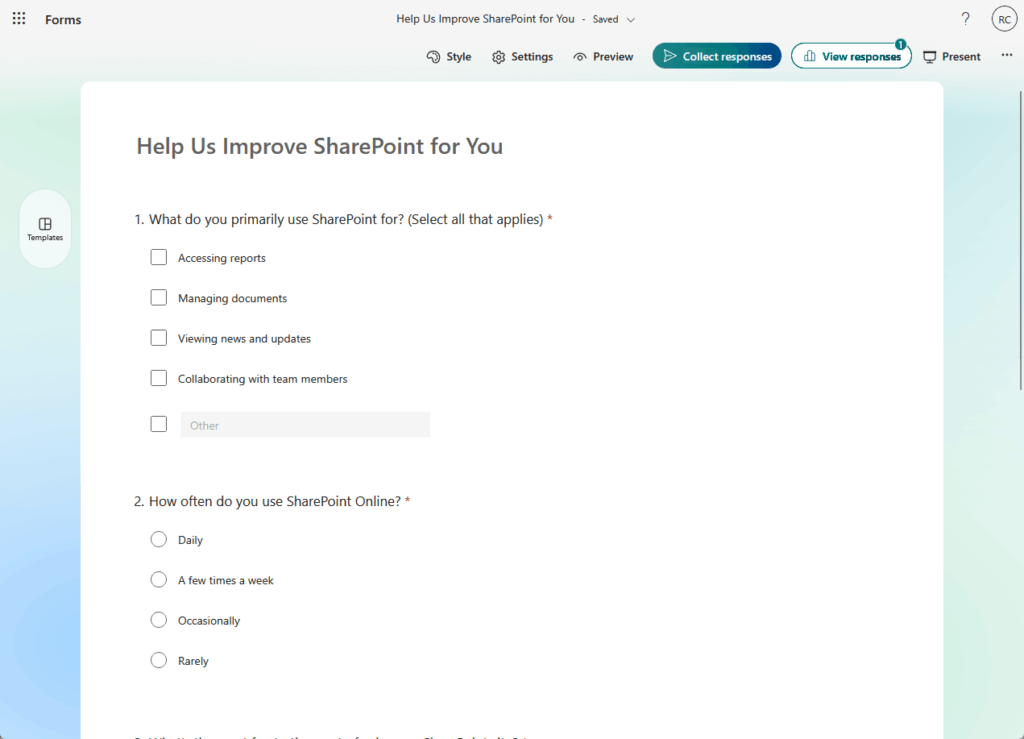
The strength of Forms lies in its simplicity and the variety of questions you can ask.
Common question types:
- Choice: For single or multiple-answer questions using radio buttons or checkboxes
- Text: To capture short answers like a name or long-form comments
- Rating: Lets users give feedback on a numbered or star-based scale
- Date: A simple calendar picker to keep dates formatted correctly
Beyond these basics, you can use branching logic to show different questions based on a person’s previous answers.
For collecting documents, the file upload option lets users attach files directly to their submission.
The “Responses” tab provides real-time charts and summaries, with Excel export for detailed analysis.
The Powerful Data Storage Hub
If Forms is the clipboard, a SharePoint List is the filing cabinet.
It’s much more than a simple spreadsheet, as it’s a web-based table designed to hold structured information securely.
A list is the right place to manage organized data like issue trackers, project tasks, or event attendees.
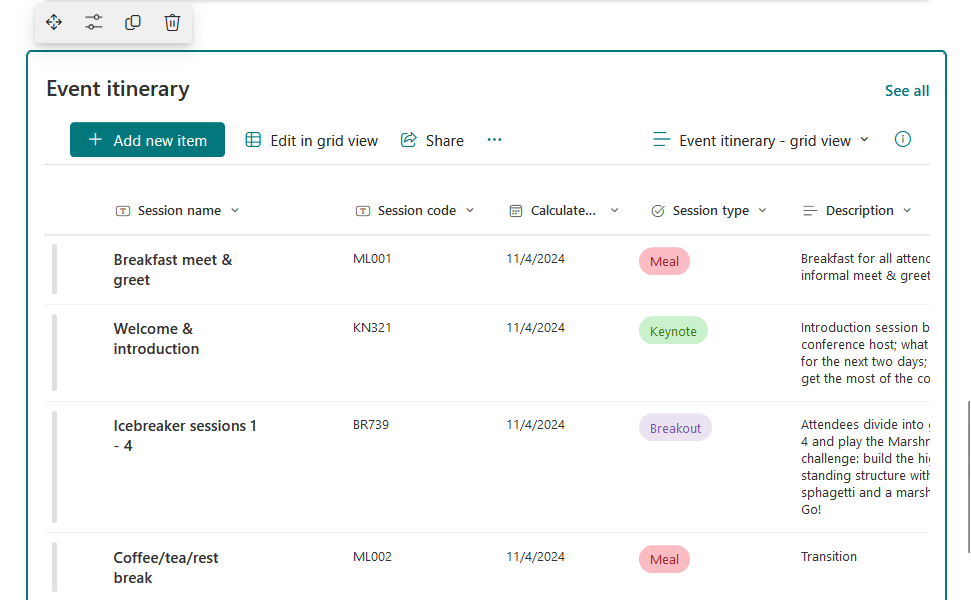
The power of a list comes from its columns, which can be configured to accept specific types of data.
Obviously, matching your Form questions to the right SharePoint column types is important for success.
| Form Question Type | Recommended SharePoint Column Type |
| Choice (Single Answer) | Choice |
| Choice (Multiple Answers) | Choice (with “allow multiple selections”) |
| Text (Short/Long) | Single line of text / Multiple lines of text |
| Date | Date and Time |
| Rating / Net Promoter Score® | Number |
SharePoint Lists can hold up to 30 million items, but you need to be aware of the list view threshold.
Single views/queries are capped at 5,000 items for performance; use indexed columns and filtered views to bypass this.
Sign up for exclusive updates, tips, and strategies
There are three ways to integrate Microsoft Forms and SharePoint.
They range from a simple display-only option to a fully automated workflow.
| Feature | Method 1: Web Part | Method 2: Forms for Lists | Method 3: Power Automate |
| Setup | Very Low | Low | Medium |
| Data Storage | Excel File | SharePoint List | SharePoint List |
| External Users | Yes | No | Yes |
| Workflows | No | No | Yes |
This is the fastest and easiest way to show a form inside SharePoint.
You use the “Microsoft Forms” web part to place your form directly onto a modern SharePoint page.
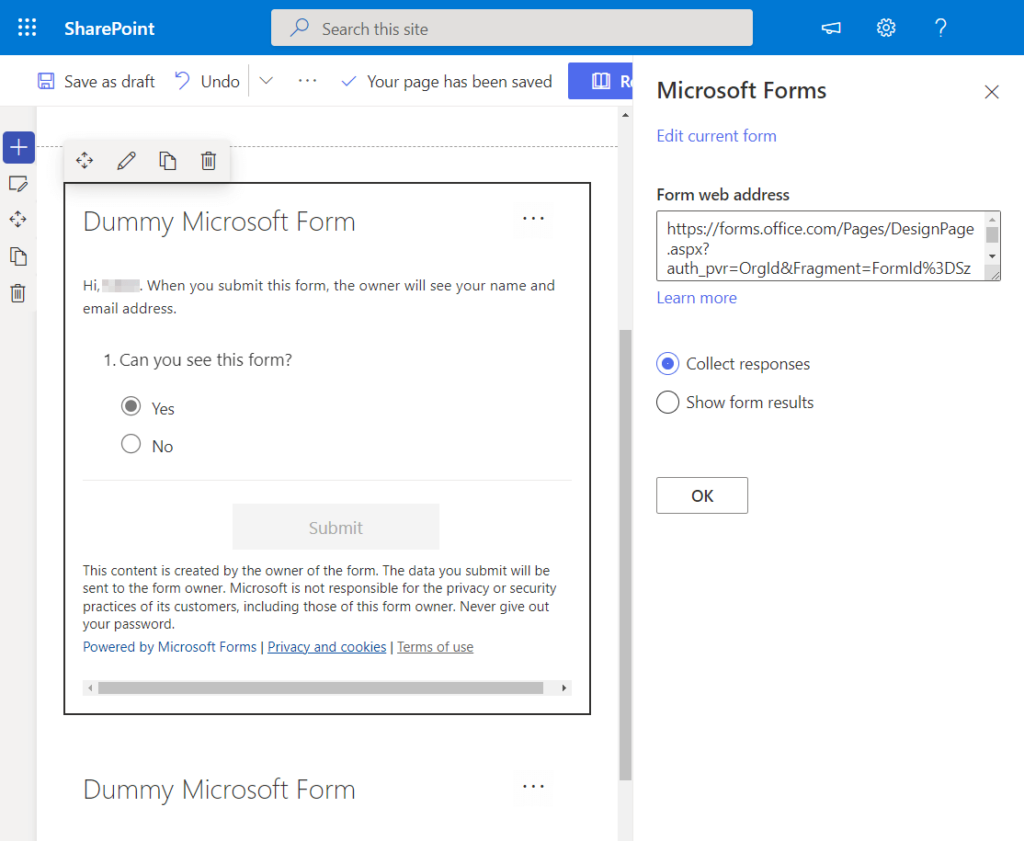
This method is great for user experience because people can fill out the form without ever leaving the site.
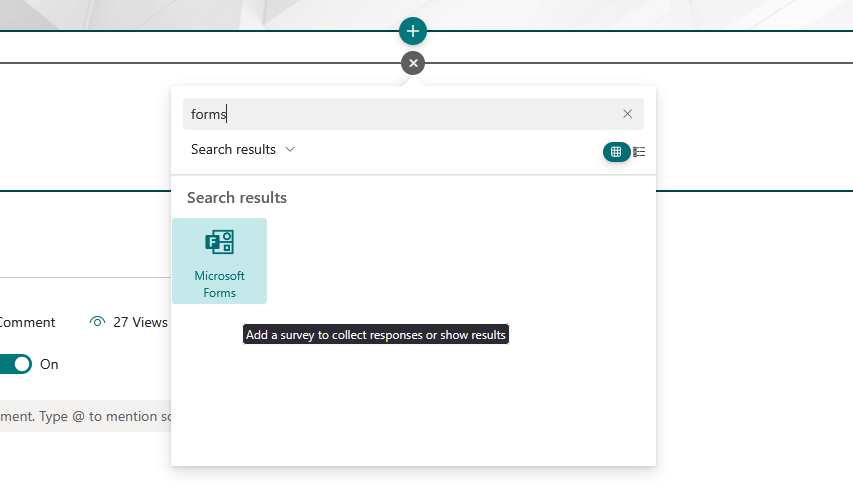
To set it up, on a SharePoint page, click edit and then add the Microsoft Forms web part.
Paste the web address of an existing form.
Choose to either collect responses or show form results and then republish the page.

This approach is perfect for quick polls, simple feedback forms, or displaying survey results on a team dashboard.
But it has one major limitation: the data doesn’t go into a SharePoint List.
Responses are stored in the Excel file connected to the form so, in a way, this method is for presentation only.
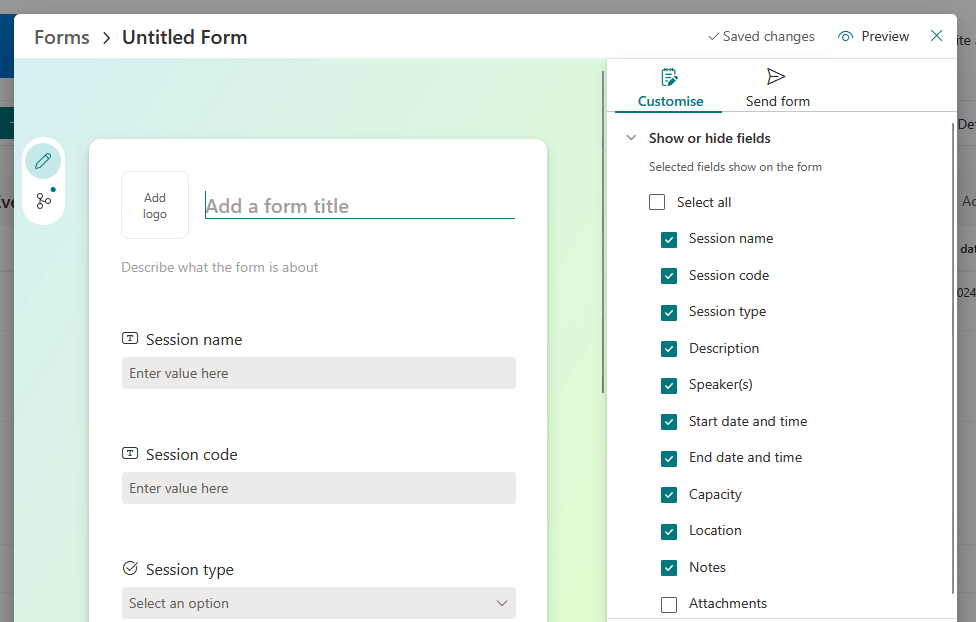
This newer method reverses the workflow.
You start by building your SharePoint List with columns, and then SharePoint automatically generates a form based on that list.
From the command bar at the top of the list, click the Forms button. > select New form.

SharePoint will create a form with questions that match your list columns and open it in a new tab.
Customize the form title, description, and questions as needed.
When you’re ready, you can share the form’s URL with users to start collecting responses.
This is an excellent choice for internal data collection, like a help desk ticketing system or an employee suggestion box.
Its biggest advantage is that the person submitting the form doesn’t need access to the SharePoint list itself.
However, this method has limitations.
Forms lack external sharing, advanced features like branching, and full SharePoint column type support.
Method 3: Build a Custom Workflow with Power Automate
For the most control and flexibility, Power Automate is the way to go.
This method lets you build a custom workflow that connects any form to any SharePoint list.
It’s the best solution for business processes that need approvals, notifications, or attachment handling.
The basic flow is built with three steps:
- Trigger: “When a new response is submitted” (Microsoft Forms)
- Action: “Get response details” (Microsoft Forms)
- Action: “Create item” (SharePoint)
In the final step, you map the answers from your form questions to the correct columns in your SharePoint list.
While this requires more setup, it unlocks the full potential of the integration.
You can also use the built-in Copilot in Power Automate to describe the flow you want in plain language.
Copilot will then build the basic structure for you.
Sample Copilot prompt:
When a new response is submitted in my 'Project Intake' Microsoft Form, get the response details, and then create a new item in my 'Project Requests' SharePoint list on the 'Marketing Site'.

This integration is powerful, but it’s important to know its limits.
As your needs become more complex, you may need to graduate to a more advanced tool like Power Apps.
The Forms and SharePoint combination works well for many processes across different departments.
- IT: Help desk tickets, hardware requests, and incident reporting
- HR: Employee onboarding, leave requests, and training registration
- Project Management: Weekly status updates and risk logging
For interactive applications beyond simple data entry, consider Power Apps.
The biggest sign you need Power Apps is when users need to find, view, and edit data they’ve already submitted.
Other triggers include:
- The need for a fully custom user interface or a multi-screen form.
- The need to perform real-time calculations or look up data from other sources.
- The need to work with related data, like a customer and all their past orders.
Start Automating Your Data Collection
Combining Microsoft Forms and SharePoint is a great way to build efficient systems for collecting and managing your business data.
The best method depends on your needs, from a simple embedded form to a fully automated workflow with Power Automate.
This integration is a perfect starting point for low-code automation and can save you a significant amount of time.
Do you have questions about connecting Microsoft Forms and SharePoint? Let me know below.
For any business-related queries or concerns, contact me through the contact form. I always reply. 🙂
Frequently Asked Questions (FAQ)
Can I share a form with external users and save their data to SharePoint?
Yes. You can use a Power Automate flow (Method 3) to achieve this. Just make sure your form’s sharing settings are set to “Anyone can respond.”
Why is the “File Upload” option missing from my form?
The “File Upload” option is only available when a form is shared with people inside your organization. It is not available on forms set to “Anyone can respond.”
Does the person filling out the form need permission to my SharePoint list?
It depends on the method. For Method 3 (Power Automate), they do not need permission. The flow runs under the creator’s credentials. For Method 2 (Forms for Lists), they also do not need permission to the list.
What happens to my Power Automate flow if I rename a column in my SharePoint list?
Renaming a SharePoint column can break your flow. Power Automate often relies on the internal name of the column, which doesn’t change when you edit the display name. However, it’s best practice to update your “Create item” action in the flow to ensure everything is still mapped correctly.


The List Forms do now have branching, as well as lookup fields. So Option 2 is a real winner