
Last Updated on May 21, 2025
Thinking of building your intranet project from scratch?
In this guide, I will show you how to create your own SharePoint intranet from scratch in a few simple steps.
Let’s get started.
Table of Contents:
Step 1: Define your goals and audience
Before building anything, you need to know why you’re building it in the first place (like laying the foundation of a house).
Focus on these:
- What problems will this new intranet solve? Internal communication? Resource sharing?
- Understand who will use the intranet. Employees, managers, HR teams, etc.?
- Think about tools like document sharing, news updates, or forms.
- Look at how SharePoint can bring together the tools you’re using.
The items above will make it easier to way easier to plan out the rest and avoid something too complicated or too simple.
If you’re a small or mid-size organization, it’s smart to focus on just a few key things first, for example:
- A homepage with announcements
- A document library
- Maybe a space for HR policies.
The nice thing is that you can always grow it later.
Also, don’t forget to ask around: a quick survey or chat with different teams can uncover things you hadn’t thought of.
Sign up for exclusive updates, tips, and strategies
Step 2: Plan your site structure
Now that you’ve figured out your goals, it’s time to decide how everything fits together, starting with the site structure.
Hub Sites vs. Flat Site Collections
Your setup in SharePoint Online can follow either of these two structures:
- Hub
- Flat
Hub sites act as central points that connect other related sites.
For example, you could have a company hub that links to department sites, which helps with shared navigation, news, etc.
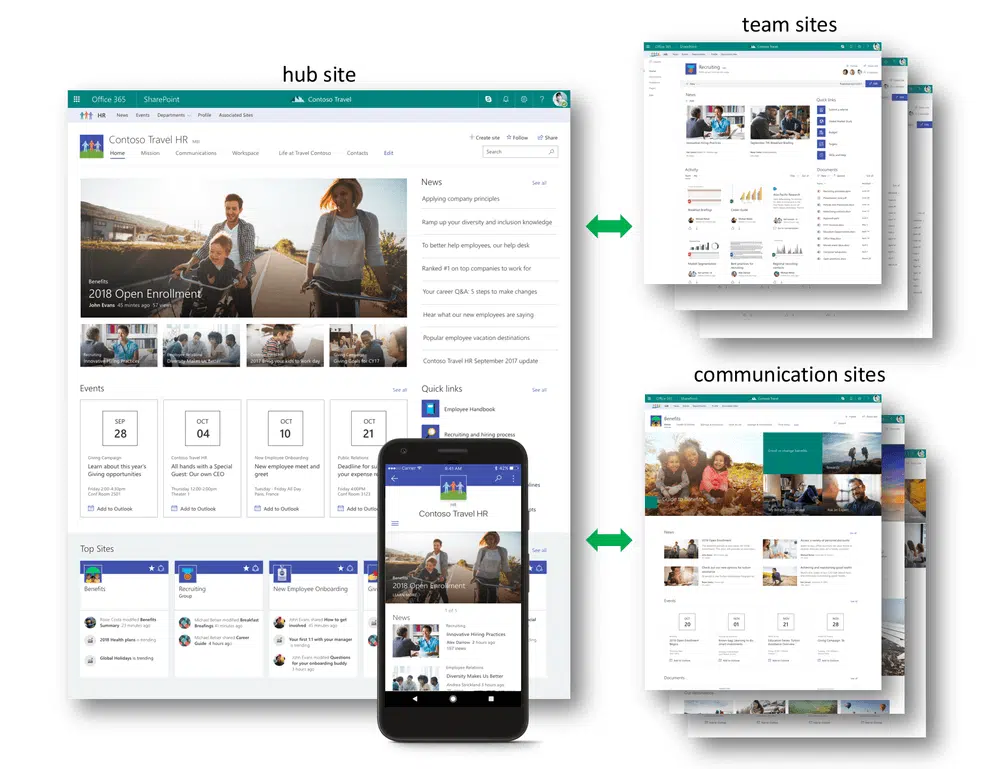
Flat site collections are more independent, where each site collection stands on its own without being grouped under a hub.
If you’re just starting, a flat structure might be easier as you can launch a few key sites without overthinking anything.
Later, you can convert to a hub structure if needed. 🙂
Define your main sections
My recommendation here is that you start with your core needs and don’t try to build everything at once. 🙂
Ask yourself:
- What info do employees ask for the most?
- Which departments need their own space?
- Where should company-wide updates live?
You want the most important content to be front and center, not buried in subpages.
Think about what people need daily versus what they only check occasionally.
As for common areas, these include:
- HR (leave policies, onboarding, forms)
- IT (troubleshooting guides, request forms)
- Finance (budget tools, expense reports)
- News (company-wide announcements)
- Projects or Teams (collaboration spaces)
Organize these into top-level sections.
If a section doesn’t have enough content yet, consider rolling it into another area until it grows.
Choosing the right site types
Choosing the right kind of site in SharePoint is key to getting the behavior you expect.
With that, there are two main types of sites, communication sites and team sites, and each comes with different strengths.
Communication sites are ideal for sharing information broadly across the organization.
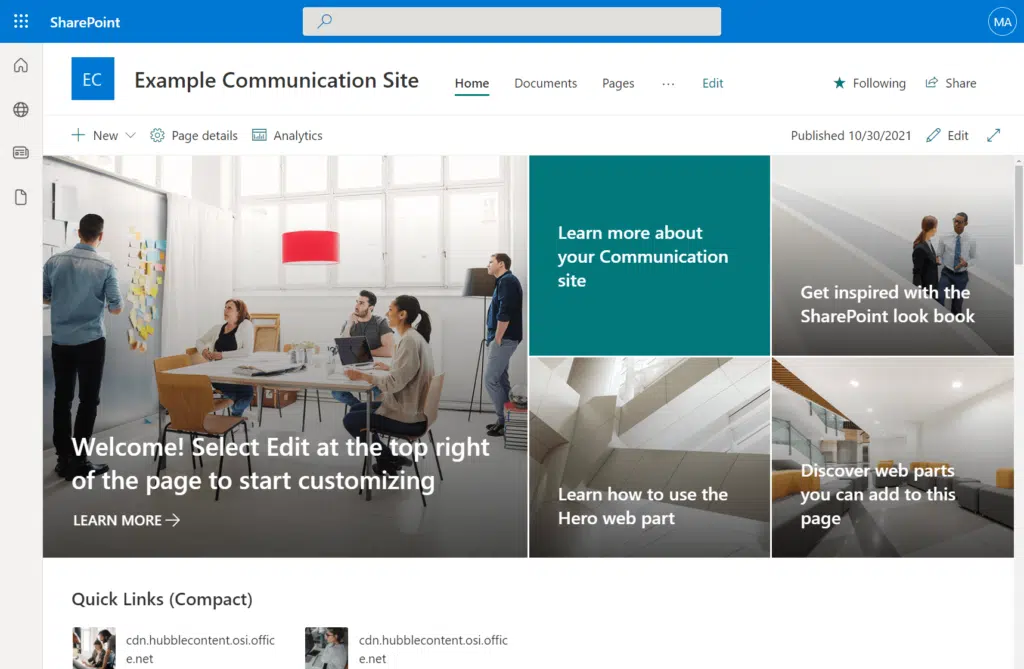
This type of site is great for:
- Company news
- HR updates
- Executive messages
- General resources
They are mostly read-only for visitors, with only a few people managing content, and typically have no collaborative tools.
Communication sites support visual layouts with banners, hero web parts, and sections for spotlighting key info.
Team sites, on the other hand, are best for smaller groups who need to work together regularly.
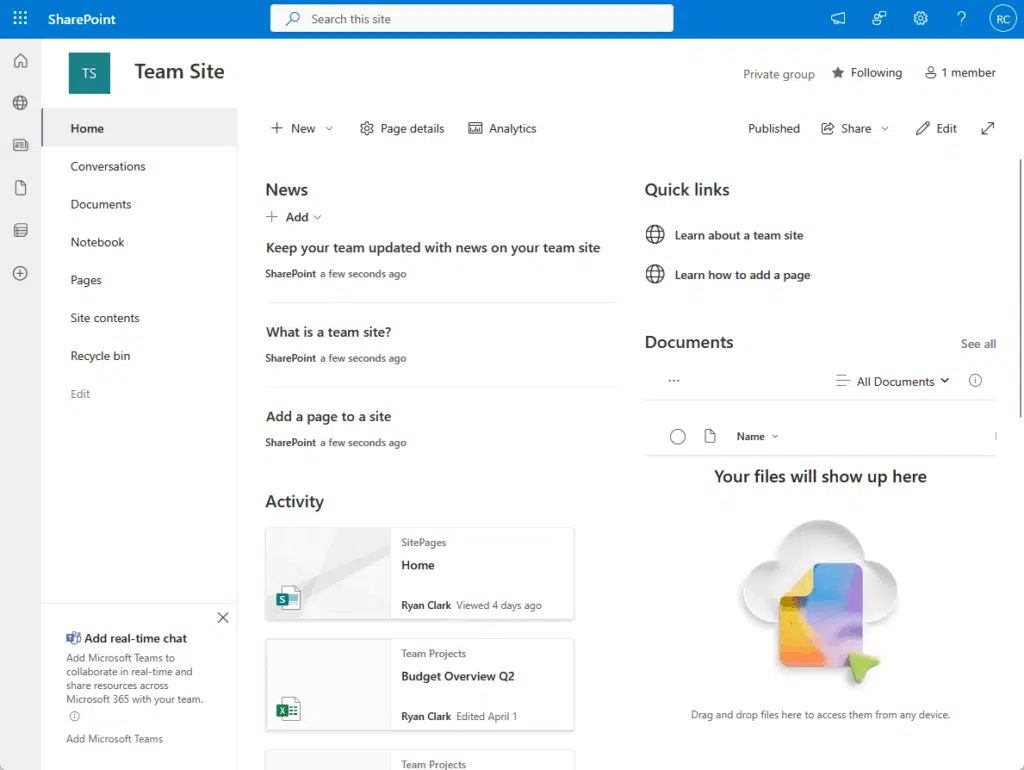
This type of site is perfect for those who need to get work done together, like:
- Departments
- Project teams
- Committees
With team sites, everyone (with access) can add, edit, or delete content, which is why it’s great for active collaboration.
It comes with built-in tools like a shared document library, notebook, calendar, and task lists, and can be connected to Teams.
What’s important here is that you pick based on the purpose of the space.
If for communication, then go with a communication site; if more on working together and sharing files, then a team site.
Step 3: Set up your environment
Now it’s time to actually build the space where your intranet will live.
Since you’re using the SharePoint intranet solution, this part is much simpler, as everything runs in the cloud.
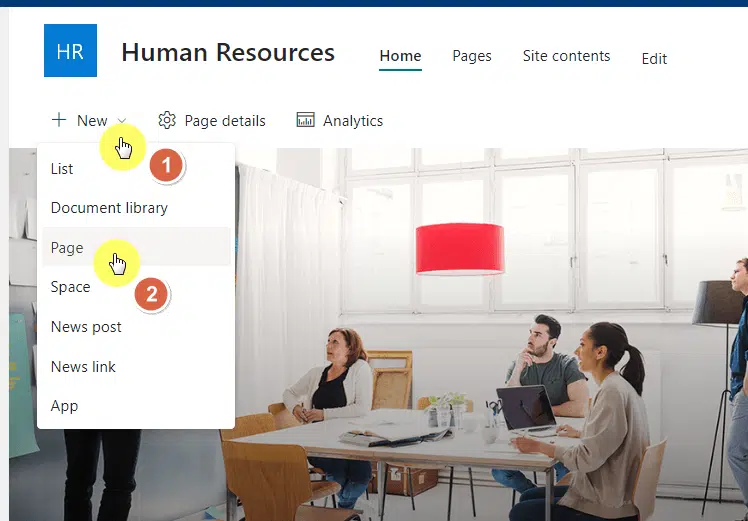
Create your sites
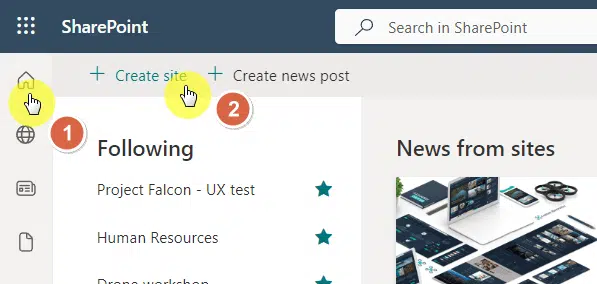
Start by creating the actual sites you will be using.
From the SharePoint home screen in Microsoft 365, you can create the two types of sites that I have shown you earlier.
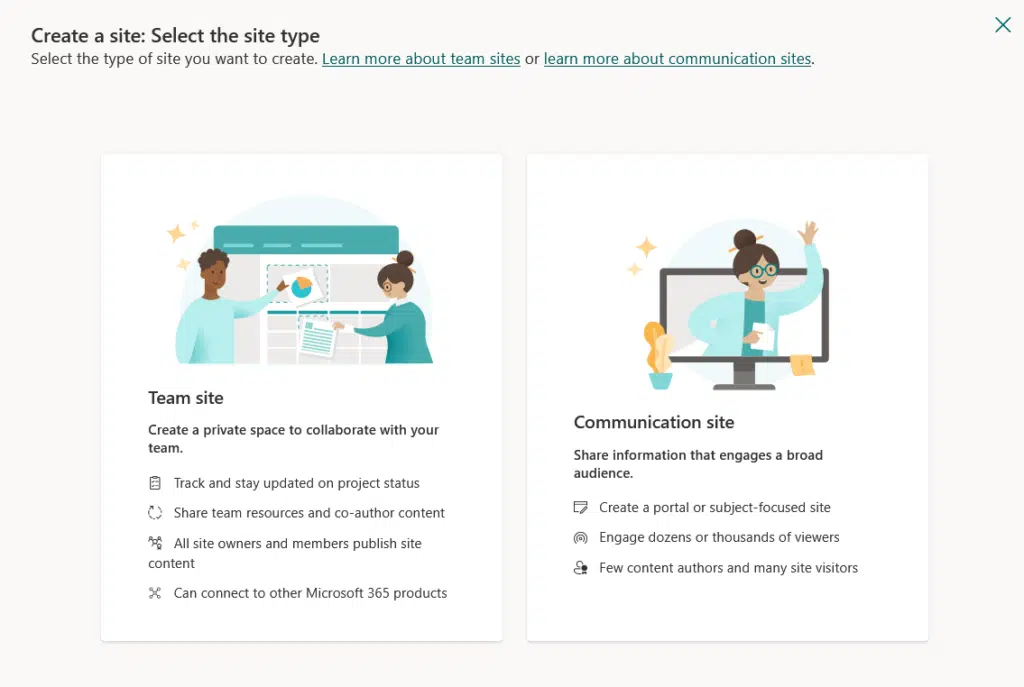
You will then see the templates available for the type of site you’re creating.
And finally, name your sites clearly (like “HR Team” or “Company News”) and add a short description for each.

You can also choose a site design if your organization has any pre-made ones available.
Don’t worry too much about getting everything perfect, you can adjust most settings later. 🙂
How about permissions?
As I explained, creating a team site also creates a group, and this group comes with built-in permissions:
- The owners you assign during creation get full control of the site.
- The members are given edit permissions.
- You can also add visitors later for read-only access.
For communication sites, there’s no Microsoft 365 Group created.
Instead, you assign permissions manually after creating the site (you add site owners, site members, and site visitors).
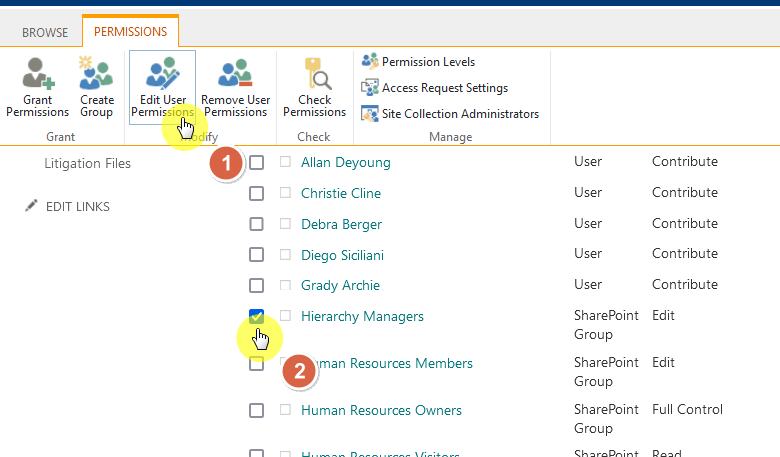
When it comes to permissions, think about who really needs editing rights and who doesn’t.
As a principle, giving too many people full access can turn your site into a messy, unorganized chaos fast.
But what’s nice is that you can manage group membership right from Microsoft 365 or within each site’s settings.
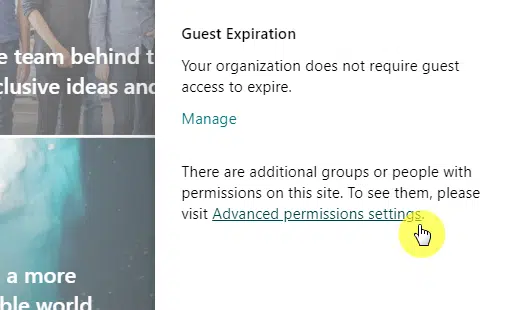
If you want to restrict some areas, consider breaking inheritance and setting custom permissions just for that library.
The admin center is where you manage all your sites in one place.
You don’t have to live in it daily, but it’s good to know where it is and what it does, especially if you’re overseeing multiple sites.
To access it, go to admin.microsoft.com or click the app launcher anywhere in Microsoft 365 and click the “Admin” button.
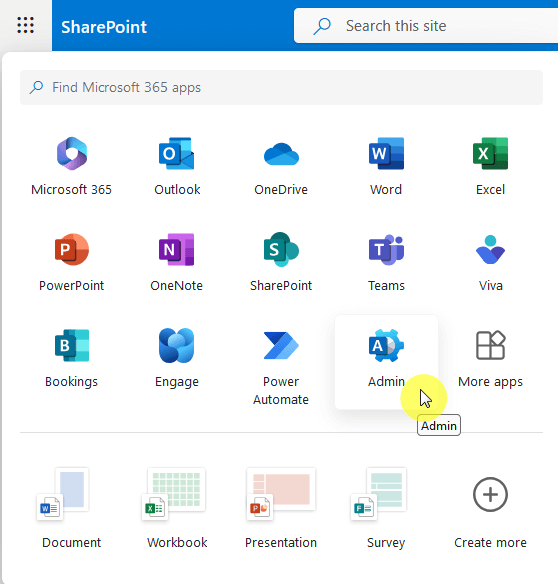
Click “Show all” in the left menu, and then select “SharePoint” under Admin centers.
This will open the SharePoint admin center in a new tab.

Once you’re in, you will see a dashboard with an overview of all your SharePoint activity.
It’s designed to be simple enough for non-techies to navigate, but powerful enough to control the details.
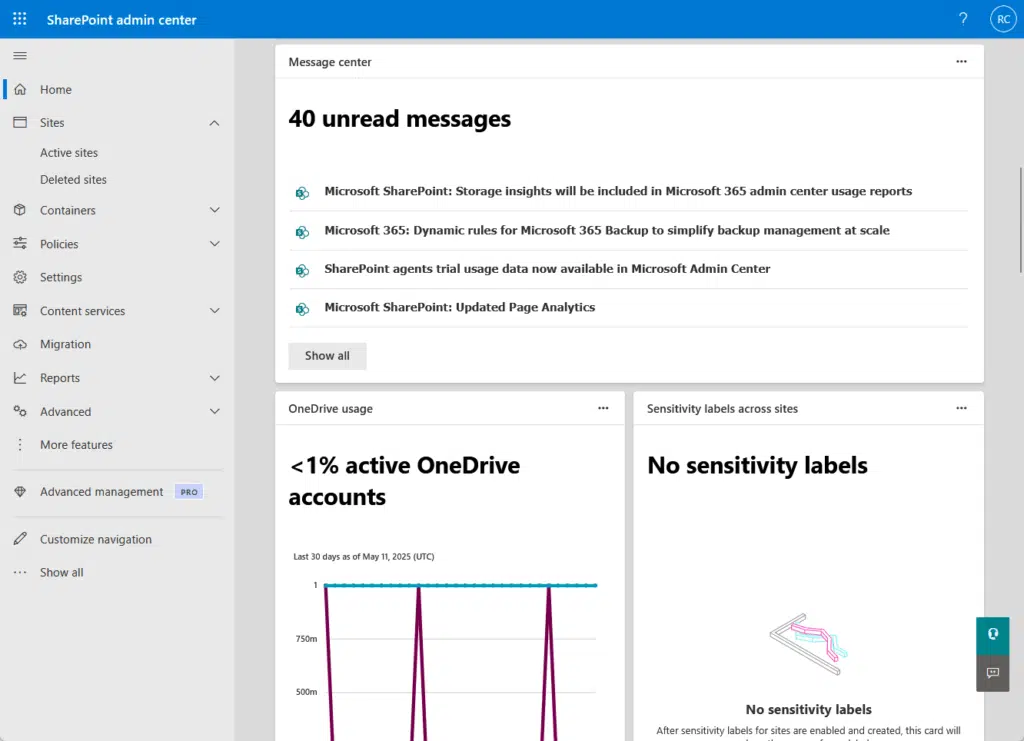
Here’s what you can do inside:
- View and manage all SharePoint sites
- Set storage limits
- Adjust sharing and access settings
- Change site administrators
- Monitor site activity and usage
These tools help you stay in control as your company intranet grows.
Even if you only check in occasionally, it’s the place to go when something needs fixing, or for quick status checks.
Step 4: Build the homepage
Your homepage is the first thing people see when they visit your SharePoint intranet site.
It sets the tone, so it should be clean, welcoming, and easy to navigate (helping them find what they need fast).
Technically, there’s already a homepage existing on a site, but you can always create a new one or edit that one instead.
Let’s focus on three key parts to get it right:
Use web parts to add useful content
SharePoint gives you web parts, which are essentially building blocks for your page.
You can drag and drop them to show different types of content.
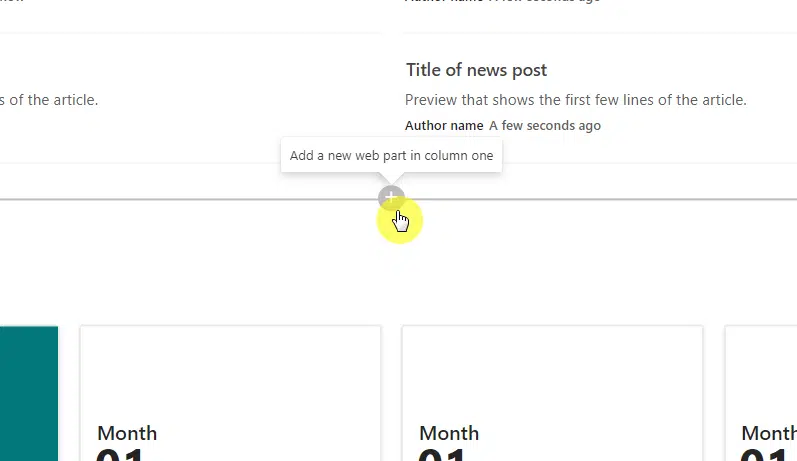
Some of the most useful ones to start with:
- News: Highlight company announcements or department updates.
- Quick Links: Create buttons to commonly used pages or tools (like HR forms or IT help).
- Events or Calendar: Keep everyone in the loop about meetings or holidays.
You can also explore other web parts like document libraries, weather (for local teams), or a countdown timer.
Don’t overdo it; a cluttered homepage gets ignored, but instead, keep it clean, useful, and focused on what people need daily.
Brand it, but keep it simple
Branding gives your intranet landing page a sense of identity, it lets people know they’re in the right place.
But there’s a fine line between making it look polished (feel familiar) and making it feel overwhelming (not distracting).
Here’s at least what you can do:
- Add your logo at the top
- Choose colors that match your brand, but keep things readable
- Use a clean, readable font and layout
Too many design elements can slow down the page or make it hard to focus.
Also worth noting, there’s a new site branding feature that works alongside the change the look options.
It lets you create your own custom theme by setting colors for things like backgrounds, text, and accents.
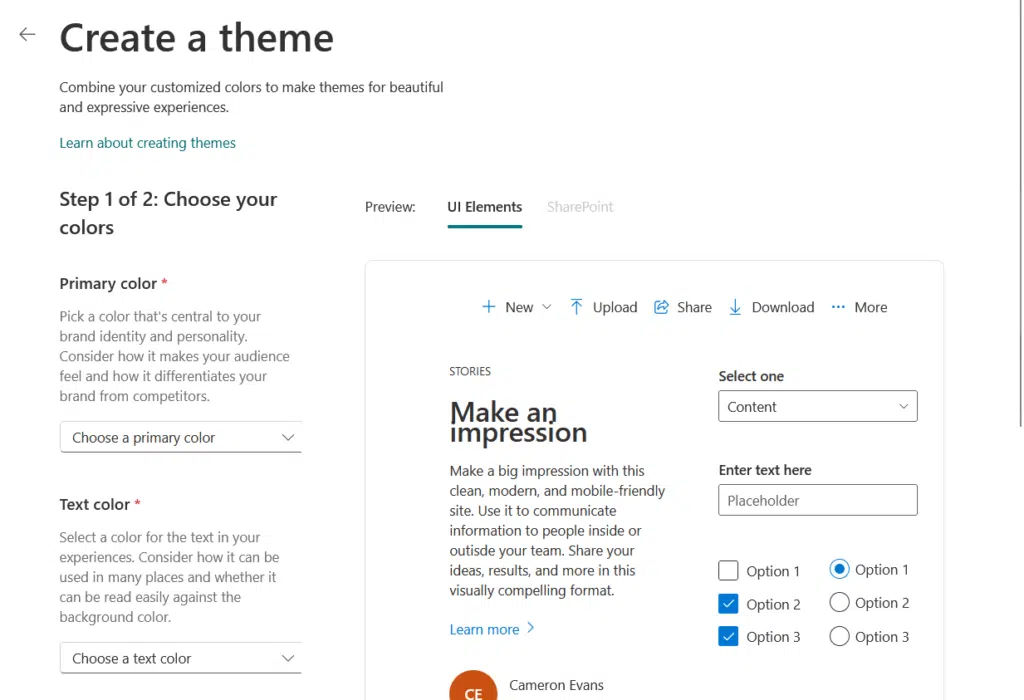
You will see a live preview and an accessibility checker, and you can upload your own font package if you want a unique look.
It’s a great add-on if you need more control than what the preset themes offer.
Make it the default landing page
Once you’re happy with how the homepage looks, set it as the default page people land on.
You can do this from the site pages in site contents, just right-click on the page and find the make homepage option.
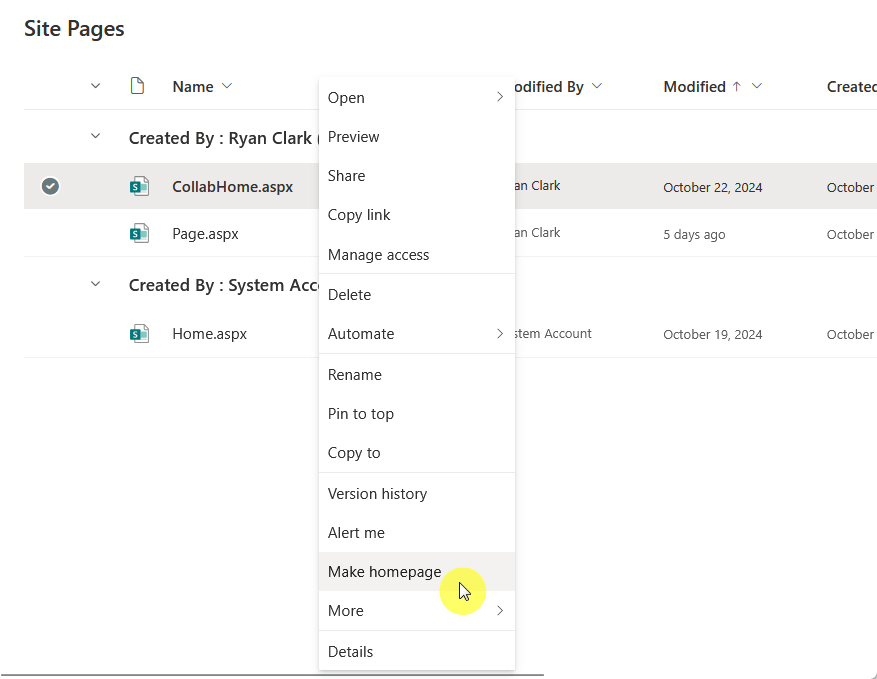
This makes sure everyone sees the same info every time they log in.
It’s also your chance to point people toward the content that matters most like policies, announcements, or tools.
Treat it like the lobby of your digital office: If it’s clear and welcoming, people won’t get lost. 🙂
Step 5: Create Departmental Sites
Now it’s time to give each department its own space on the modern intranet.
These sites should reflect what they need, whether it’s sharing information, managing documents, or collaboration.
Set up individual sites for each department
Start by creating a separate site for each main department, like HR, IT, Finance, and Operations.
Think about how each team works and if they need a team site (for collaboration) or a communication site (for sharing info).
If you’re not sure whether or not that department/ team needs a site, here’s what to look out for:
- They regularly share documents with the rest of the organization
- They receive frequent requests or questions
- They collaborate often internally
- They need visibility (for sharing updates, announcements, etc.)
- Their content doesn’t really belong on other sites
If a department isn’t doing any of these, they might not need their own site right away.
You can always start small, let them use shared spaces first, and give them their own site later if their needs grow.
But don’t forget to give each modern SharePoint site a clear name and description.
Add document libraries and lists
A document library is where a department can store and manage files like policies, templates, guides, or reports.

It works like a shared folder, but with more control:
- You can set permissions
- Track versions
- Organize files into folders or with metadata
People can open, edit, or co-author documents in their browser, making it ideal for keeping files accessible and current.
On the other hand, lists are perfect for tracking information, like IT requests, employee onboarding tasks, or inventory.
With lists, you can:
- Add columns
- Create custom views
- Set rules or workflows
They look like a spreadsheet but live inside SharePoint, with more structure and flexibility.
It’s a nice way to collect, organize, and manage structured data that isn’t tied to documents, like requests, tasks, or inventories.
Link each site to the main hub
If you’re using a hub site structure, make sure each departmental site is associated with the main hub.
For this, you need to be at the SharePoint admin center, go to the active sites, and select the site to associate.
There will be an option there at the top panel:
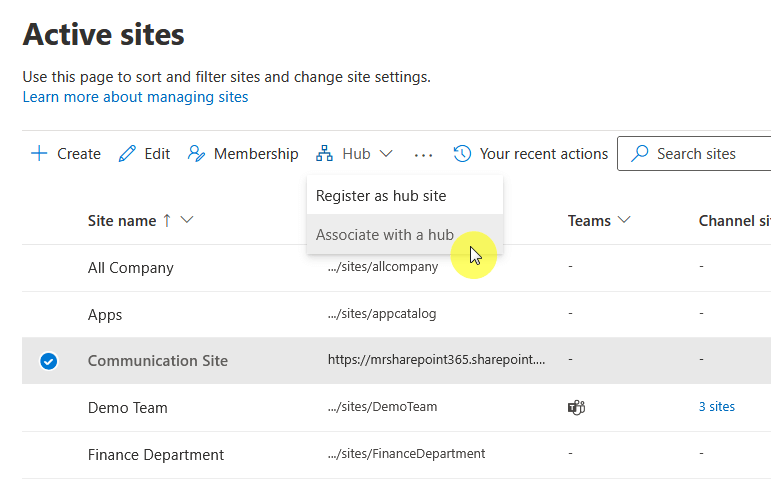
When you do this, a few useful things happen:
- Shared navigation appears
- Branding syncs up
- The search becomes connected
- Roll-up content becomes possible
It helps users move between departments without feeling lost.
Basically, everything in the hub will share the same look, so it feels familiar no matter which site they go to in the hub.
Plus, admins don’t have to rebuild menus or styles for every new site; they just link it to the hub. 🙂
Step 6: Train and Launch
You’ve set up your sites, organized your content, and linked everything to your hub, and now it’s time to roll it out.
Unfortunately, launching a SharePoint intranet isn’t like flipping a switch: you want people to actually use it.
Here are some ways to help:
- Short video tutorials
- Quick-start guides
- Live walkthrough sessions
- FAQ pages
- Department-specific how-tos
The trick here is not to overwhelm people, but to give them enough that they would feel confident.
A five-minute video or one-pager can go a long way, and keep the tone casual and the instructions simple.
Once the training is ready, focus on your launch, make it a clear and simple rollout to get better engagement.
Some launch ideas include:
- Company-wide email announcement
- A kickoff meeting or demo
- Internal posters or digital signage
- Adding a link in Microsoft Teams
- A fun “intranet scavenger hunt” challenge
Get creative, but keep it practical, and make sure everyone knows where to go and why it matters.
A strong launch builds momentum, making all your work setting things up totally worth it. 🙂
Conclusion: Don’t forget to maintain and update the intranet
Don’t forget to maintain and update the intranet once it’s live (the truth is that it only stays useful if it stays current).
Assign someone, like a team member, to check in regularly, remove outdated content, and add new resources as things evolve.
Even small updates can make a big difference in keeping people engaged and informed.
Anyway, do you have any questions about building an intranet from scratch in SharePoint? Let me know.
For any business-related queries or concerns, contact me through the contact form. I always reply. 🙂


