

Last Updated on September 23, 2023
Feeling stuck on how to make a SharePoint enterprise wiki site collection work on the modern experience?
This is one of the most common questions that I encounter from my clients, especially those who are used to the classic experience.
In this article, I’ll walk you through creating a SharePoint enterprise wiki that will work on the modern experience.
Let’s get started.
Table of Contents:
Creating an enterprise wiki site
Have you tried creating an enterprise wiki site before through the classic experience?
It’s still possible to do so now. However, sites and pages created using the enterprise wiki template don’t work with the modern experience.
The good news is that you can pretty much achieve the same results if you create an enterprise wiki using a communication site.
Unfortunately, there is no way for you to convert an already existing classic corporate wiki to a modern version except to create a new one.
Sign up for exclusive updates, tips, and strategies
How to create an enterprise wiki site collection
It’s fairly easy to create enterprise wikis using the modern experience compared to the complexity of the classic one.
By the end of this guide, you will be able to create a more beautiful wiki with modern functionalities.
The first thing you have to do is create a communication site:
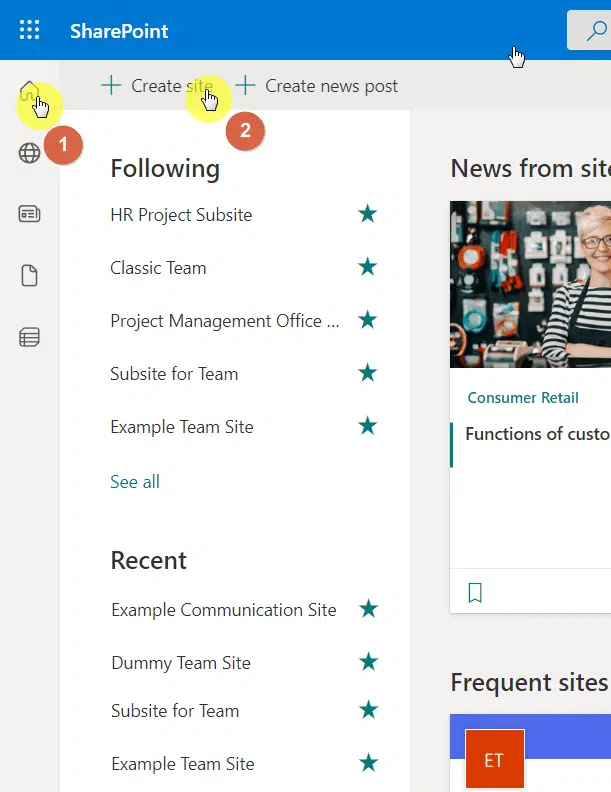
- Hit the home icon on the start page
- Click the create site button
Related: How to Create a Modern SharePoint Wiki Knowledge Base
On the panel, select communication site:
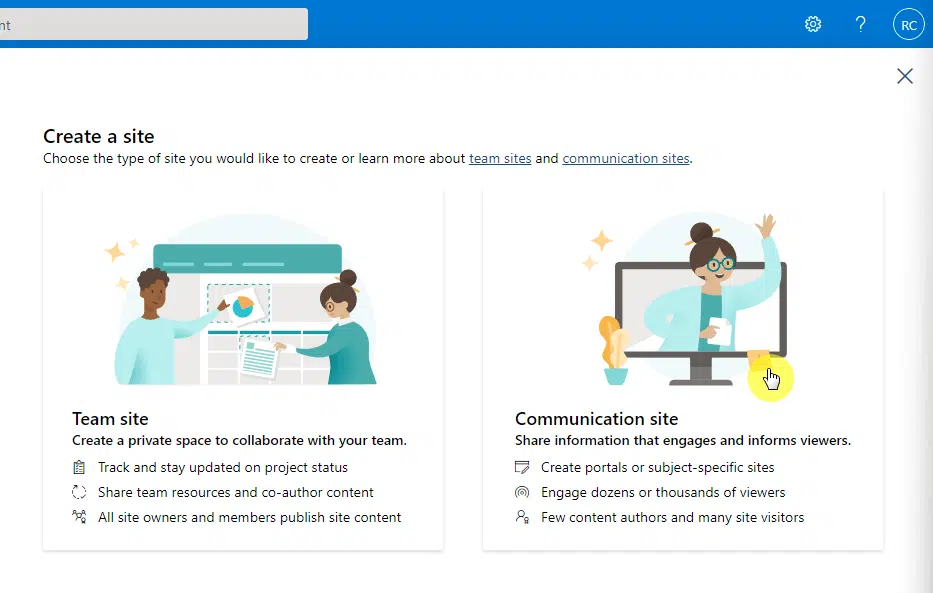
Follow the instructions on the page and provide the following information:
- Site name
- Site description (optional)
- Default site language
Note: For creating a site from a template, check this guide: How to Create a SharePoint Site From Template: Full Tutorial.
Once you have a communication site ready, all that’s left is to configure the different parts of your enterprise wiki:
Homepage
There is a default communication site homepage that the system will provide for you.
Now, you can create a new page from scratch and make it your homepage, or simply edit the current homepage.
If you ask me, it’s actually better to simply edit the current homepage instead since it was already designed as one.
When you make a custom page as a homepage, you won’t be able to get rid of the header portion through normal means.
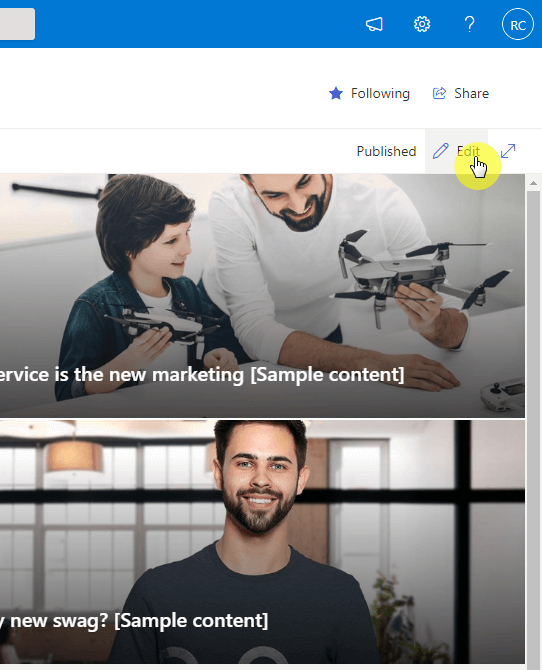
Anyway, make sure you’re on the homepage first and then click the edit button on the upper-right corner of the page:
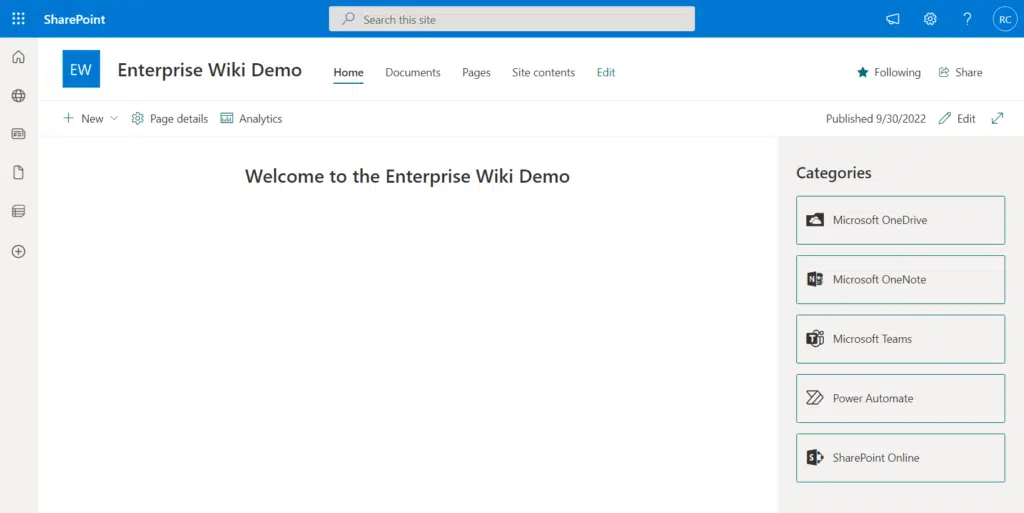
Now, delete the web parts that you won’t be using anymore. My demo homepage below looks plain and only includes category links and a few texts.
Note: For a full list of modern web parts, check here: Modern SharePoint Web Parts: List of All Available Web Parts.
If you’re not sure how I was able to achieve the look above:
- Added a vertical section to house the sidebar
- The left part only includes a text web part
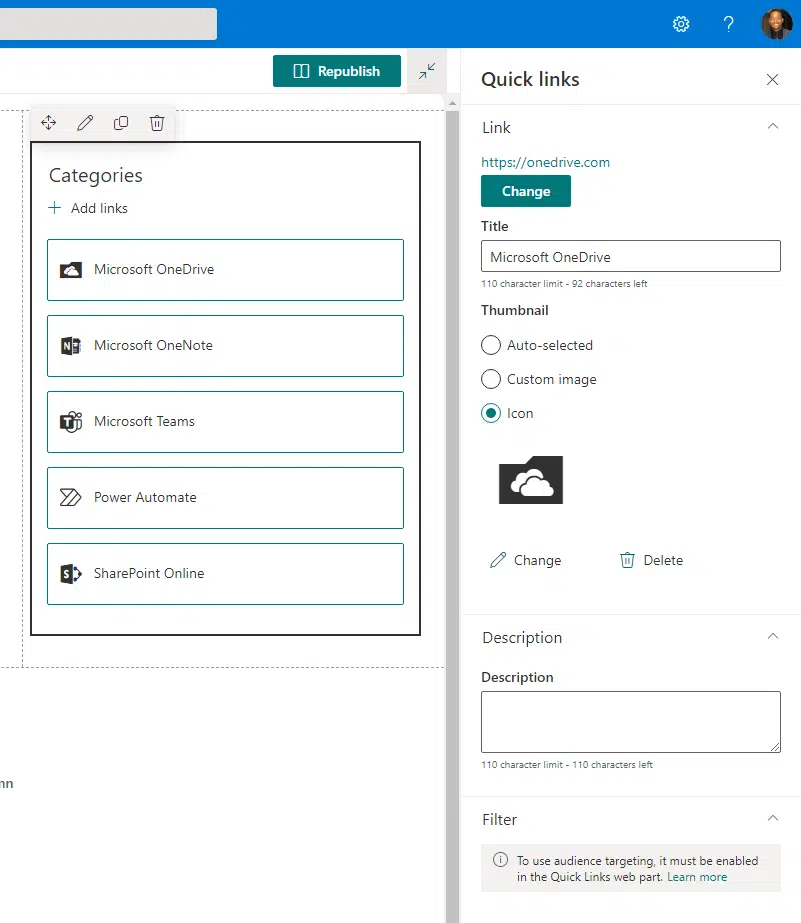
- The right part only includes a quick links web part
- The quick links web part uses the button layout
Since the category pages aren’t live yet, I only used dummy link sources and used the appropriate icons.
Note: For more intranet homepage examples, check this out: SharePoint Intranet Homepage Examples (Free Templates).
Second-level wiki pages (categories)
With that, it’s now time to create the category pages.
You can approach this by creating simple pages that contain the following:
- Links to pages that belong to the category
- Link back to the homepage
- Title and description for the category
- Other elements you want to include in the sidebar
The first part takes a bit of time since you will have to set up everything. You can then use a finished category page as a template.
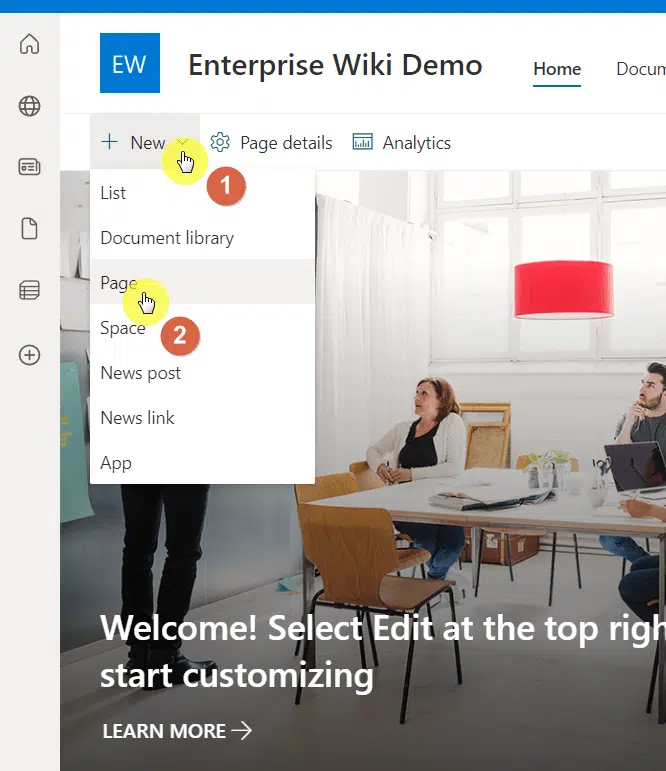
Start with creating a page from scratch. Click new > page on the homepage of the site:
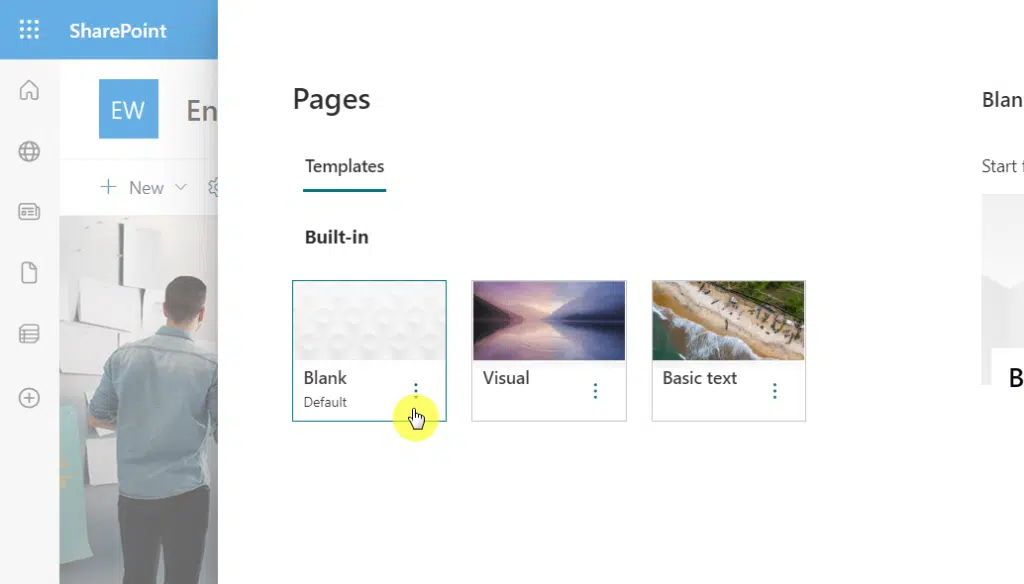
Since you will be starting from scratch, select the blank template. You can still start with the other templates and erase everything on the page.
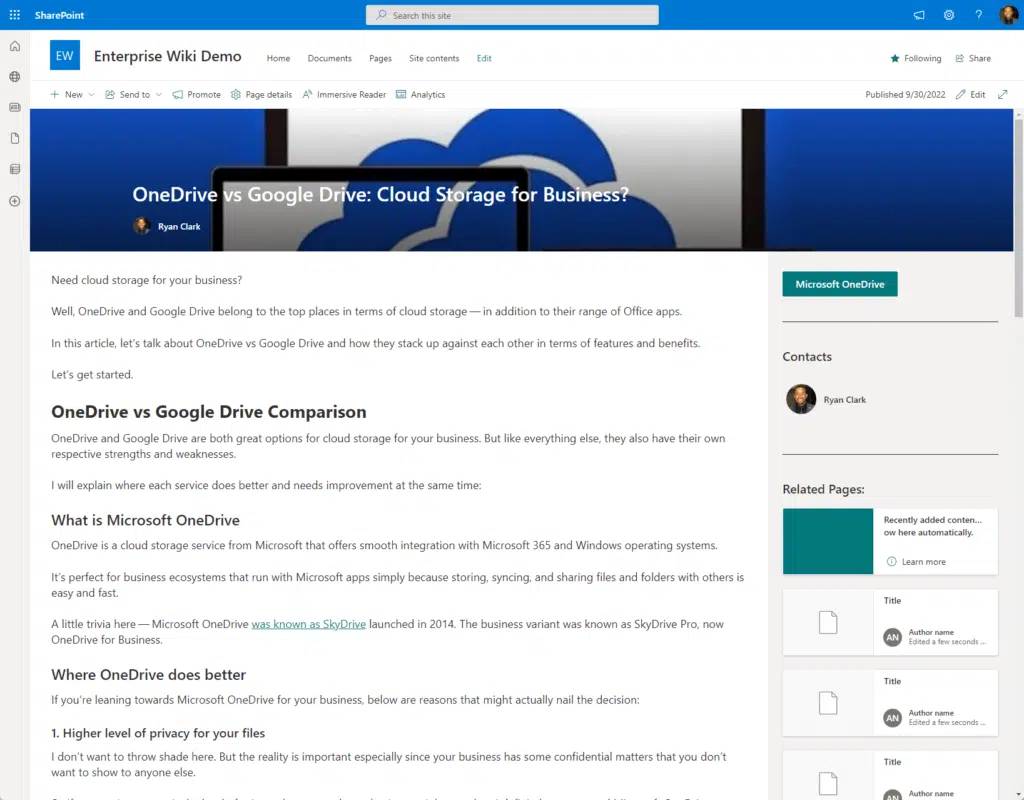
Similar to the homepage, design the category pages as you like. For reference, here is a sample page I created:
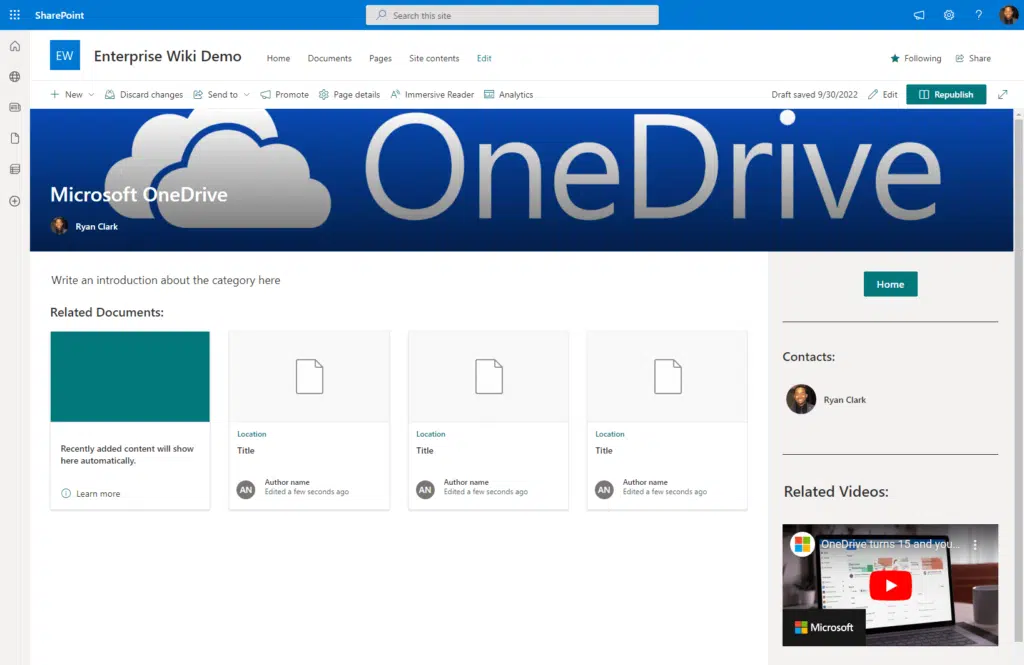
Some pointers on how to achieve this look:
- Used the image and title layout on the title area
- Added a vertical section for the sidebar
- Used a combination of text, highlighted content, button, divider, contacts, and YouTube web parts
The highlighted content web part is still not configured since I don’t have any wiki pages yet so there’s no need to filter.
To save time on the other category pages, edit the page and click the save as template button on the upper-left side:
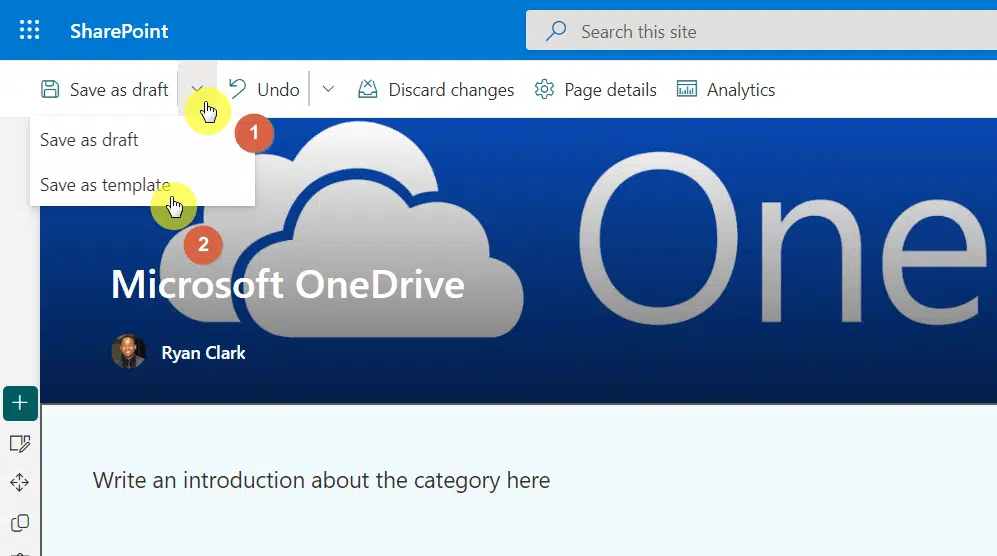
Since there is now a template for a category page, all you need to do is edit the contents of the page.
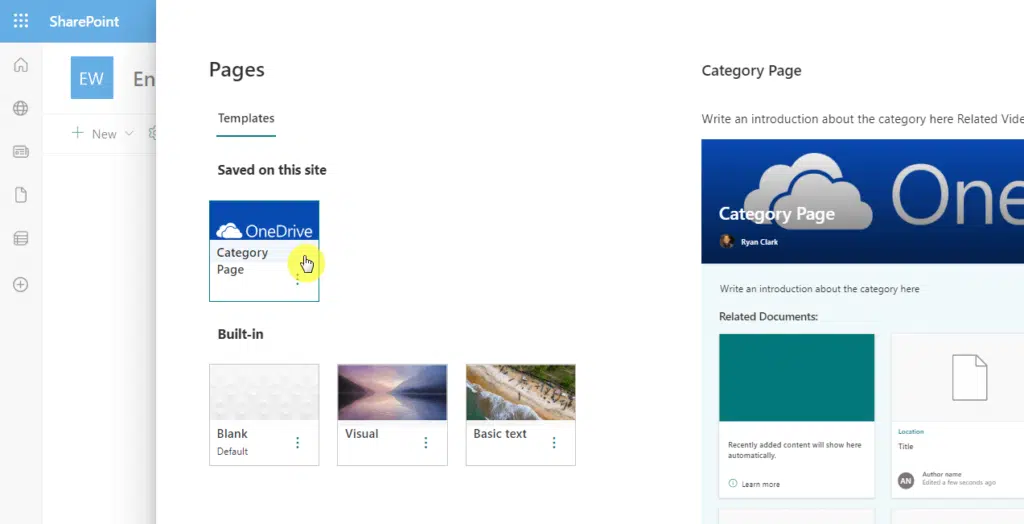
To use a template, create a new site page as usual. But this time, select the template that you have saved:
Before you go off from here, take note of the following:
- After publishing a category page, make sure to change the links on the homepage
- Don’t forget to add the homepage link to the home button
- Delay creating other category pages until you finish the section below
Wiki pages
This last part includes a few things you need to go over.
First, you need to create the wiki pages. Similar to the steps earlier, it’s a good idea to create a template first.
Now, create a new site page with the blank template and write a sample wiki page. It can also contain a sidebar with any information you want to include.
Check out my wiki page example below:
You will then have to repeat the same process earlier to create wiki page templates.
After that, all you need to do when you create further wiki pages is to use the wiki page template:

There is one final thing you have to do here — add a metadata column to categorize the wiki pages in the pages library.
For that, you can either go to site contents > site pages or directly click pages from the top navigation:

Inside the library:
- Click the add column button
- Select the choice option
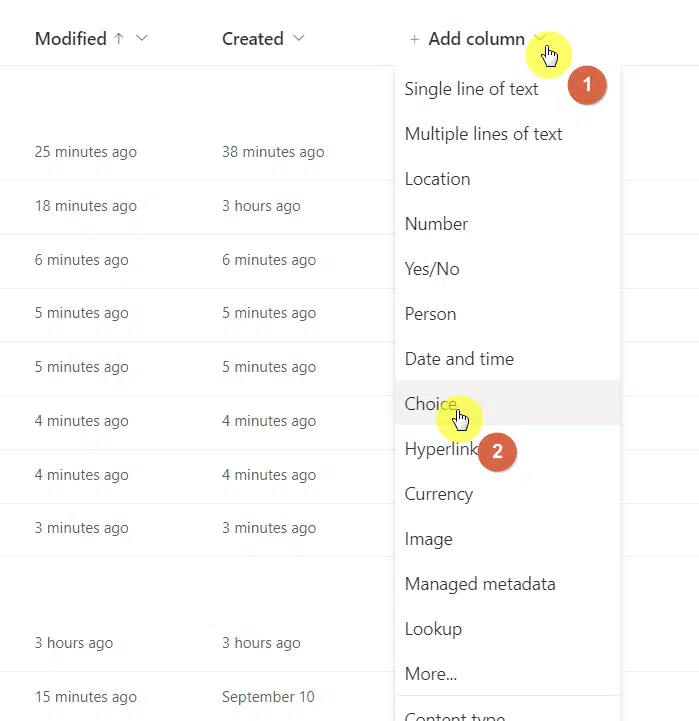
Configure the choice column and add the categories as choices. If applicable, you can also enable multiple selections.
Right after that, you will have to tag the wiki pages according to their category. Feel free to ignore the other pages.
Once you’re done, edit the category and wiki page templates and configure the highlighted content web part accordingly:
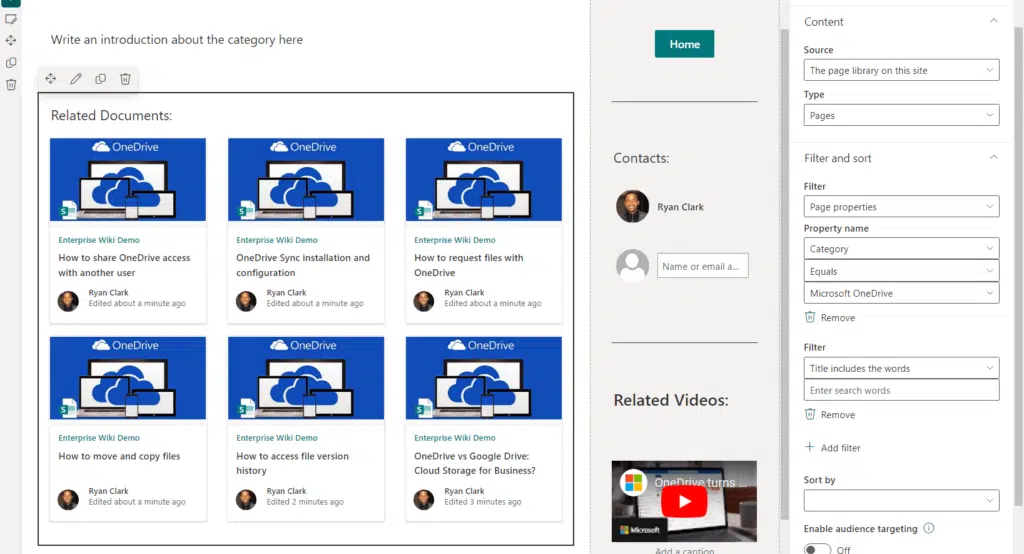
If this is your first time working with a highlighted content web part:
- Change the filter to page properties
- Configure the property name and specific property
After that, you’re now set to create the rest of the category pages and individual wiki entries.
Some ideas that you can add to your wiki site collection:
- Breadcrumb
- Related documents
- Related sites
- Popular pages
Do you have some questions on building an enterprise wiki using the modern experience? Share it below.
For business inquiries, please contact me using the contact form found here. I’ll get back to you asap.


Ryan, how are you getting web part locations all the way to the right of the page?
fkn magic apparently
Magic is not the correct answer, but you can use a “vertical section”.