
Last Updated on June 2, 2025
Feel like only scratching the surface?
In this guide, I will share with you tips that can help you get more done in SharePoint with way less friction.
Let’s get started.
Table of Contents:
- Section 1: Automate and Work Smarter
- Tip 1: Use Power Automate to create approval workflows
- Tip 2: Automate file organization with metadata rules
- Tip 3: Schedule regular reports with SharePoint Lists and Power Automate
- Tip 4: Use Edit in Grid View mode for batch updates
- Tip 5: Create custom alerts for document changes
- Tip 6: Show team calendars in SharePoint with Outlook integration
- Tip 7: Automate onboarding documents via templates
- Tip 8: Use Flow buttons for repetitive team actions
- Tip 9: Pre-populate forms using list automation
- Tip 10: Automate Teams channel file delivery
- Tip 11: Add Power Automate buttons directly to document libraries
- Tip 12: Use List Rules to trigger automated responses
- Tip 13: Schedule automatic document cleanup
- Tip 14: Link form submissions to SharePoint Lists
- Tip 15: Build workflows that tag content automatically
- Tip 16: Integrate SharePoint tasks with Planner
- Tip 17: Use site templates to create recurring project libraries
- Tip 18: Trigger alerts for version changes
- Tip 19: Automatically update calendar events from lists
- Tip 20: Combine Power Automate and Excel for live reporting
- Section 2: Permissions and Security
- Tip 21: Always use SharePoint groups over individuals
- Tip 22: Limit access with site-level permissions
- Tip 23: Use sensitivity labels to protect content
- Tip 24: Enable multi-factor authentication for all users
- Tip 25: Create read-only libraries for archives
- Tip 26: Track who accessed a file using audit logs
- Tip 27: Avoid breaking inheritance unless necessary
- Tip 28: Use DLP policies to protect sensitive information
- Tip 29: Disable sharing links for confidential files
- Tip 30: Review permission reports monthly
- Tip 31: Set guest expiration dates
- Tip 32: Restrict syncing to managed devices only
- Tip 33: Use Information Barriers to separate teams
- Tip 34: Add watermarking to sensitive files
- Tip 35: Monitor sharing with built-in analytics
- Section 3: Search and Navigation
- Tip 36: Use managed metadata to boost search results
- Tip 37: Customize the search schema for specific needs
- Tip 38: Use promoted results (bookmarks) for important content
- Tip 39: Add tags to help search indexing
- Tip 40: Use site search boxes strategically
- Tip 41: Make sure pages and files have titles and descriptions
- Tip 42: Group documents with content types
- Tip 43: Organize with modern navigation menus
- Tip 44: Use hub sites for better content discovery
- Tip 45: Set up custom filters on library views
- Tip 46: Use column indexing to speed up queries
- Tip 47: Create consistent naming conventions
- Tip 48: Avoid nesting folders too deeply
- Tip 49: Use quick links for high-traffic content
- Tip 50: Train users to use filters, not folders
- Section 4: Customization and Branding
- Tip 51: Apply custom themes for company colors
- Tip 52: Update your site logo and favicon
- Tip 53: Use vertical sections to improve layout
- Tip 54: Create branded templates for site consistency
- Tip 55: Update site fonts and branding with the new Branding panel
- Tip 56: Insert video banners for internal campaigns
- Tip 57: Use JSON to format list views
- Tip 58: Personalize pages with audience targeting
- Tip 59: Customize page footer content
- Tip 60: Replace stock images with team visuals
- Tip 61: Use collapsible sections for cleaner design
- Tip 62: Add quick access buttons to the homepage
- Tip 63: Pin important sites with the app launcher
- Tip 64: Use the SPFx to build reusable web parts
- Tip 65: Sync the SharePoint theme with Teams branding
- Section 5: Monitoring and Performance
- Tip 66: Use the usage analytics dashboard weekly
- Tip 67: Track site growth with Storage Metrics
- Tip 68: Monitor traffic spikes using insights
- Tip 69: Archive inactive libraries
- Tip 70: Clean up old versions in libraries
- Tip 71: Optimize images for faster page load
- Tip 72: Use audience targeting for better performance
- Tip 73: Remove unused web parts
- Tip 74: Simplify navigation menus to boost speed
- Tip 75: Split oversized lists into manageable views
- Tip 76: Enable content delivery network (CDN) for faster access
- Tip 77: Compare site health across hub sites
- Section 6: Collaboration and New Features
- Tip 78: Co-author documents in real time
- Tip 79: Use Microsoft Loop inside SharePoint pages
- Tip 80: Pin shared calendars to team sites
- Tip 81: Add Viva Connections to personalize user experiences
- Tip 82: Use the “Add to OneDrive” button wisely
- Tip 83: Share files from SharePoint to Teams
- Tip 84: Use List templates for repeatable tracking
- Tip 85: Add Planner dashboards to project sites
- Tip 86: Connect Power BI reports to pages
- Tip 87: Use Microsoft Syntex to tag documents
- Tip 88: Auto-publish meeting notes to a SharePoint page
- Tip 89: Track tasks from SharePoint inside To Do
- Tip 90: Create private channels for sensitive projects
- Tip 91: Use site templates based on departments
- Bonus Section: Hidden Gems and Power Moves
- Tip 92: Use keyboard shortcuts to move faster
- Tip 93: Right-click for quick actions in libraries
- Tip 94: Pin tools to the site’s action bar
- Tip 95: Use site templates and site scripts for faster setup
- Tip 96: Enable offline access for libraries
- Tip 97: Use comment threads on list items
- Tip 98: Embed forms directly into site pages
- Tip 99: Highlight changes with conditional formatting
- Tip 100: Auto-generate pages from templates
- Tip 101: Bookmark useful links in your personal dashboard
Section 1: Automate and Work Smarter
The tips in this section help streamline daily SharePoint tasks, speeding up workflows and easing the workload.
Tip 1: Use Power Automate to create approval workflows
Chasing approvals through endless emails is a tedious process, and important details often get overlooked.
Power Automate lets you create a workflow to send documents for review and notify the right people.
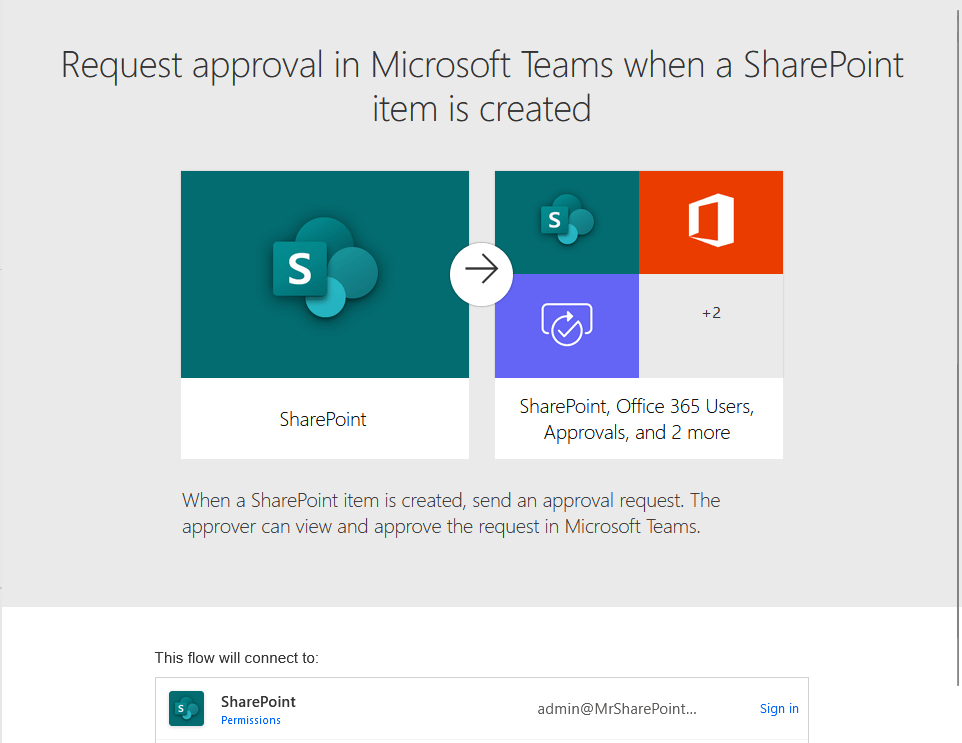
No more wondering who’s holding things up.
You will get clear approvals, rejections, or comments, all logged automatically.
Tip 2: Automate file organization with metadata rules
Manually organizing files is fine… until you have a hundred of them. 😅
Metadata makes your life easier by tagging files with key info, such as:
- Department
- Status
- Project
- Owner
- Deadline
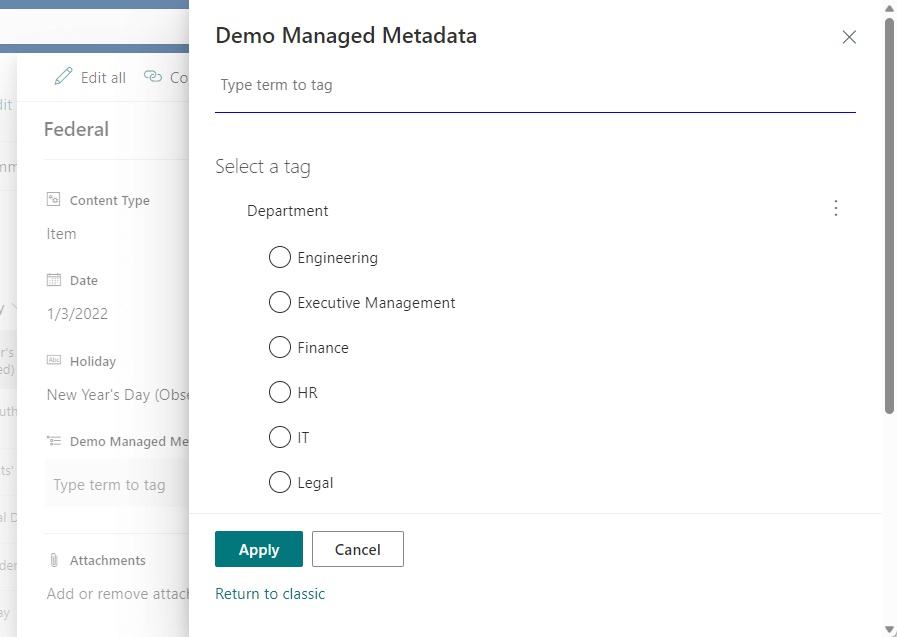
Adding these tags makes it much easier to organize and search for documents later.
With rules and views, SharePoint can instantly sort or filter them for you.
You will also spend less time clicking through folders and more time finding what you need.
Still compiling weekly reports by hand? You don’t have to. 🙂
Use Power Automate to grab data from a SharePoint list and send it on a schedule (daily, weekly, monthly, you name it).
Whether it’s tracking inventory or task progress, the report lands in your inbox (or your boss’s) without lifting a finger.
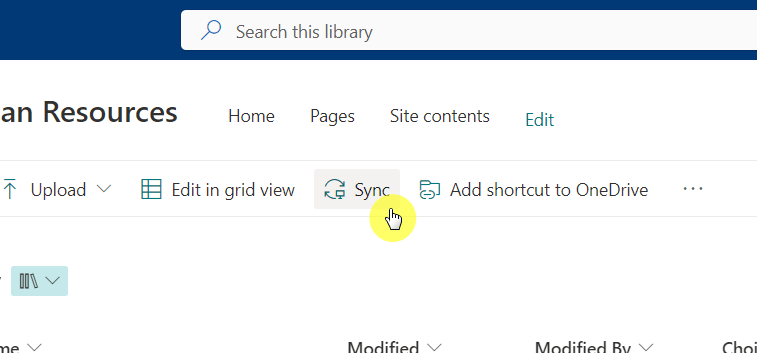
Tip 4: Use Edit in Grid View mode for batch updates
Editing one item at a time is painfully slow.
The “Edit in grid view” feature lets you update a SharePoint list or library in a spreadsheet-style grid, just like Excel.
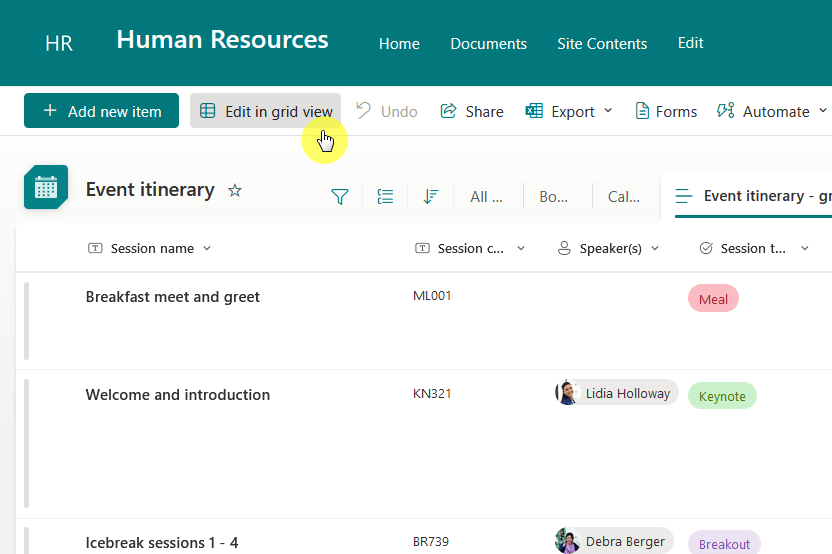
Here’s what you can do in Edit in grid view:
- Change multiple rows at once
- Paste values across cells
- Clean up data in bulk
It’s one of the easiest wins for people who manage large lists.
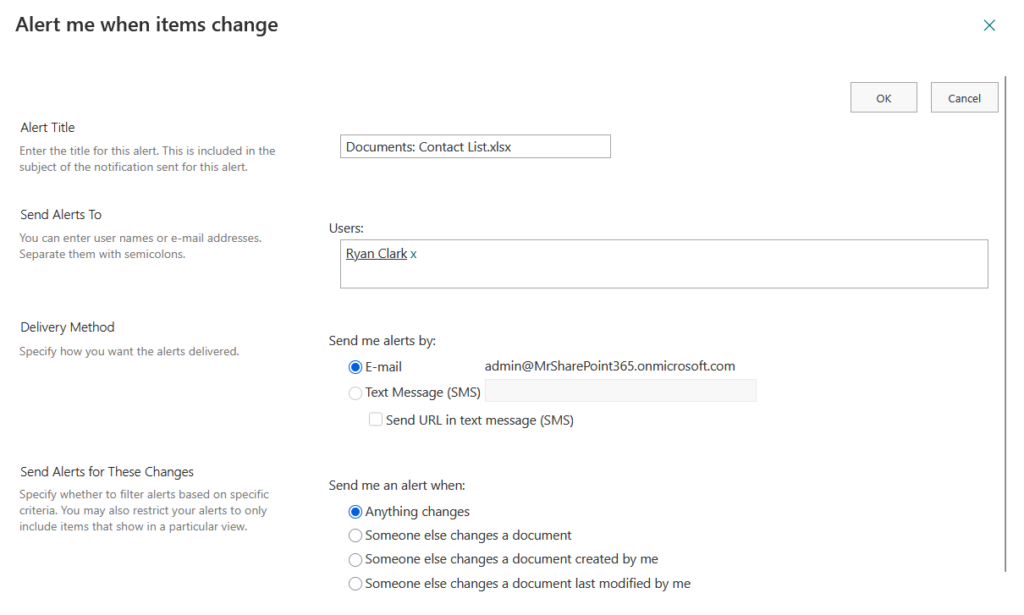
Tip 5: Create custom alerts for document changes
SharePoint won’t tap you on the shoulder when something changes, but alerts come pretty close.
You can set up notifications for when a file is added, edited, or even deleted.

Choose how often you want to be notified and who else should be looped in.
It’s beneficial when you’re working on sensitive or fast-moving documents.
If your team still checks multiple calendars, stop.
Modern SharePoint Online doesn’t support syncing classic SharePoint calendars to Outlook.
Instead, use the Group calendar web part or embed an Outlook calendar directly on your SharePoint page.
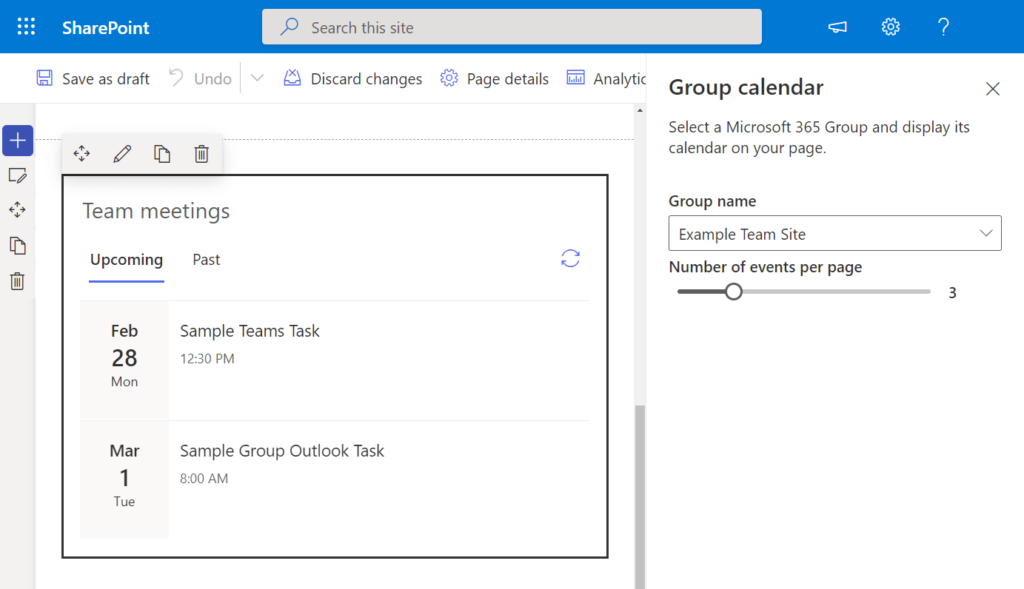
This way, team deadlines, project milestones, and events are visible to everyone in one place – right in SharePoint.
Everyone stays on the same page, and your calendar always matches what’s in Outlook.
Tip 7: Automate onboarding documents via templates
New hire? Don’t scramble to pull together their paperwork every time.
Store templates for welcome packets, tax forms, IT guides, whatever they need.
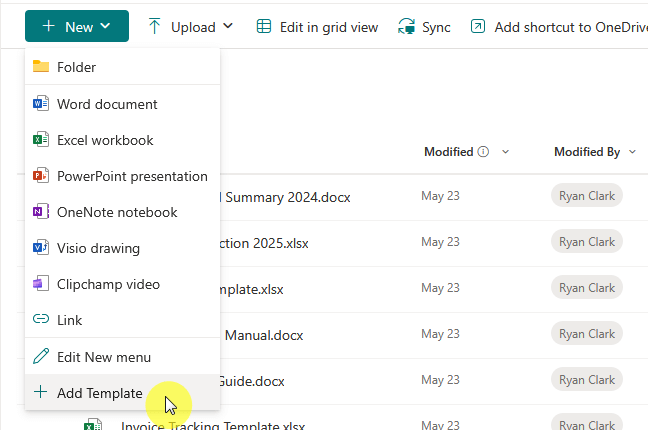
Then use automation to create a fresh copy for each new employee.
It saves you time and ensures consistency.
If your team repeats the same task regularly, like sending reminder emails or logging issues, Flow buttons can help.
These one-click buttons trigger entire automated processes.
Place them right in a SharePoint list or library, so anyone on your team can use them, no setup required.
Tip 9: Pre-populate forms using list automation
Why ask users to fill out info you already have?
With list automation, you can pre-fill fields in SharePoint forms using data that’s already stored.
For example, you might automatically add:
- Usernames
- Project codes
- Previous responses
It speeds up form entry and keeps your data consistent.
Tip 10: Automate Teams channel file delivery
Make it easier for your team to find important documents by automating file delivery to Teams.
When a file is added to a certain folder in SharePoint, you can trigger it to post directly to a Teams channel.
Everyone sees it in real-time – no more “Did you upload it yet?” messages.
Make automation accessible right where people work.
By adding Flow buttons to a document library, users can trigger actions without leaving the page.
Here are some actions you can automate:
- Send files for approval
- Move files to another folder
It turns routine tasks into one-click actions, which your team will thank you for.
Tip 12: Use List Rules to trigger automated responses
SharePoint Lists now let you build simple rules without any code.
For example, when a status column changes to “Completed,” you can trigger an email or a task.
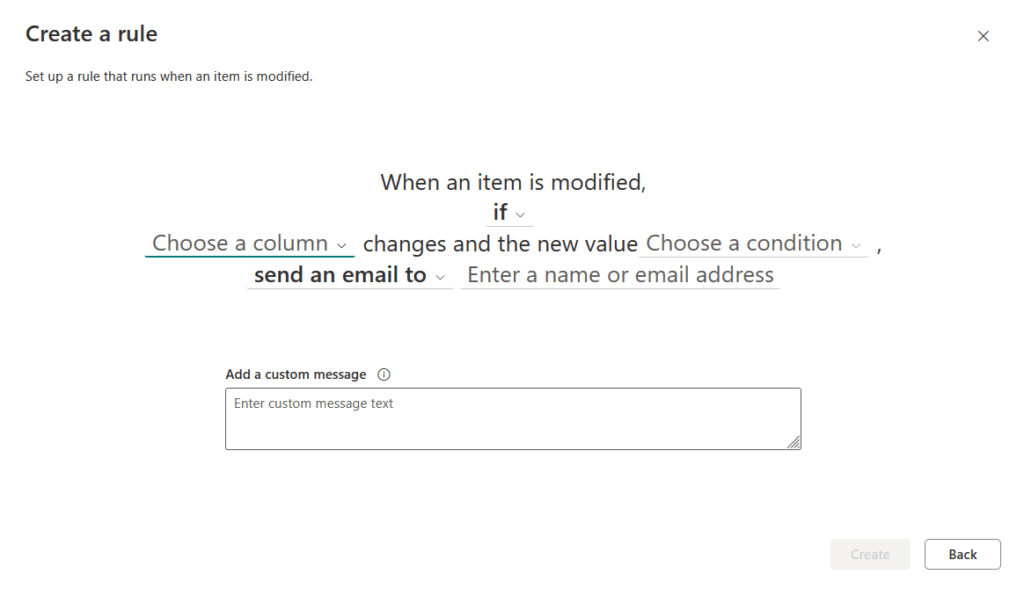
It’s a lightweight way to add automation that reacts to changes in real time.
Tip 13: Schedule automatic document cleanup
Old documents can clutter your libraries fast.
Set up a flow that automatically archives or deletes files based on criteria like “last modified date.”
It keeps your SharePoint clean and your storage limits in check without needing anyone to babysit the files.
If you’re using Microsoft Forms, you can automatically send responses to a SharePoint List.
This is great for surveys, registrations, or internal requests.
From there, it’s easier to track and sort the data, or even kick off workflows based on responses.
Tip 15: Build workflows that tag content automatically
Make documents easier to find by automatically assigning metadata.
For example, if someone uploads a contract to a specific folder, tag it with “Legal” and “Pending Review.”
It saves users from manual tagging and improves search results down the line.
You can turn SharePoint list items into Planner tasks automatically.
This keeps your team’s work in sync and visible across both platforms.
When the task is updated in Planner, you can even reflect those changes in SharePoint.
Tip 17: Use site templates to create recurring project libraries
Every new project starts with the same folders and documents, right?
SharePoint Online doesn’t let you save a document library as a template.
Instead, use site templates to create new libraries with your preferred structure.
If you need even more control, ask IT to use site scripts or automation to create custom libraries for your projects.
Tip 18: Trigger alerts for version changes
Sometimes it’s not about a new file – it’s about what changed.
Set up alerts that notify you when a document gets a new version.
This is especially useful for policies, contracts, or anything that needs approval before it’s final.
Tip 19: Automatically update calendar events from lists
If your team tracks events in a SharePoint list, automation can help you keep everyone updated.
For example, you can automatically add these to a calendar or sync with Outlook:
- Trainings
- Meetings
- Deadlines
It turns raw list data into something everyone can use at a glance.
Tip 20: Combine Power Automate and Excel for live reporting
Need live updates in Excel from SharePoint?
Create a flow that sends list data to Excel Online.
Here are some things you can easily track:
- KPIs
- Project progress
- Resource usage
You will have a live-reporting dashboard that updates every time the data changes.
Sign up for exclusive updates, tips, and strategies
Section 2: Permissions and Security
Now, here are some tips that can help you keep your data safe, your users accountable, and your sites running smoothly:
It might seem quicker to give a person direct access, but it quickly gets messy.
Using groups like “Finance Viewers” lets you manage permissions without having to touch every single file.

When someone joins or leaves a team, you just add or remove them from the group, and everything updates automatically.
Tip 22: Limit access with site-level permissions
If everyone has access to everything, mistakes are bound to happen.
Use site-level permissions to make sure people only see what they need.
For example, your HR team doesn’t need access to the Finance department’s budget files.
Keeping things separate improves focus — and reduces risk.
Tip 23: Use sensitivity labels to protect content
Think of sensitivity labels as quiet bodyguards for your documents.
You can apply them to automatically encrypt files, block sharing, or apply visual markings.
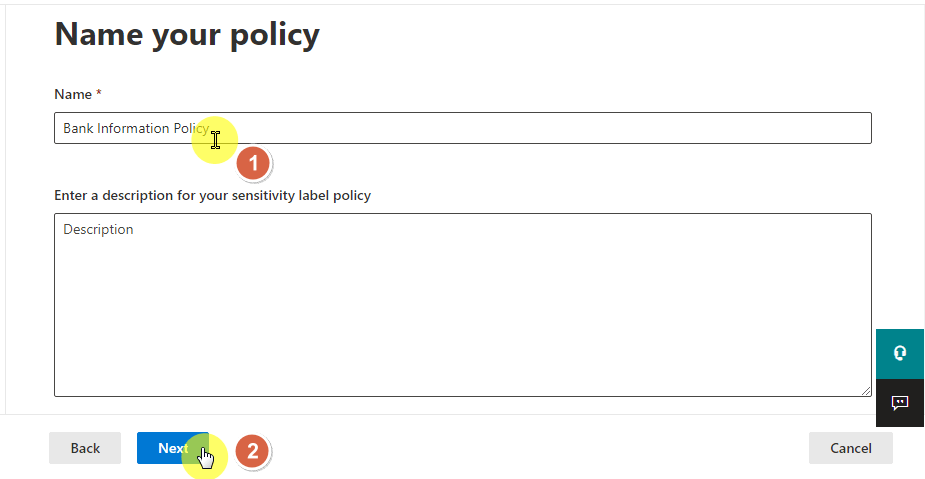
It’s a subtle but strong way to keep your sensitive documents secure, especially when people are working remotely or on personal devices.
Tip 24: Enable multi-factor authentication for all users
MFA adds a second step, usually a phone app or text message, when logging in.
It’s one of the easiest ways to stop hackers in their tracks.

Even if a password gets out, MFA keeps the door closed.
For SharePoint, where sensitive info lives, this isn’t optional; it’s essential.
Tip 25: Create read-only libraries for archives
When documents are final, like published policies, annual reports, or contracts, they should be locked down.
A read-only library ensures they can’t be edited, but everyone can still access and reference them.
It’s a reliable way to keep your official documents clean and consistent.
Tip 26: Track who accessed a file using audit logs
SharePoint’s audit logs tell you who did what, and when.
If a file was deleted or shared unexpectedly, you can look up the activity and see exactly who was involved.
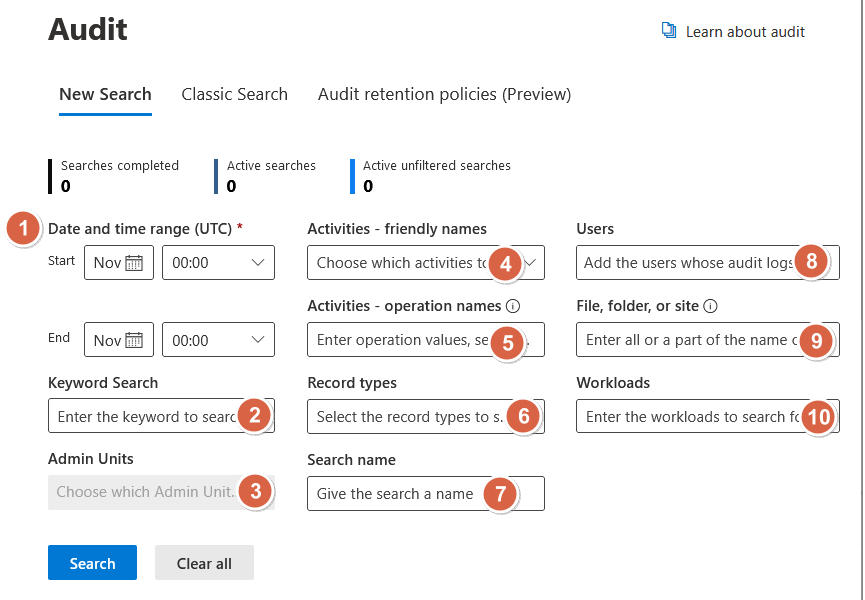
This is also a great way to monitor sensitive documents without micromanaging your team.
Tip 27: Avoid breaking inheritance unless necessary
Permissions in SharePoint trickle down like a family tree.
Breaking inheritance on a folder creates an exception that you need to track and manage.
It’s better to stick with inherited permissions unless you truly need to lock down one area.
Tip 28: Use DLP policies to protect sensitive information
Data Loss Prevention can scan your libraries in real time for sensitive details.
For example, it checks for:
- Social Security numbers
- Credit card details
- Confidential terms
If it finds something risky, it can block sharing, restrict downloads, or alert your admin.

It’s proactive protection that works behind the scenes.
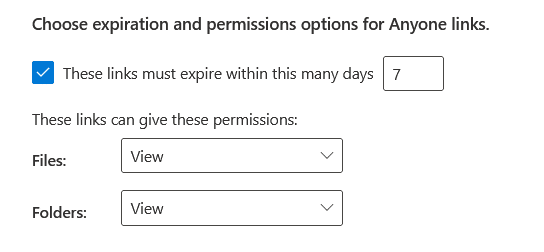
Tip 29: Disable sharing links for confidential files
Default sharing links can sometimes be too open.
For content that’s sensitive (contracts, employee data, financial docs), disable anonymous links.
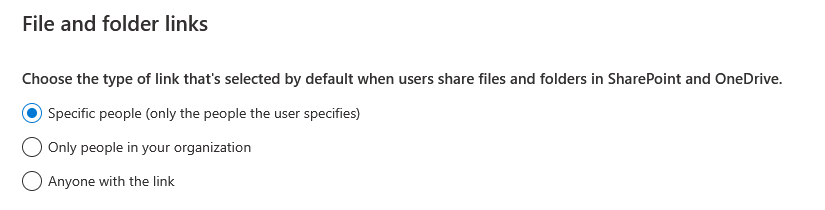
Instead, only allow sharing with specific people who are logged in.
It’s a simple setting that can prevent a lot of future headaches.
Tip 30: Review permission reports monthly
Over time, people leave roles, switch teams, or finish projects — but they may still have access.
Use SharePoint’s permission reports to check who has access to your sites and files.
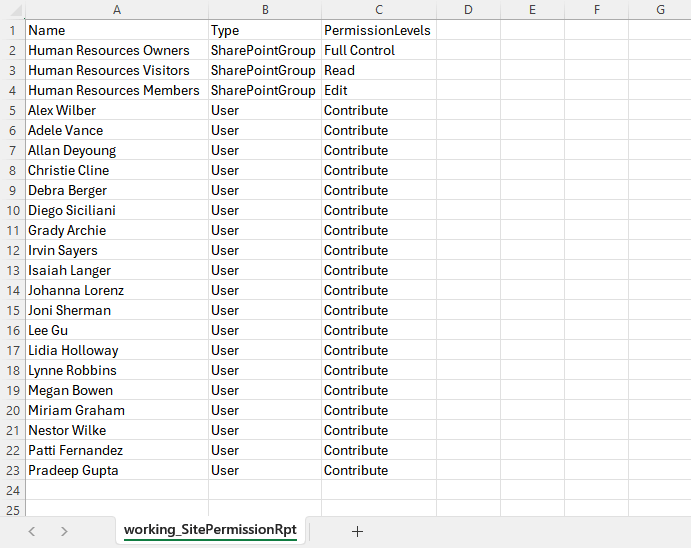
A quick monthly review can help you catch issues before they turn into real problems.
Tip 31: Set guest expiration dates
Guests like contractors or partners often need access, but not forever.
With guest expiration policies, you can automatically remove access after a certain period (like 30 or 90 days).
You can always extend it if needed, but it keeps your environment tidy by default.
Tip 32: Restrict syncing to managed devices only
Syncing SharePoint libraries to personal laptops or phones opens up security risks.
Instead, restrict syncing to devices that are managed by your organization.
This ensures your files only live on trusted hardware, especially important when people are working remotely.
Tip 33: Use Information Barriers to separate teams
Some teams need a wall between them — like HR and Legal, or Compliance and Sales.
Information Barriers stop users in one group from accessing files, chatting, or even seeing each other in searches.
It’s a powerful way to meet legal and regulatory rules without micromanaging access.
Tip 34: Add watermarking to sensitive files
If your files are at risk of being shared externally, watermarking is a subtle but strong deterrent.
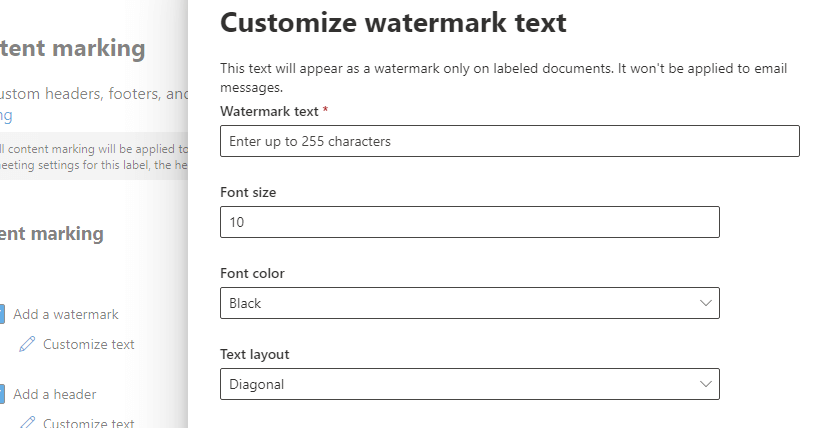
You can apply dynamic watermarks to add details like:
- Usernames
- Timestamps
- File types
These watermarks remind people that the document is protected and traceable if leaked.
Tip 35: Monitor sharing with built-in analytics
Want to know if people are actually using what you’ve shared, or oversharing?
SharePoint’s built-in analytics can show how often files are opened, edited, or shared.
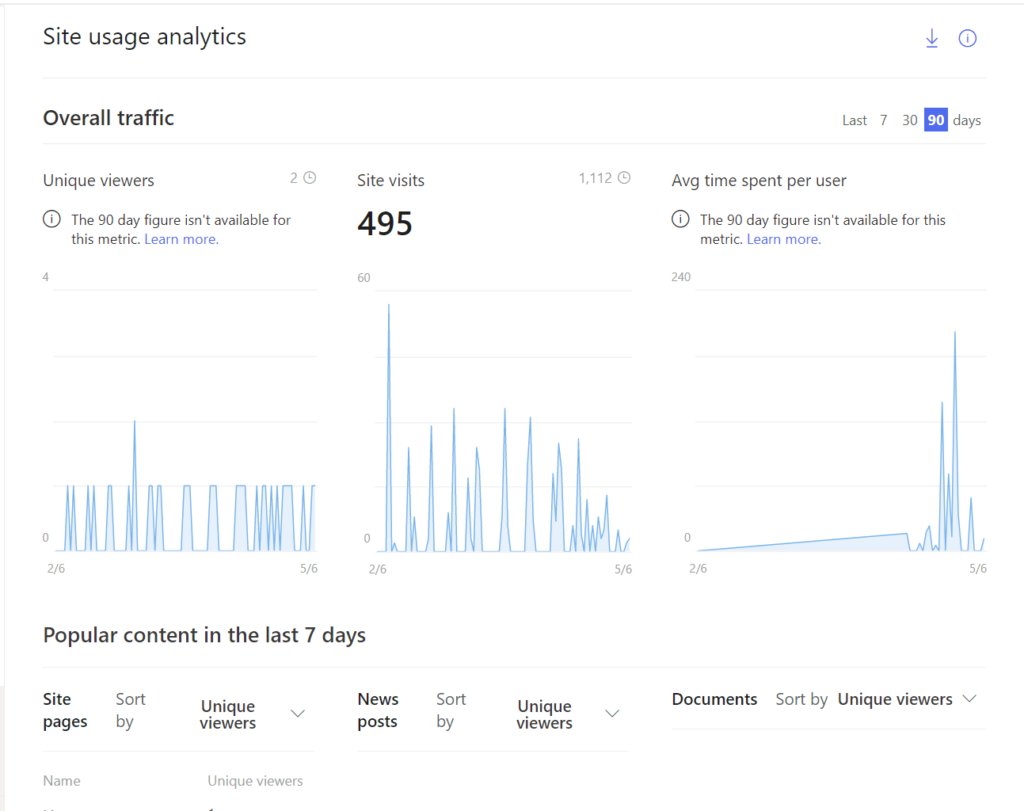
Use it to catch unusual behavior, or just understand how your content is being used day to day.
Here are some tips that can help you organize your content better, make things easier to find, and save everyone from endless clicking.
Tip 36: Use managed metadata to boost search results
When your files are tagged with consistent, structured metadata, SharePoint search becomes much more useful.
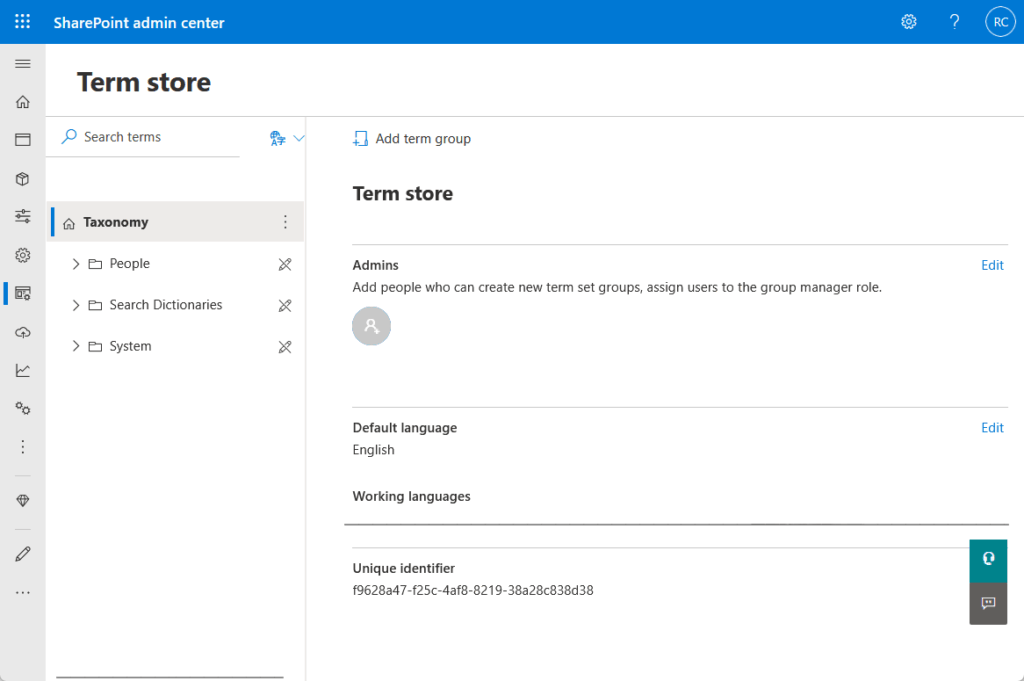
Managed metadata, like standardized categories or department names, helps the system understand your content better.
Results become more accurate and easier to filter.
Tip 37: Customize the search schema for specific needs
SharePoint’s search engine isn’t just plug-and-play.
You can customize what’s included and how it’s ranked.
If certain fields or tags matter more to your organization, you can boost their weight in search results.
It takes some setup, but the pay-off is huge for power users.
Tip 38: Use promoted results (bookmarks) for important content
Have a file or page that always needs to show up first in search results?
In modern SharePoint Online, use Microsoft Search bookmarks to promote key links when users search for specific terms.
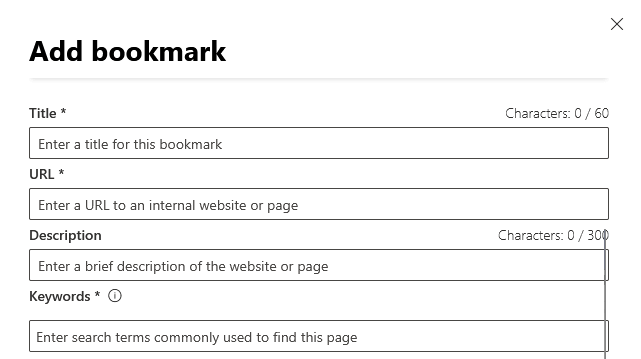
This is a great way to highlight policies, how-to guides, or templates people are always looking for.
For classic SharePoint, query rules for promoted results may still be available in classic search centers.
But for most users, bookmarks are the modern method.
SharePoint indexes a lot on its own, but adding custom tags to documents and pages gives you more control.
Think of tags as keywords – give SharePoint better clues, and your users get better results.
Tip 40: Use site search boxes strategically
Each SharePoint site has its own search box, but not all search boxes search the same things.
Some only return results from that site, while others pull from a wider scope.
Teach your team where to search depending on what they’re looking for.
Tip 41: Make sure pages and files have titles and descriptions
It sounds basic, but a lot of content is uploaded with default names like “Document1.”
Titles and descriptions aren’t just helpful to people, they’re gold for the search engine.
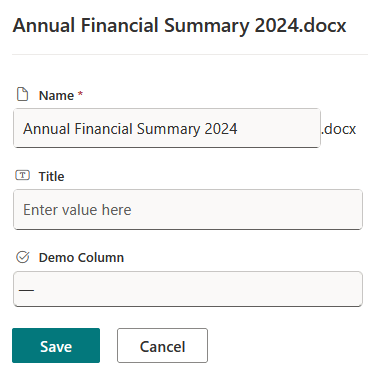
Name things clearly, and you will instantly improve your site’s usability.
Tip 42: Group documents with content types
Content types let you set up custom settings for different kinds of documents.
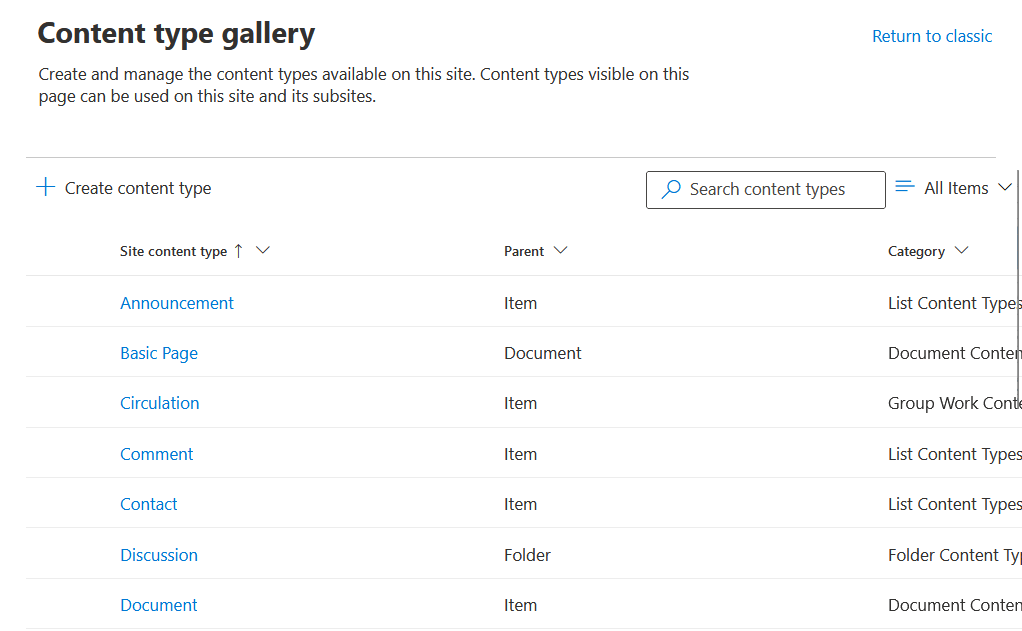
You can define:
- Templates
- Columns
- Workflows
For example, use content types for contracts, reports, or invoices.
Grouping documents this way helps with filtering and keeps your libraries organized behind the scenes.
Modern SharePoint sites let you create clean, user-friendly navigation with mega menus and quick links.
A well-organized menu makes it easier for people to find what they need without relying on search.
Think of it as your site’s map.
Tip 44: Use hub sites for better content discovery
Hub sites pull multiple related sites under one roof and unify search, branding, and navigation.
If your company has separate sites for each department or team, hubs bring it all together.
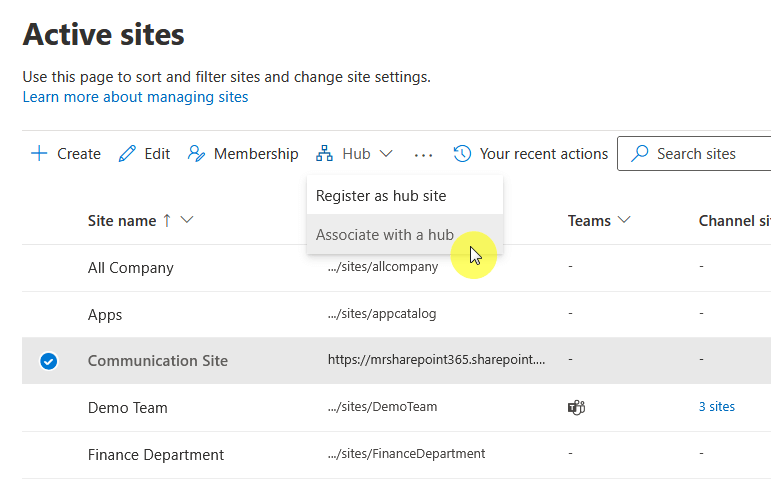
People don’t have to guess where to look.
Tip 45: Set up custom filters on library views
Filters are lifesavers in large document libraries.
Instead of making users scroll through long lists, create views with filters for “Recently Updated,” “By Project,” or “Assigned to Me.”
It makes navigating much quicker and more intuitive.
Tip 46: Use column indexing to speed up queries
If your lists are getting large (thousands of items), you might notice things slowing down.
Column indexing helps SharePoint retrieve data faster by making certain columns searchable and filter-friendly.
It’s an easy performance win.
Tip 47: Create consistent naming conventions
Set rules for how your files and folders are named – like “Client_Project_Date” or “Dept_DocType_Version.”
This helps with visual organization and also boosts search accuracy.
Plus, it looks more professional than “finalfinalFINAL.docx.”
Tip 48: Avoid nesting folders too deeply
It’s tempting to organize everything in deep folder trees, but that’s how files get lost.
Stick to a flatter structure and use metadata or views to group files.
It makes navigation simpler and works better with SharePoint’s modern features.
Tip 49: Use quick links for high-traffic content
Add a quick links web part to pages and pin your most-used resources, like key documents, request forms, or internal tools.
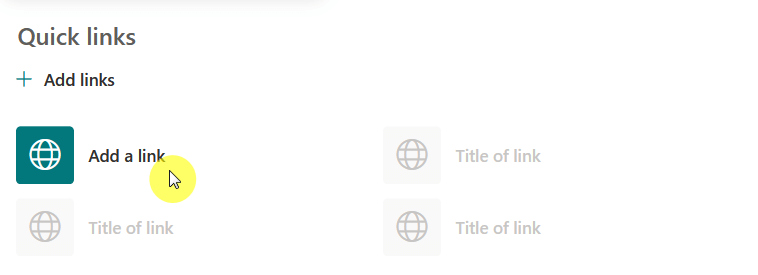
This reduces the need for search and puts the right files one click away.
Tip 50: Train users to use filters, not folders
Folders are fine, but filters are faster.
Encourage your team to use metadata-based filters when browsing libraries.
Once they see how quickly they can find what they need, they won’t want to dig through folders again.
Section 4: Customization and Branding
For the tips here, the focus is on making your SharePoint site feel more like your own, both in how it looks and how it functions for your team.
Tip 51: Apply custom themes for company colors
No one gets excited about a plain blue SharePoint site.
Custom themes let you use your organization’s colors, so your site matches your brand.
It’s more than just looks – it helps reinforce identity and makes your site feel intentional, not default.
Tip 52: Update your site logo and favicon
The tiny details matter.
Upload your logo so it shows up in the top corner of every page.
Update the favicon (the little icon in browser tabs) to match.
These tweaks are easy but impactful.
They help users instantly recognize where they are, especially if they bounce between multiple internal sites.
Tip 53: Use vertical sections to improve layout
Modern SharePoint pages support vertical sections, which open up new layout possibilities.
Instead of stacking everything in one column, you can place a calendar next to announcements, or links beside a list.
It makes the page feel less like a document and more like a real homepage.
Tip 54: Create branded templates for site consistency
If every department builds its own site from scratch, things get messy fast.
Instead, create a few branded templates with pre-built headers, footers, layouts, and example web parts.
When someone starts a new site or page, they just plug in their content and go.
It keeps your SharePoint ecosystem clean and unified.
Tip 55: Update site fonts and branding with the new Branding panel
SharePoint Online now lets you change fonts and site colors easily using the Branding panel in site settings.
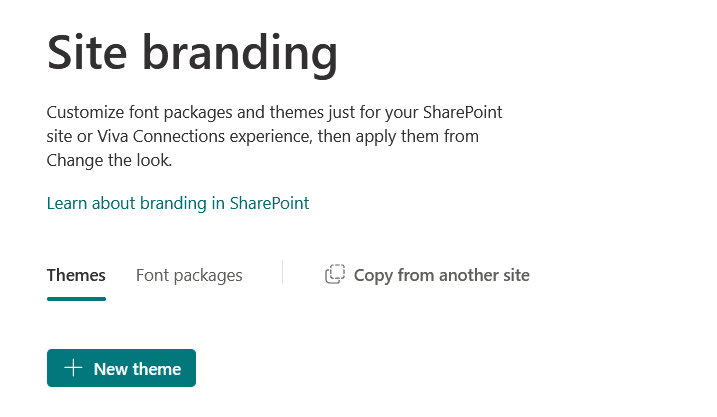
You can update your site’s:
- Fonts
- Color palette
- Logo
This way, everything matches your company brand – no coding needed.
For advanced needs, you can still use site scripts or SPFx extensions, but most users won’t need them anymore.
Want to promote a company event, a product launch, or an HR initiative?
Instead of a block of text, try using a video banner at the top of your homepage.
It grabs attention, adds energy to the page, and helps people actually notice what you’re promoting.
Tip 57: Use JSON to format list views
Lists can be boring — rows and rows of plain text.
But with a little JSON formatting, you can turn them into dashboards.

You can color-code status columns, turn priorities into icons, or use bars to show progress.
It takes a little effort to set up, but once you do, it makes your data more readable and useful.
Tip 58: Personalize pages with audience targeting
Different people need different content.
Audience targeting shows certain web parts only to the right people.
For example, you can display:
- Welcome messages
- Quick links
- Dashboards
New hires might see onboarding steps, while managers see project metrics.
It’s like having one site that adapts to each user.
The footer is often overlooked, but it’s a great spot for consistent, site-wide info.
You can add links to policies, support contacts, or external resources.
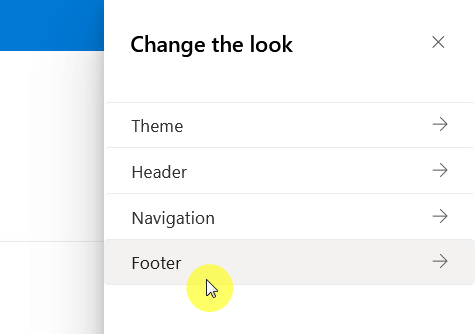
Branded footers also help make SharePoint feel more like a real intranet than just a document portal.
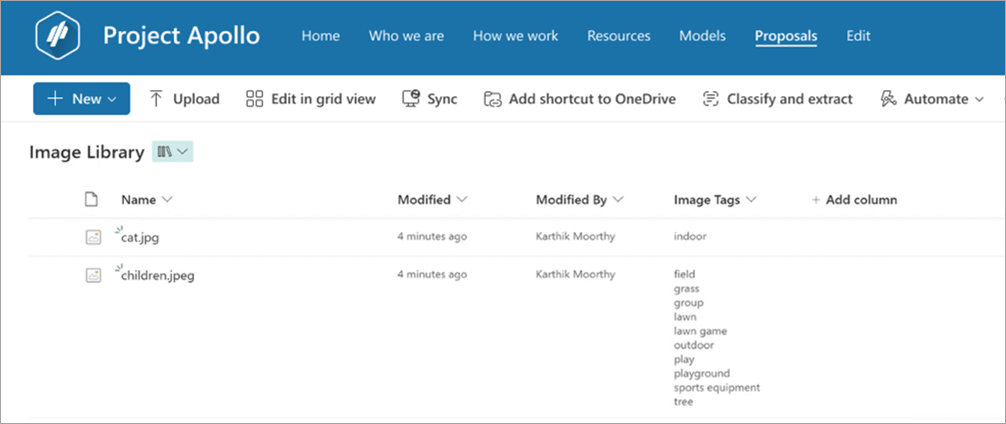
Tip 60: Replace stock images with team visuals
Swap out those generic office photos with real pictures from your own events, teams, or projects.
It adds authenticity and makes your SharePoint site feel more connected to the people who actually use it.
Plus, everyone enjoys seeing familiar faces.
Tip 61: Use collapsible sections for cleaner design
Got a lot of info to display?
Collapsible sections let you tuck away content until it’s needed.
This is great for FAQs, step-by-step instructions, or extra details that not everyone needs upfront.
It keeps your pages clean without cutting useful info.
Think of your homepage as a command center.
Use buttons for things like “Submit a Request,” “Access Project Files,” or “Book a Meeting Room.”
These buttons guide users to the most common actions and make navigation feel effortless.
Tip 63: Pin important sites with the app launcher
If your team juggles multiple SharePoint sites, use the Microsoft 365 app launcher to pin key ones.
It gives users instant access from anywhere – just one click from Outlook, Teams, or OneDrive.
It’s a simple way to keep important sites top-of-mind.
Tip 64: Use the SPFx to build reusable web parts
The SharePoint Framework (SPFx) is your toolkit for next-level customization.
You can build custom web parts that pull data, show dashboards, or create interactive widgets.
Once built, you can reuse them across pages and sites, keeping things both flexible and uniform.
If your Teams workspace uses a specific style or layout, you can match that in SharePoint.
Use the same icons, headers, and color palette so switching between the two feels seamless.
It’s a small step that builds a stronger digital workspace.
Section 5: Monitoring and Performance
These tips help you keep your SharePoint sites fast, healthy, and clutter-free.
Tip 66: Use the usage analytics dashboard weekly
Every modern SharePoint site has a built-in analytics dashboard.
You can see:
- Who’s visiting
- What they’re clicking
- Which files are being used most
Check it weekly to get a sense of engagement.
If certain pages aren’t getting any traffic, you will know it’s time to update or promote them.
Tip 67: Track site growth with Storage Metrics
As your site grows, it can get cluttered fast.
The Storage Metrics tool helps you see which libraries or folders are eating up space.

This is especially helpful if you’re bumping into storage limits or planning a cleanup.
Knowing what’s taking up room helps you plan smarter.
Tip 68: Monitor traffic spikes using insights
A sudden jump in site traffic could mean your content just got popular — or that something’s wrong.
Use analytics insights to track traffic spikes and dips.
This helps you respond faster if, say, a key document is down or an announcement didn’t reach enough people.
Tip 69: Archive inactive libraries
Old projects don’t need to stay front and center.
Move completed or inactive document libraries to a separate archive site.
This keeps your main site clean and ensures active content is easy to find, without deleting anything important.
Tip 70: Clean up old versions in libraries
Version history is useful, but over time, those old drafts and edits pile up.
Configure your libraries to automatically delete older versions after a set number.
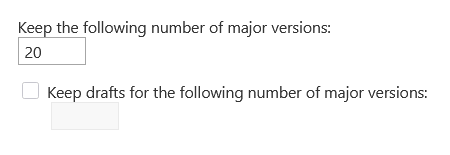
It keeps things lean and saves storage, without compromising traceability.
Tip 71: Optimize images for faster page load
Large, high-res images can slow down your site, especially on mobile.
Compress your images before uploading, or use web-optimized formats like WebP.
A few seconds shaved off page load time makes a big difference for user experience.
Tip 72: Use audience targeting for better performance
Audience targeting isn’t just for personalization — it also helps performance.
By showing different content to specific groups, SharePoint only loads what’s needed for each user.
That means faster pages, especially for content-heavy homepages.
Tip 73: Remove unused web parts
Web parts that aren’t being used just clutter the page and drag down performance.
Go through your pages every few months and remove or replace outdated or broken parts.
This helps the page load faster and keeps the layout fresh.
A navigation menu with 30 links is harder to load and even harder to use.
Trim it down to the essentials and group links logically.
Clean menus are faster, more mobile-friendly, and much easier for new users to follow.
Tip 75: Split oversized lists into manageable views
Lists with thousands of items can get sluggish.
Instead of showing everything at once, create filtered views (by date, project, or owner) to limit the data shown.
This improves load time and makes the list more usable day to day.
Tip 76: Enable content delivery network (CDN) for faster access
If your team is spread across regions, a Microsoft CDN can help speed up access to scripts, images, and other assets.
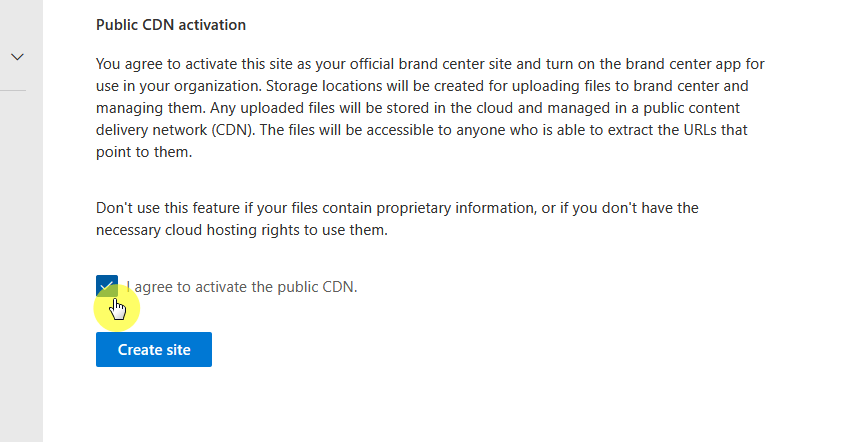
It caches files closer to the user’s location, so the site loads faster regardless of where someone is working.
Tip 77: Compare site health across hub sites
If you’re managing multiple connected sites, your hub site analytics can give you a bird’s-eye view.
Use it to compare engagement, performance, and storage across departments.
It’s a smart way to spot underused content or identify teams that might need support.
Section 6: Collaboration and New Features
Here are some tips that will help your team work better together, make use of the latest SharePoint features, and get more out of your Microsoft 365 tools.
Forget the days of emailing files back and forth.
With SharePoint and Office Online, multiple people can work on the same document at once.
You can see their changes as they happen, leave comments, and make edits without version chaos.
It’s fast, transparent, and a big win for productivity.
Microsoft Loop lets you embed live, collaborative components like checklists and tables into your SharePoint pages.
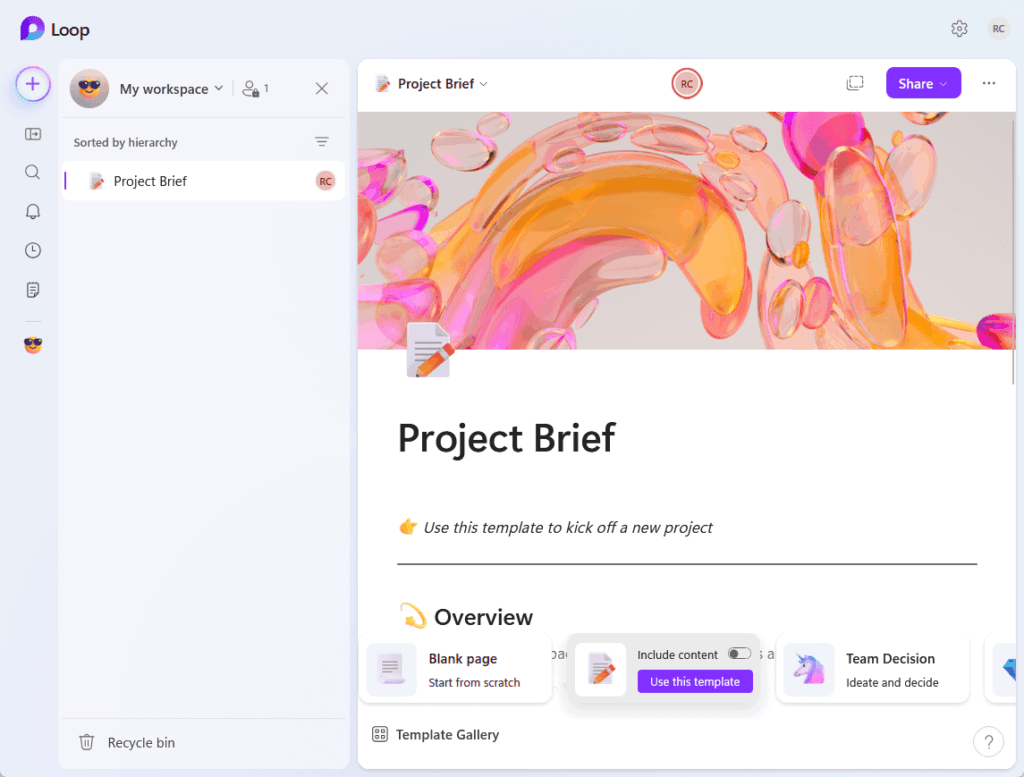
As your team updates them in one place, they sync everywhere.
It’s a great way to capture input across teams without losing track of who said what.
Instead of juggling separate calendars for meetings and deadlines, embed a shared calendar into your SharePoint team site.
It becomes a central hub for scheduling, and everyone can see what’s coming up without switching tabs or tools.
Tip 81: Add Viva Connections to personalize user experiences
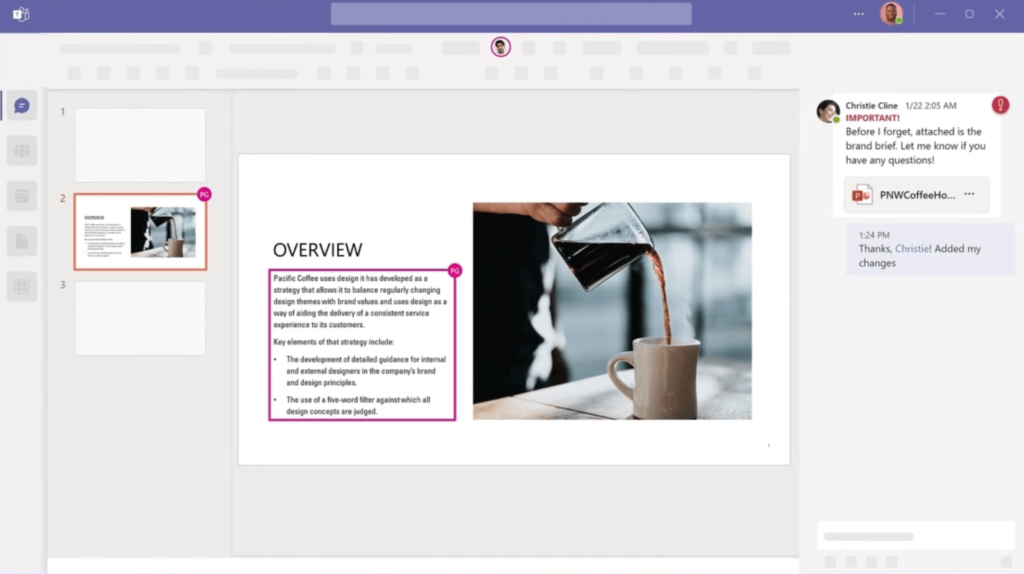
Viva Connections brings personalized content from SharePoint into Microsoft Teams.
You can show tailored dashboards, tasks, and updates all in one place.
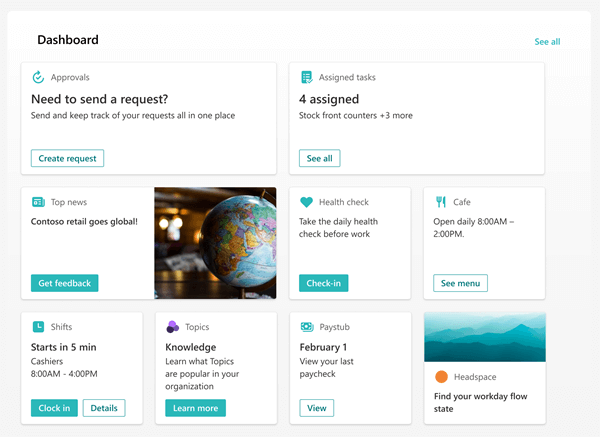
It’s a great way to bring intranet content to where people are already working.
This underrated feature lets users pin shared libraries directly to their OneDrive for quick access.

It helps teams work together and saves time when people need to access shared files quickly.
To share a SharePoint file in Teams, copy the link from your document library and paste it directly into your Teams chat or channel.
Some organizations may see a “Share to Teams” button, but this is only available if enabled by your admin.
Either way, you can easily loop your team into important files and keep the conversation in context.
Tip 84: Use List templates for repeatable tracking
Planning events? Tracking assets?
SharePoint’s modern list templates give you ready-made setups for common workflows.
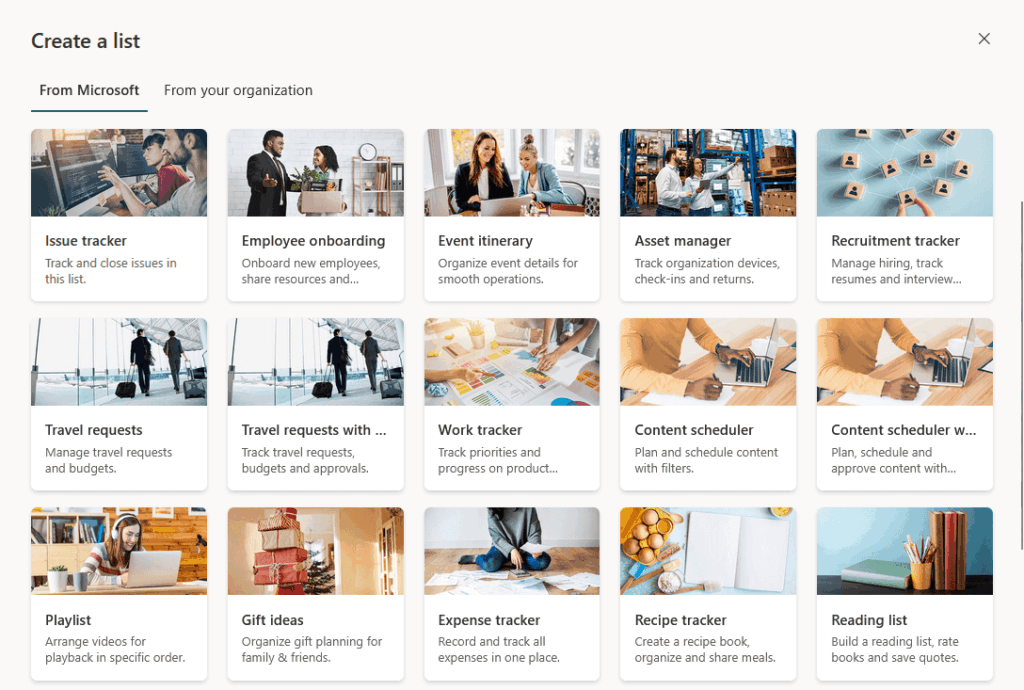
Just pick a template, tweak it to fit your team’s needs, and start tracking.
It saves setup time and gets everyone working off the same playbook.
Tip 85: Add Planner dashboards to project sites
Planner integrates directly with SharePoint so you can embed a board showing tasks, deadlines, and progress.
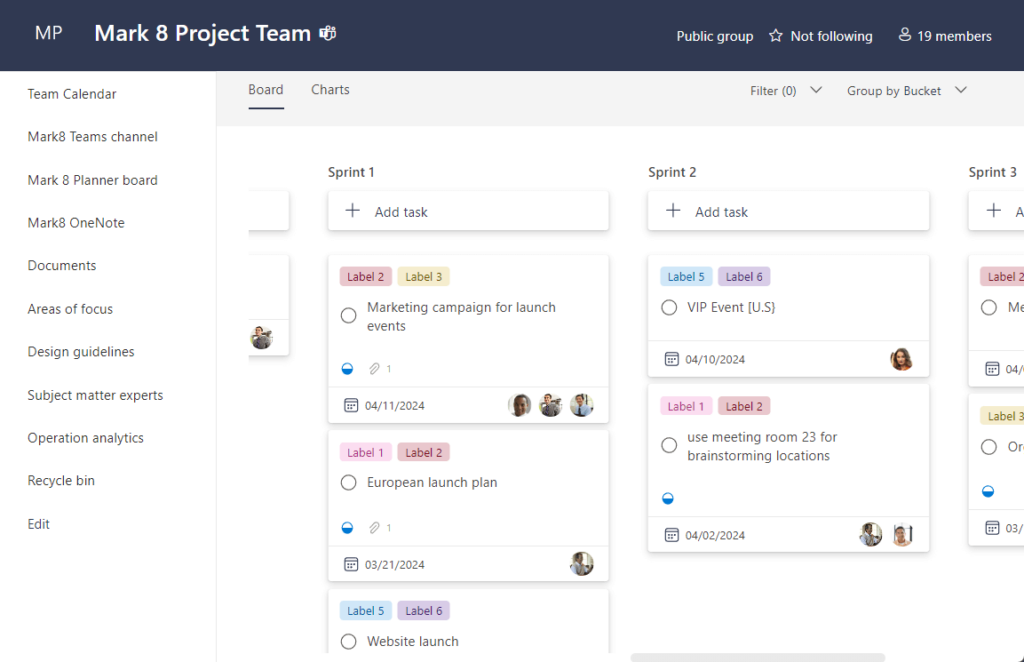
It’s a visual way to stay on track, which is ideal for project pages or department dashboards.
Tip 86: Connect Power BI reports to pages
If your team lives in data, don’t make them open another app to find it.
Use the Power BI web part to embed live reports right on your SharePoint pages.
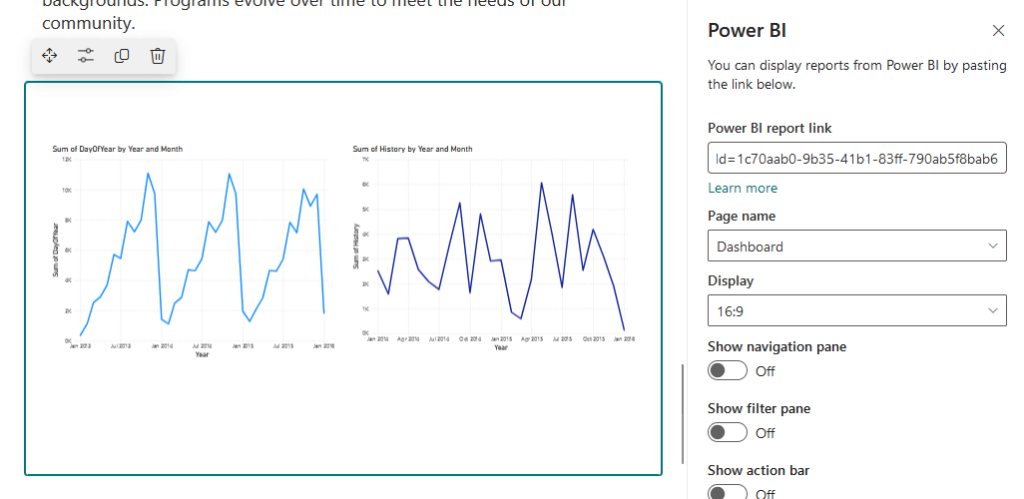
Whether it’s sales performance or team KPIs, the data stays front and center.
Tip 87: Use Microsoft Syntex to tag documents
Syntex uses AI to automatically tag, sort, and classify documents based on their content.
This saves hours of manual work and helps with compliance, too.
If you deal with lots of invoices, contracts, or forms, it’s worth exploring.
After a meeting in Teams, you can use automation to send notes or recordings directly to a SharePoint site.
It keeps documentation centralized and makes it easier for team members who missed the call to catch up.
Tasks created in SharePoint lists can now show up in Microsoft To Do if they’re synced through Planner.
This means users can manage personal tasks and team responsibilities in one place, without copying them manually.
Tip 90: Create private channels for sensitive projects
Need to collaborate on a confidential initiative?
Create a private Teams channel tied to a SharePoint site with restricted permissions.
Only approved users will see the content, keeping sensitive work secure while still being collaborative.
Tip 91: Use site templates based on departments
Different teams have different needs.
SharePoint now lets you apply site templates designed for specific roles – like HR, IT, or Sales.
These come preloaded with relevant layouts, web parts, and pages to help teams hit the ground running.
Bonus Section: Hidden Gems and Power Moves
These are tips that often fly under the radar but can make a big difference in how efficiently and confidently you use SharePoint day to day.
Tip 92: Use keyboard shortcuts to move faster
SharePoint supports handy keyboard shortcuts that can save you a surprising amount of time.
For example, pressing Alt + N quickly opens the “New” menu in a document library.
These little tricks make everyday actions smoother, especially if you live in SharePoint all day.
Tip 93: Right-click for quick actions in libraries
Don’t overlook the right-click.
In modern libraries, a right-click on any file or folder opens a menu with quick actions.
You can:
- Share
- Copy link
- View version history
- Move to another folder
It’s much faster than digging through toolbars – just a small tweak that makes you feel like a pro.
Tip 94: Pin tools to the site’s action bar
You can add your most-used actions, like “New Task” or “Submit Request,” to the site’s top action bar.
This makes the site more intuitive for your team and reduces the learning curve for new users.
Tip 95: Use site templates and site scripts for faster setup
If you’re building similar sites for projects or departments, site templates are the easiest way to start.
Modern SharePoint site templates let you apply a preset with lists, pages, layouts, and branding — all in one go.
If you need advanced automation or want to customize the setup at scale, you can still use site scripts in the admin center.
These scripts can automatically create lists, set permissions, and more for each new site.
Tip 96: Enable offline access for libraries
Working remotely or on the go?
You can sync SharePoint document libraries with OneDrive to make files available offline.
This is perfect for travel days or spotty Wi-Fi, and changes you make offline sync back once you’re reconnected.
Tip 97: Use comment threads on list items
Modern SharePoint Lists let you add comments directly to list items, complete with @mentions.
This creates a thread that lives with the task or item itself.
It’s great for discussions, follow-ups, or decisions that need context.
Tip 98: Embed forms directly into site pages
You can embed Microsoft Forms for things like:
- Feedback
- Polls
- Internal requests
This makes SharePoint pages easier to use and keeps everything in one place.
People can fill out and submit without opening a new tab or losing focus.
Tip 99: Highlight changes with conditional formatting
Make important updates pop by using conditional formatting in lists.
For example, color overdue tasks in red or highlight anything marked “Urgent.”
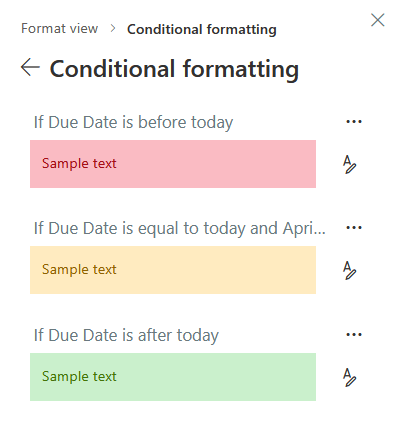
It’s a simple way to make your lists more actionable at a glance.
Tip 100: Auto-generate pages from templates
Page templates aren’t just for consistency – they’re also a big time-saver.
When someone needs to create a new page (like a project kickoff or announcement), they can start from a prebuilt template.
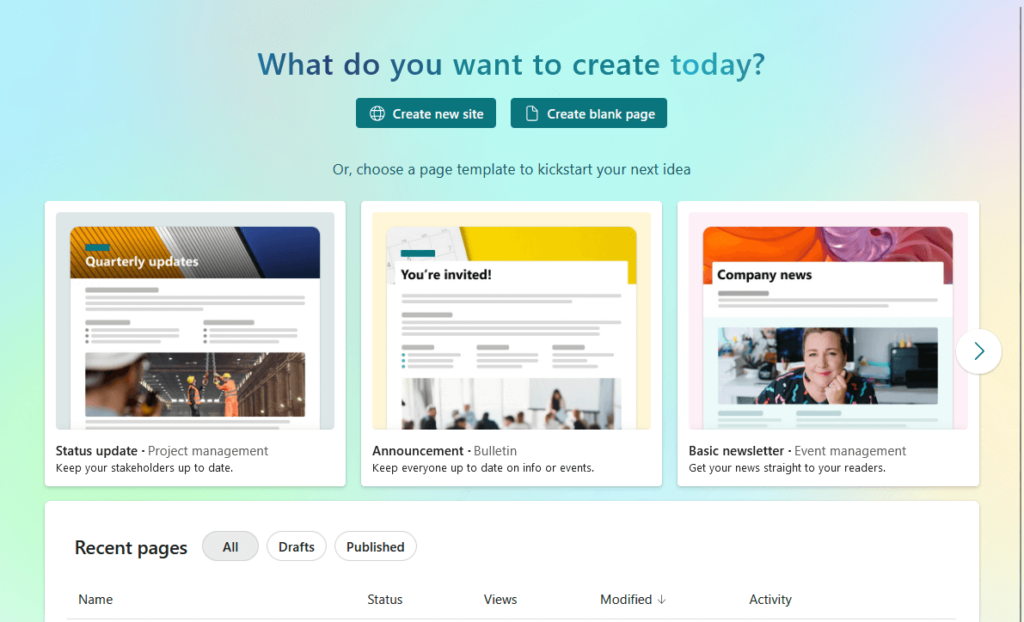
You can publish in minutes instead of hours.
Tip 101: Bookmark useful links in your personal dashboard
You can build a personal landing page in SharePoint with quick links to your sites, files, and tools.
It’s like your own command center — and it saves time every single day by keeping everything in one place.
Your turn: Do you have any questions about the tips mentioned here? Let me know below.
For any business-related queries or concerns, contact me through the contact form. I always reply. 🙂
Nice article, lots of info. Thanks