
Last Updated on May 8, 2025
Worried about your data’s security?
In this guide, let’s talk about the top security features of SharePoint Online that can help protect your data.
Let’s get started.
Table of Contents:
1. Identity and Access Management
Identity and access management just means controlling two things:
- Who can get into your SharePoint site
- What they’re allowed to do once they’re in
Simply speaking, it’s about making sure only the right people can log in and only see what they’re supposed to see.
Let’s talk about the specific features that make this possible:
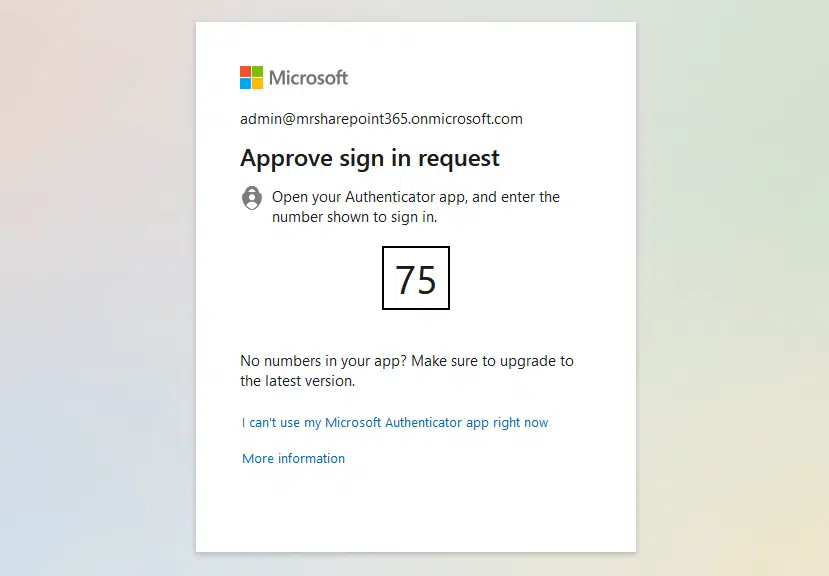
Multi-Factor Authentication (MFA)
Multi-factor authentication (MFA) adds a second step when logging in.
You don’t just need a password, you also need something like a phone code or app confirmation to log in.
Like this:
Here’s how user authentication helps secure the SharePoint environment:
- Requires users to prove their identity in more than one way
- Makes it harder for hackers, even if they have your password
- Works with mobile devices
This means if someone steals a password, they still can’t get in without the second factor, so it should block common attacks.
It’s one of the easiest ways to lock down your SharePoint without needing big technical changes.
Conditional Access Policies
These let you set rules for when and how people can access SharePoint, a smart way to control access based on different conditions.
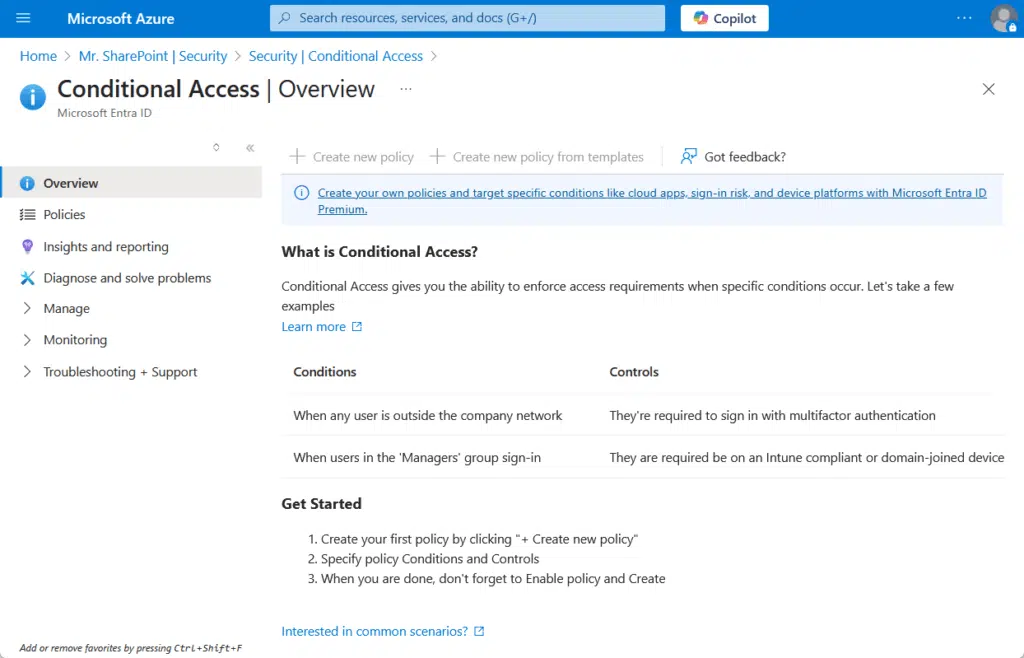
Here’s what these policies usually cover:
- Block or allow sign-ins depending on where the user is (location-based)
- Only let in users with approved or secure devices
- Respond to risky logins, like sign-ins from unknown places
This gives admins more control without locking everyone out.
Like allowing full access at the office but read-only access from home, or blocking unknown devices from downloading anything.
What’s nice is that these rules work in the background and adjust automatically.
Role-Based Access Control (RBAC)
RBAC is about giving the right people the right SharePoint permissions.
With role-based access control, you group users by role and set permissions for each role instead of assigning access individually.
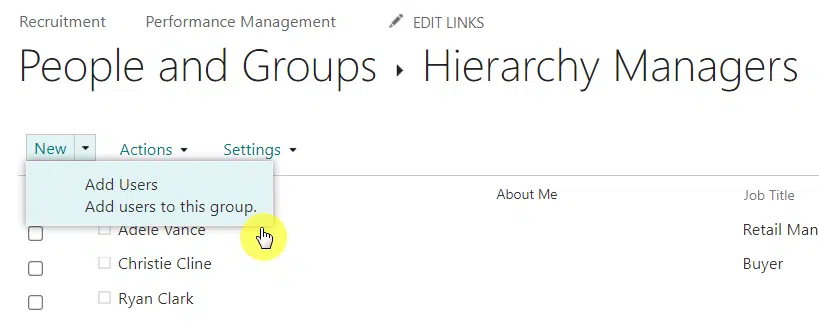
Here’s how this works:
- Assigns user permissions by role (admins, editors, viewers, etc.)
- This makes it easy to update access when roles change
- Avoids over-permission by sticking to predefined roles
Basically, if someone gets promoted, you can just switch their role, and they automatically get new permissions.
It keeps things organized and helps prevent someone from getting access they shouldn’t have.
Sign up for exclusive updates, tips, and strategies
2. Data Protection Measures
Data protection is all about keeping your files safe while they’re stored or being shared with a mix of built-in tools.
This includes:
- Encryption at rest and in transit
- Information rights management
- Data loss prevention
Let’s explore each of them:
Encryption at Rest and in Transit
Encryption protects your files from being read by anyone who shouldn’t have access, whether the data is stored or being sent.
Here’s what it covers:
- Encryption at Rest: Secures files while stored on Microsoft’s servers
- Encryption in Transit: Protects files while they move between users and servers
Encryption uses standard protocols, including Transport Layer Security (TLS) and BitLocker for stronger protection.
So even if someone managed to intercept your data or break into the system, they would only see scrambled content.
Microsoft manages the encryption keys, but admins can also set up their own through customer-managed keys.
Information Rights Management (IRM)
Information Rights Management puts limits on what people can do with documents, even after they’ve been downloaded.
It’s like setting ground rules that travel with the file.

Here’s how IRM helps:
- Restricts actions like printing, copying, or forwarding files
- You can turn it on for whole document libraries
- The rules stay in place even if the file is opened outside SharePoint (offline)
This is helpful when you need to share sensitive data but still keep control, like not wanting someone to forward a confidential report.
It also adds expiration dates if you want files to stop being usable after a certain time.
Take note that you will need to activate rights management in Microsoft 365 first, but once it’s on, it’s easy to apply.
Data Loss Prevention (DLP)
As you can tell from the name, this is about protecting sensitive data from leaking out, on purpose or by accident.
It checks files and messages for things like credit card numbers or personal details.
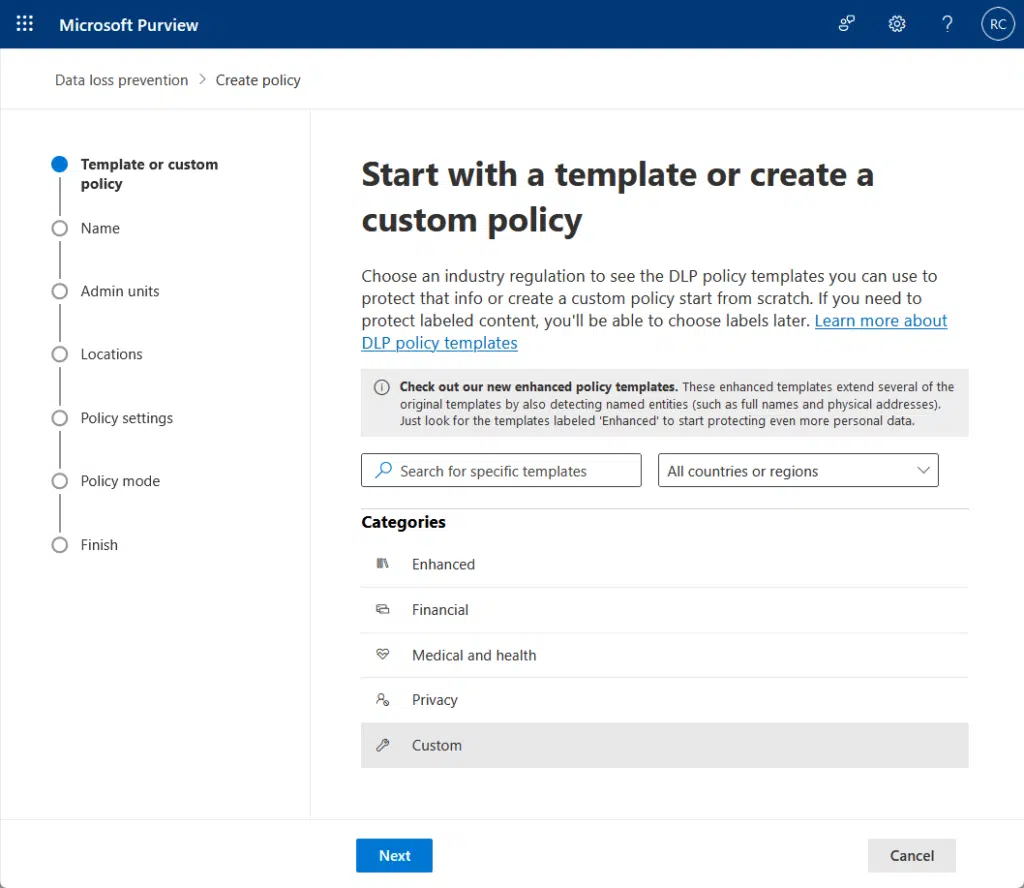
Here’s what DLP does in SharePoint:
- Scans content automatically like SSNs or financial data
- Blocks sharing or warns users when rules are triggered
- Teams up with sensitivity labels to add extra control
Data loss prevention policies can stop a file from being shared externally if it contains certain types of data.
But on the other hand, you can also set it to just alert the user first, which helps with training and awareness.
It’s a good way to stop data from slipping through the cracks, especially when people aren’t being careful.
3. External Sharing Security Settings
These controls in SharePoint let you manage how your content is shared with people outside your organization.
Here’s what’s typically included:
- Guest access management
- Sharing link expiration
- Domain restrictions
Let’s talk about each one:
Guest Access Management
Guest access management lets you bring in people from outside your organization while keeping control over what they can do.
If you think about it, this is useful for working with clients, vendors, or contractors without giving them full access.
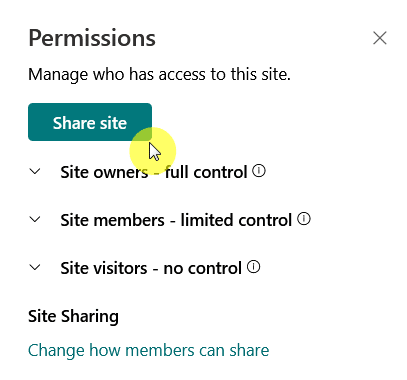
Here’s how it works:
- Only users you approve can access certain files or sites
- Guests can be limited to view-only or allowed to edit
- Admins can see what guests are doing and revoke access anytime
Guests get an email invite and usually need to sign in with a code or a Microsoft account.
You can also block guest access at the tenant or site level if needed, depending on your SharePoint security requirements.
It’s flexible but safe, as long as you stay on top of who’s been invited and what they can see.
Sharing Link Expiration
Sharing link expiration is a way to make sure that access to shared content doesn’t stay open forever.
It puts a timer on shared links so they stop working after a set period.
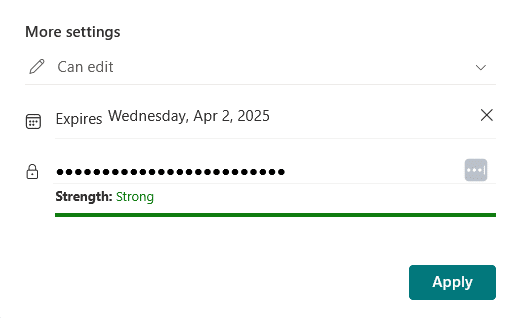
Here’s what it helps with:
- Links stop working after a time you choose (auto-expire)
- Applies to anonymous and guest links (temporary users and general public links)
- Prevents old links from being misused later
This feature is great for things like one-time reviews or short-term projects.
You can still re-share the content later if needed, but you won’t have links hanging out there for years.
Admins can set default expiration times across the organization, and users can adjust dates within allowed limits.
Domain Restrictions
Domain restrictions help you control who outside your organization can access shared content.
You can easily set it up through the SharePoint admin center under sharing policies:
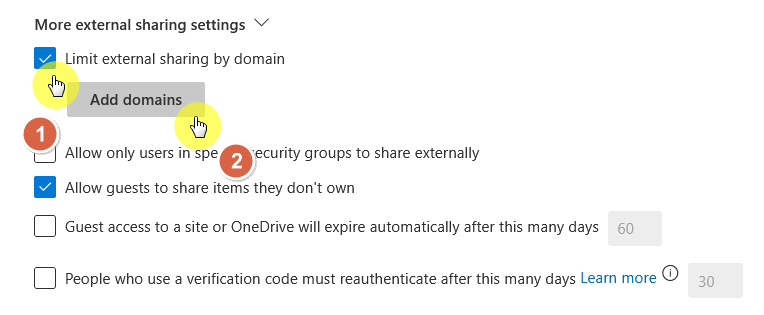
Here’s what this can do:
- Allow or block specific domains
- Limits invites to users with approved email addresses
- Helps enforce data sharing rules with trusted partners only
This is useful if you want to make sure files don’t end up with random Gmail or unknown accounts, which is really risky.😅
You might set it up to allow only people from your company domain, so only verified partners can view shared files
4. Compliance and Auditing Tools
These tools in SharePoint help you:
- Track activity
- Stay within legal rules
- Respond to issues when they come up
They’re built to give you visibility and control without having to dig through everything manually.
Audit Logs
Audit logs record user activity so you can see what’s happening across your sites and files, kind of like a digital paper trail.
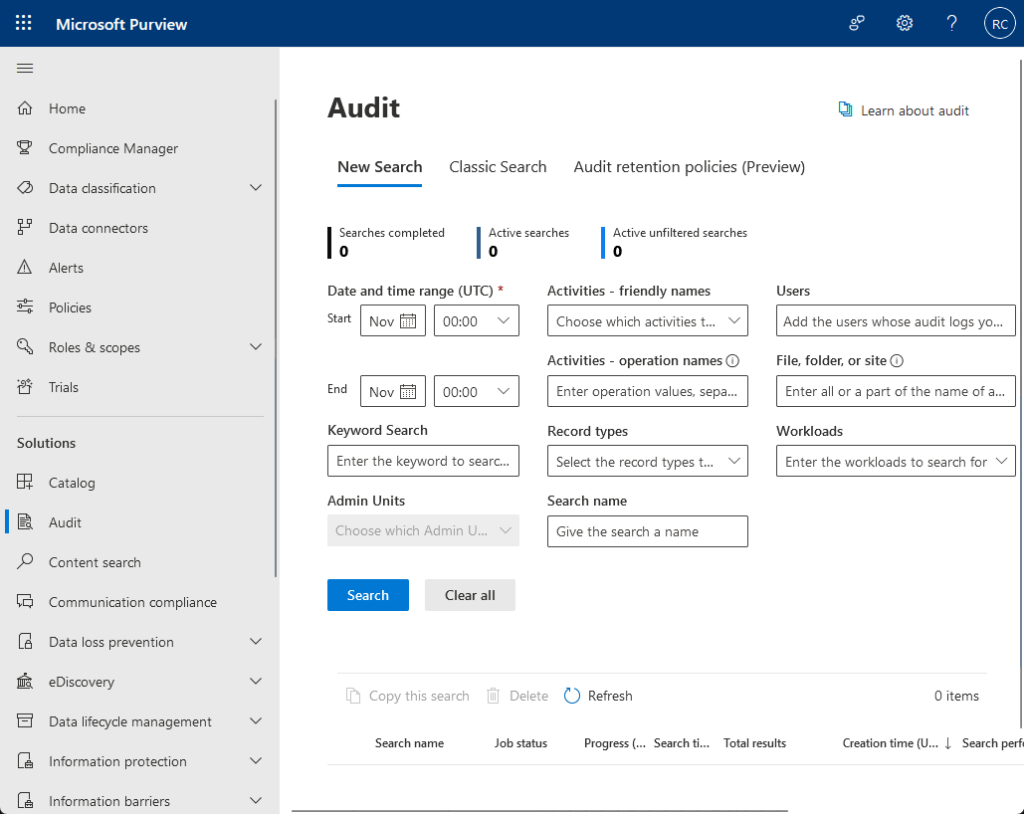
Here’s what audit logs help you do:
- See who viewed, edited, deleted, or shared files
- Know when someone gains or loses access
- Find out what happened if there’s a security or data problem
You can search logs by date, user, or activity type by pulling reports from the security and compliance center.
This tracking helps with daily oversight and compliance, making audit logs a go-to when something seems off.
eDiscovery
eDiscovery is a smart tool that helps you find and preserve content for legal, HR, or compliance investigations.
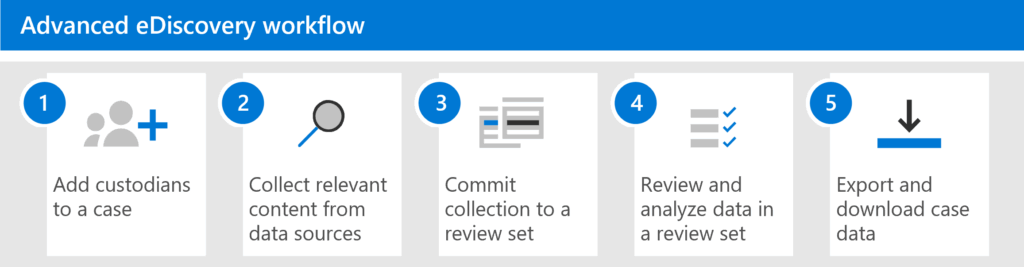
Here’s what eDiscovery does:
- Looks through SharePoint, OneDrive, and Teams for specific data
- Preserve information so it can’t be deleted or changed
- Lets you download data for legal teams or audit.
You can set up eDiscovery cases to organize your searches and holds, helpful if you’re dealing with multiple investigations.
It’s an unpopular feature that’s very important for staying legally protected and being able to respond quickly to formal requests.
Compliance Manager
This is another tool that helps you stay on top of regulations, like how well your organization is meeting compliance goals.
Here’s what it offers:
- Assessment templates (built-in checklists for standards like GDPR or HIPAA)
- Scoring system for your compliance progress
- Action plans to fix any gaps in your current setup
It’s helpful because it breaks down complex rules into manageable tasks.
For example, you can assign actions to specific team members, track progress, and even upload evidence.
It’s not just about avoiding fines, it’s about having a structured way to keep your data handling in check.
5. Threat Detection and Response
Well, this is all about spotting suspicious activity, designed to catch problems early, before they turn into something bigger.
These features work in the background and are tied into Microsoft Defender and Entra ID.
Advanced Threat Protection (ATP)
ATP is like a security guard for your SharePoint files. 🙂
It scans content for things like malware or phishing links and blocks them before they can do damage.
Here’s what ATP does:
- Scans files automatically
- Rewrites and monitors URLs to catch phishing.
- Works across services like OneDrive, Teams, and Exchange
If someone uploads a bad file, ATP can stop others from opening it.
A good example here is that even if a user clicks a suspicious link, ATP can step in with a warning or block the site entirely.
It’s great for catching threats early and helping people avoid making mistakes (and it doesn’t slow things down).
Security Alerts
Security alerts are real-time warnings about suspicious or risky activity to help admins act quickly when something unusual happens.
Here’s what these alerts cover:
- Unusual sign-ins
- Mass file deletion or access
- Policy violations
These alerts show up in the Microsoft 365 Defender portal and can also be sent by email.
You can customize what triggers an alert based on your organization’s risk level, security goals, and activities to monitor.
The goal is to spot threats early so you can step in before things go too far.
Automated Incident Response
Something like a continuation of the previous feature, this feature is for taking action after detecting a threat.
Instead of waiting for someone to step in, the system reacts almost instantly based on pre-set security rules.
Here’s what it usually handles:
- If there’s suspicious behavior, it can temporarily block access
- Restricts sharing or downloading if a threat is detected
- Gathers data and creates a case for review
This helps reduce damage and save time.
For example, if an account starts downloading tons of files, the system might automatically stop it and alert a SharePoint administrator.
It’s like a security assistant working 24/7, well, you still control everything, but it saves time and gives you a head start.
Anyway, do you have any questions about the security features I mentioned here? Let me know.
For any business-related queries or concerns, contact me through the contact form. I always reply. 🙂


