

Last Updated on June 12, 2025
Confused about who can access what in SharePoint?
In this guide, you will find out exactly how SharePoint permissions work, how to avoid common mistakes, and more.
Let’s get started.
Table of Contents:
If you want to keep your SharePoint sites safe and your team happy, you should get comfortable with how permissions work.
Think of SharePoint permission levels like keys for a building.
Some unlock every door, others just get you into a specific room.
Here are the ones you will see most often:
- Full control: The master key (site settings, users, everything).
- Edit: You can change and move things around, but not mess with the structure.
- Contribute: You get to add, edit, and delete stuff, but can’t knock down walls.
- Read: Look, don’t touch.
- View only: Like reading through a window (can’t even download some files).
- Limited access: Special hall pass. Just enough to get you to that one meeting room, not the whole building.
Admins can also build their own “keys” (custom permissions).
But most teams use these templates.
People often get confused because they’re given the wrong key or permission level.
What’s the difference between inherited and unique permissions?
By default, SharePoint is like a parent who expects all the kids to follow the same rules.
Which usually involves setting permissions at the top, and everything underneath follows along accordingly.
This is called “inheritance.”
Unique permissions, on the other hand, let you create exceptions for specific sites, libraries, folders, or even single files.
Instead of following the same rules as the parent site, these items play by their own rules.
This helps if you want to keep a folder private or let someone access just one file.
Just remember, the more unique permissions you create, the harder things become to manage.
How do you break permission inheritance safely?
It’s easy to break inheritance (well, almost too easy, in fact).
Head to the settings for your site, library, folder, or file, and hit “Stop inheriting permissions.”
SharePoint will pop up a warning to make sure you really mean it.
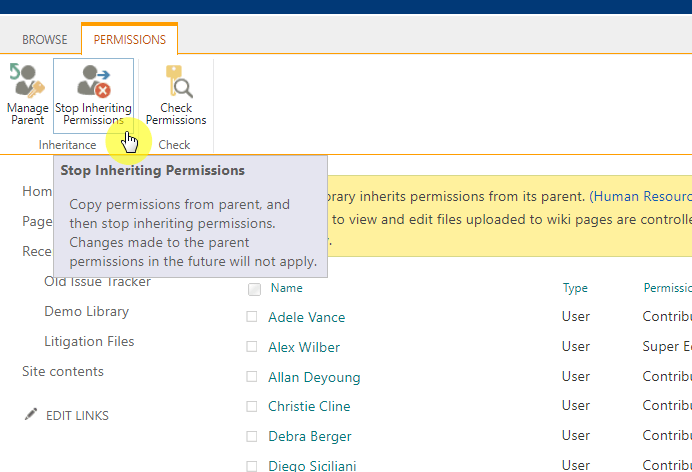
You will see a list of everyone who had access, and you can add or remove people for this specific spot.
But make sure to manage unique permissions effectively:
- Write down where and why you broke inheritance (future-you will thank you)
- Only do this for stuff that’s truly sensitive or unique.
- Check back every so often (forgotten unique permissions can confuse down the road)
Good management is important because too many exceptions make security reviews difficult and increase the chance of mistakes.
Clear management keeps your SharePoint environment easier to audit and more secure.
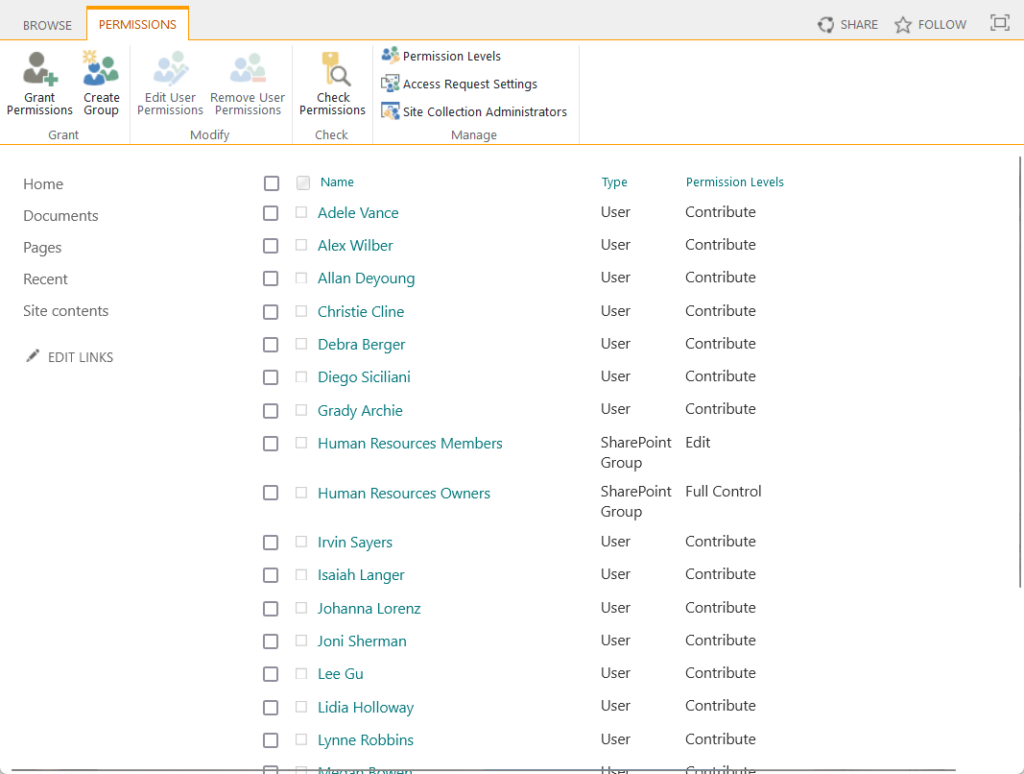
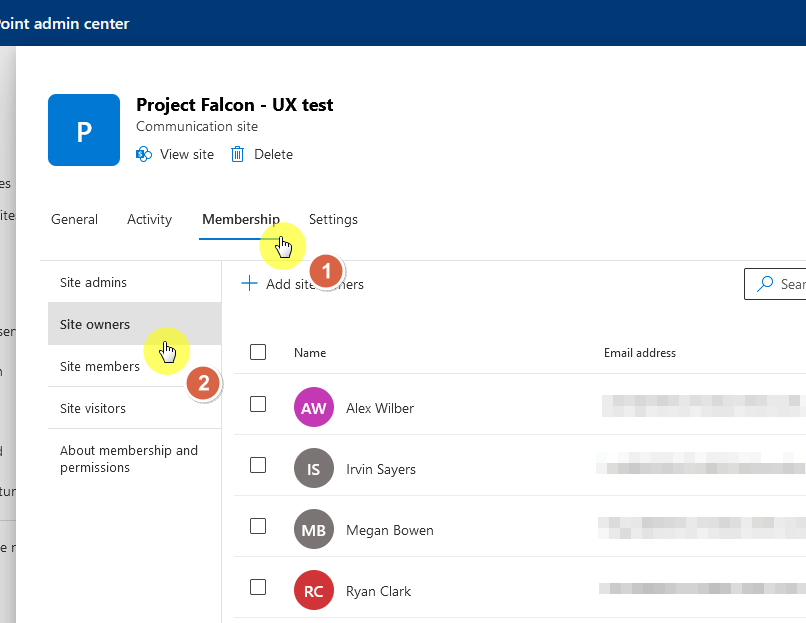
What’s the difference between site owners, members, and visitors?
Every SharePoint site starts with three main groups:
- Site owners: The ones with the keys to everything, including who gets in.
- Site members: The people doing the work (editing, uploading, and updating content).
- Site visitors: The “read-only” folks, just there to view.
Too many owners? You get chaos.
Too few members? Work slows down.
So, it’s smart to check these groups once in a while and make sure the right people are in each.
If you’ve used SharePoint for a while, you know there’s the “classic” look and the newer “modern” interface.
Both actually use the same basic permission concepts, but modern sites make it easier to manage group permissions and sharing.
Classic sites have more settings and options, but that often just means more room for mistakes.
Whenever you can, stick with modern sites as they’re simpler, more secure, and play nicely with Microsoft 365 Groups.
Sign up for exclusive updates, tips, and strategies
Managing Permissions
Managing permissions well helps your team work smoothly and keeps your data safe.
To grant permissions, open the site, library, or document, and click “Share.”

Enter the person’s name or email, and pick a permission level (like Edit or Read).
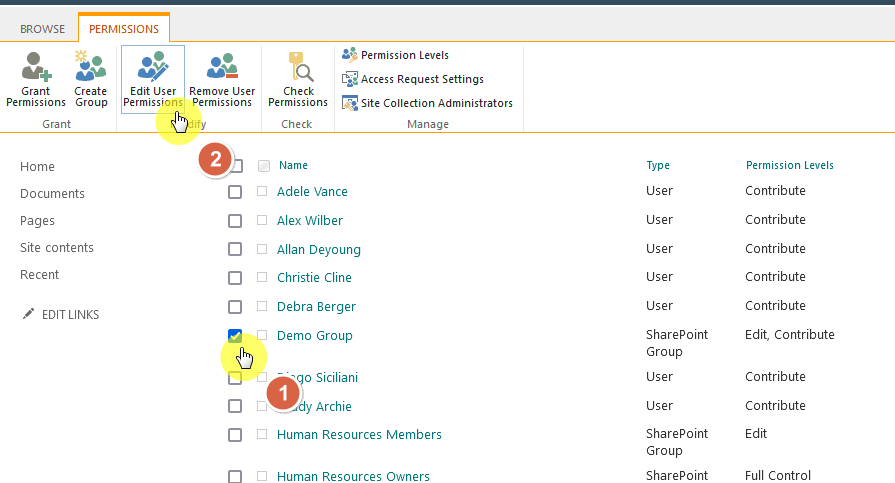
You can also go to the site permissions page, choose a group, and add new members there (better for most cases).

If you need to remove access, go to the permissions settings and find the user or group.
Then either change their permission level or remove them entirely.
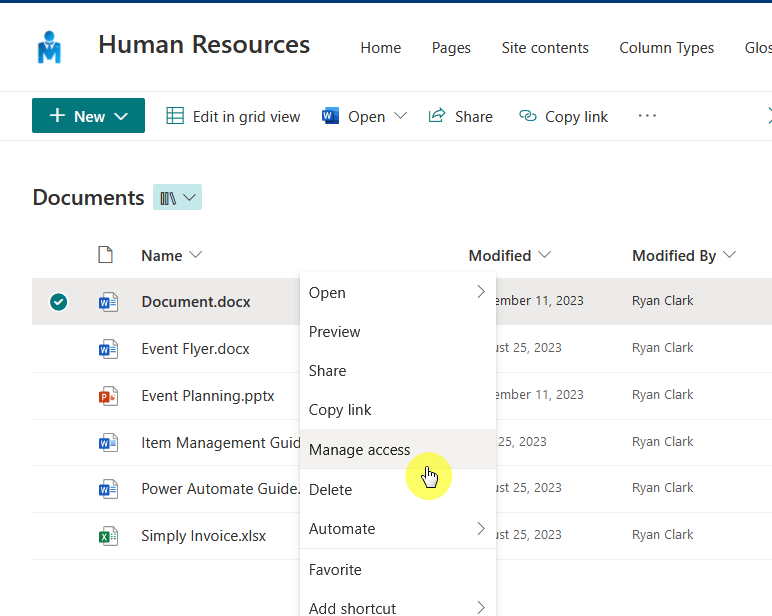
For files or folders with unique permissions, open their details, click manage access, and make changes there.
Here’s an example of how to manage folder permissions:
But before sending any invites, remember: it’s better to add people to groups than give one-off access.
Best habits:
- Favor groups over individuals
- Double-check before you hit “send”
- Schedule regular permission reviews for sensitive stuff
Keeping your permissions organized also saves time when users join, leave, or change roles.
This makes onboarding and offboarding much smoother for everyone.
How can you audit who has access to sensitive documents?
You would be surprised how often people have access they don’t need.
SharePoint makes it pretty simple to check:
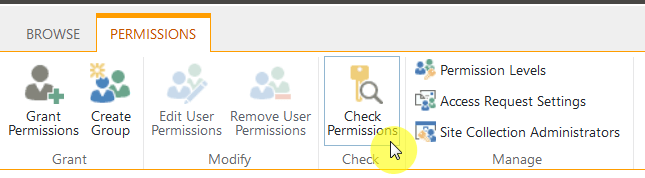
- The permissions panel shows who’s in.
- The check permissions tool lets you look up a user and see exactly what they can do.
- There’s also the Microsoft Purview
The permissions panel gives you a quick view of who can access a site, library, or file and what they can do.
You can see all users and groups, check their permission levels, and make updates right from this panel.
The check permissions tool lets you enter a name or email to quickly see what that user can access and do.
This tool is great for troubleshooting when someone says they can’t open or edit something they should have access to.
Microsoft Purview helps you run detailed access and activity reports across your SharePoint environment.
It helps in spotting unusual access or permission changes quickly.
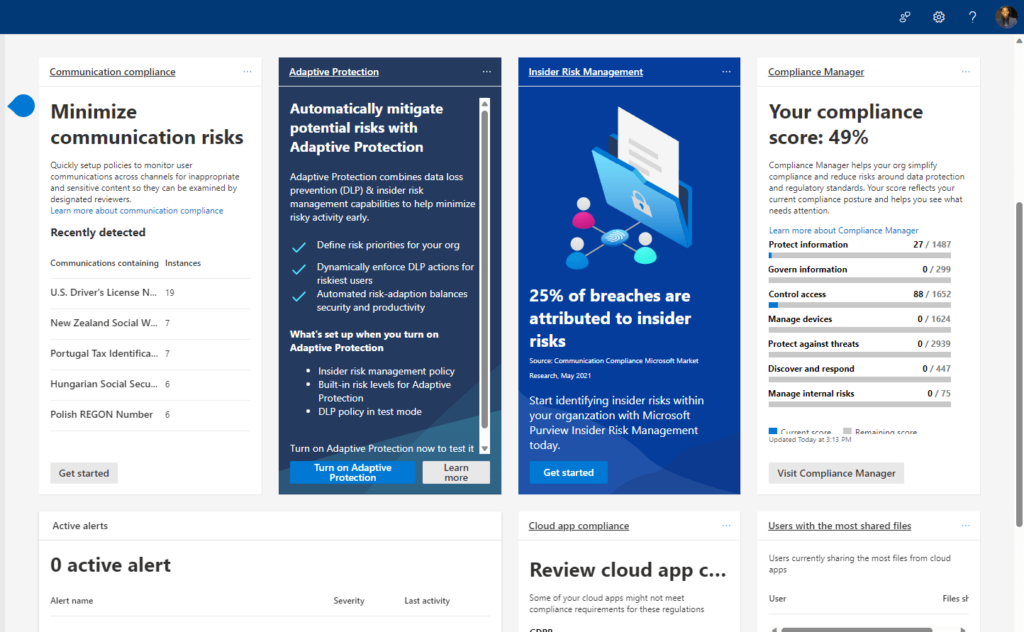
Use it for compliance checks, audits, or tracking who’s viewing or editing sensitive data.
With all that, set a reminder to review unique permissions and group memberships every few months.
If you manage many sites, consider using PowerShell or third-party tools to make these reviews faster and easier.
How do you bulk-edit or automate permissions?
The SharePoint web interface is great, but if you need to update lots of permissions, it can get tedious.
That’s where PowerShell and the Microsoft Graph API come in.
You can:
- Add or remove users from several groups in one go.
- Reset inheritance on multiple sites.
- Pull permission reports for a whole department.
For example, you can use PowerShell to add new employees to the right groups as soon as they join.
You can also remove users from all sites right after they leave.
For example, here’s a PowerShell script that removes a user from all SharePoint groups:
# Replace these with your actual values
$userToRemove = ""
$siteUrl = "https://yourtenant.sharepoint.com/sites/yoursite"
Connect-PnPOnline -Url $siteUrl -Interactive
$groups = Get-PnPGroup
foreach ($group in $groups) {
Remove-PnPGroupMember -Identity $group -Users $userToRemove -ErrorAction SilentlyContinue
}This script connects to a site, loops through all SharePoint groups, and removes the user.
Think about automating onboarding, offboarding, and audits: it will save you hours (and headaches). 🙂
How can you keep permission management simple and secure?
First, always use groups to manage access to keep permission management simple and secure.
Groups reduce confusion and make it much easier to update permissions as your team changes.
Another helpful practice is to avoid overusing unique permissions. 😅
When you have sensitive files, place them in separate libraries or even create a new site for that purpose.
This approach makes it easier to see who can access important content at a glance.
It’s also wise to limit the number of site owners to just a few trusted people.
With fewer owners, you cut down on accidental changes or unnecessary risk.
Finally, review your permissions at least twice a year.
This helps you catch outdated access and clean up any issues before they become real problems.
One last tip: add a quarterly reminder in your calendar to help you stay on track.
This way, permission reviews become part of your routine and are less likely to be forgotten.
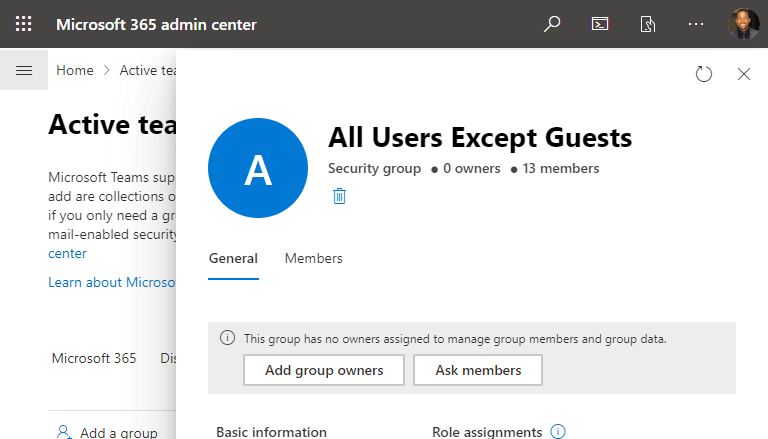
Here’s where things get a little tangled.
You’ve got:
- SharePoint groups
- Microsoft 365 Groups
- Azure AD security groups
SharePoint groups are used only within a single SharePoint site and help you organize people based on their roles.
They’re quick to set up and easy to manage when you want simple site-specific access control.
On the other hand, Microsoft 365 Groups work across:
- Teams
- SharePoint
- Outlook
This means permissions stay consistent when your site connects to a Team.
With these groups, you manage access in one place, and it updates everywhere in your Microsoft 365 workspace.
Meanwhile, Azure AD security groups are managed through your organization’s Azure Active Directory.

They can include users from across your entire company.
Use these when you need to control access at a broader level, not just within one site or team.
In short:
- SharePoint groups manage access in a single site.
- Microsoft 365 Groups sync permissions across Teams, SharePoint, and Outlook.
- Azure AD security groups handle broad, organization-wide permissions.
When in doubt, check your site’s settings to see what kind of group you’re working with.
And if you’re starting fresh, Microsoft 365 Groups is usually the way to go.
External Users And Guest Access
External and guest access lets people outside your organization work with your SharePoint sites and files.
Sometimes you need to work with people outside your company.
SharePoint lets you do this, but you get to choose how open things are:
- Anyone link (public sharing)
- Specific people (private sharing)
- Guest access (controlled access)
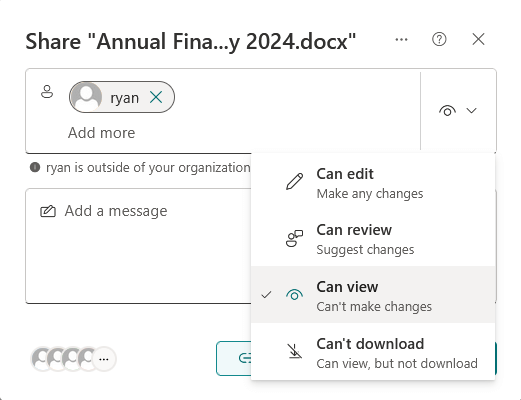
Let’s say you want to securely share a project folder with an external partner.
First, select the folder in your SharePoint document library and click “Share.”

Next, enter the partner’s email address, choose “Specific people,” and set the right permission (View or Edit user permissions).
Finally, click “Send” to send the invite.
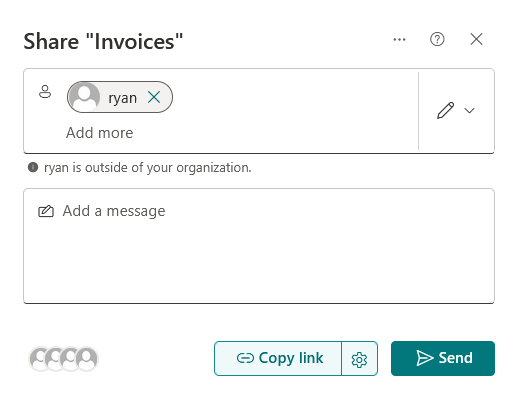
After you click “Send,” the partner receives an email invitation with a unique, trackable link.
This method is secure and keeps your internal files protected while still allowing smooth external collaboration.
I picked “Specific people” since it only allows the invited person in, making it the safest choice.
Anyone links let anyone with the link can get in, but specific people only allow your chosen person, so it keeps files safer.
What’s the safest way to handle guest access?
The safest way to handle guest access starts with turning off “anyone” links so only invited users can get in.
For SharePoint admins, you can disable “Anyone” links tenant-wide in the SharePoint Admin Center.
Go to the SharePoint Admin Center, select Policies > Sharing, and set the sharing level to prevent anonymous links.
You can also set the maximum sharing level for individual sites.

Always invite specific people as guests, and require them to sign in to have full control over who’s accessing your site.
It’s also important to review your guest list regularly in the admin center to make sure only the right people still have access.
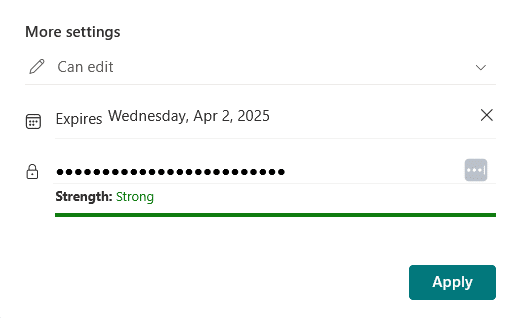
You can set guest access to expire automatically in the admin center.
Just set the expiration period for guest links, and SharePoint will remove access once the time is up.
Lastly, clearly label external or guest sites so users know when they’re sharing with outsiders.
For example, you can:
- Add a colored banner using a site banner web part
- Apply a custom theme with a clear label
- Add a text or hero web part at the top of the home page
Some organizations use a PowerShell script or site design template to apply a banner automatically for all external sites.
But the most straightforward way is to manually add a text or image banner at the top of your site’s home page.
Troubleshooting And Advanced Permissions Settings
This is important because solving permission problems quickly keeps your SharePoint sites secure and helps users stay productive.
How do you troubleshoot permission issues users are facing?
When someone can’t access a SharePoint file or folder, start with these basic checks:
| What to Check | What to Look For | Why It Matters |
| User group membership | Is the user in the right group? | Wrong group = wrong permissions |
| Unique permissions | Does the file or folder break inheritance? | Unique permissions override normal access |
| Correct site or library | Is the user in the right spot? | Easy to confuse similar sites |
| Sharing restrictions | Is sharing restricted by admin? | Site/tenant settings override |
These checks help you spot common mistakes that block users from accessing content.
Fixing them quickly saves time and avoids bigger headaches later.
If those steps don’t solve the problem, use the “Check Permissions” tool.
Enter the user’s name or email to see exactly what access they have for the file, folder, or site.
This tool gives you a clear answer when someone says they can’t open or edit something they should have access to.
If things are still not working, look for recent changes.
Maybe someone updated a group, broke inheritance, or changed a site setting.
You can also ask the user to log out and sign back in, as a fresh login often clears up permission changes that haven’t synced yet.

Logging out and back in often solves access problems after changes, because new permissions don’t always update right away.
When in doubt, always check these basics before diving deeper. 👍
Can you manage permissions with PowerShell?
PowerShell is a lifesaver when you need to manage permissions for many users or sites at once.
You can use PowerShell to:
- Automate repetitive permission changes
- Add or remove users in bulk
- Reset inheritance or permissions for multiple sites
- Create and export permission reports
This saves you time and helps avoid mistakes that can happen with manual changes.
For example, if you need to quickly remove a former employee from all groups in a site, you can use a script to do it in seconds.
Here’s a sample script that removes a user from all SharePoint groups in a site:
# Replace with your values
$userToRemove = ""
$siteUrl = "https://yourtenant.sharepoint.com/sites/yoursite"
Connect-PnPOnline -Url $siteUrl -Interactive
$groups = Get-PnPGroup
foreach ($group in $groups) {
Remove-PnPGroupMember -Identity $group -Users $userToRemove -ErrorAction SilentlyContinue
}This script connects to your SharePoint site, loops through every group, and removes the user everywhere at once.
You speed up your workflow and help ensure no access is left behind by accident.
Just be sure to test scripts in a safe environment before running them on live data to avoid unintended changes. 😅
How do retention and compliance settings interact with permissions?
Retention and compliance features don’t grant extra access to users, but they still play a major role in managing your content.
These settings determine what actions people can take with files, even if they already have view or edit permissions.
For example, when a file is under a retention policy, it can’t be deleted (even by site owners or admins).
This protects important documents from being removed before the retention period ends.
Compliance holds are another layer that simply freeze files in place, preventing deletion or edits, but not giving anyone new permissions.
Meanwhile, auditing tools let you see who tried to access or delete specific files, which is important for sensitive content.
The short of it is:
- Files under retention can’t be deleted, even by owners
- Compliance holds freeze files in place so they can’t be changed or removed
- Auditing tracks every access or deletion attempt for added accountability
Always involve your IT or compliance team when turning on these features, especially for libraries with confidential information.
Working together ensures your retention and compliance setup matches your organization’s security requirements.
Final Thoughts
Permissions in SharePoint Online can seem overwhelming, but you can make them manageable with these habits:
- Use groups instead of individual permissions
- Avoid one-off permissions whenever possible
- Schedule regular reviews to keep things tidy
If you stick to these habits, you will avoid most headaches.
Write things down and make reviews a routine, and you will spend less time fixing access problems and more time getting work done.
Anyway, do you have any questions about SharePoint Online permissions or access issues? Let me know below.
For any business-related queries or concerns, contact me through the contact form. I always reply. 🙂
This is by far one of the most comprehensive and well-explained guides I’ve come across on SharePoint permissions—especially with the 2025 context. The analogies (like keys to rooms) made complex concepts so much easier to grasp.
As someone supporting businesses with Microsoft 365 and SharePoint solutions, I couldn’t agree more with your emphasis on using groups over individual permissions and regularly reviewing access. It’s these small habits that make a huge difference in maintaining a secure, scalable environment.
Thanks for breaking it all down so clearly, Ryan. Bookmarking this for future reference!