

Last Updated on July 18, 2023
Need to create a new custom permission level?
In this guide, you will learn how to create a new custom permission level in SharePoint Online, assign it to users or groups, and use PowerShell to create it.
Let’s get started.
Table of Contents:
- Reviewing the Default Permission Levels
- When to Use Custom Permission Levels
- Creating a New Custom Permission Level
- Assigning the Custom Permission Level to Users or Groups
- Using PnP PowerShell to Create a Custom Permission Level
- Common Mistakes to Avoid When Creating Custom Permission Levels
- Frequently Asked Questions
- What are SharePoint custom permission levels?
- Can I modify the default permission levels in SharePoint?
- When should I consider creating custom permission levels?
- Can I assign a custom permission level to a specific user?
- How often should I review and update my custom permission levels?
- What if I make a mistake when creating a custom permission level?
Reviewing the Default Permission Levels
SharePoint comes with default user permissions to provide granular control over your site’s content and structure.
Before creating custom permission levels, it’s important to understand SharePoint’s default out-of-the-box permission levels.
Let’s go over them fast:
- Full control: Allows users to view, add, delete, or modify all content, settings, permissions, and design elements
- Design: Users can view, add, delete, or modify items, documents, and the site’s structure or design.
- Contribute: Users can add, edit, and delete items in lists and libraries but cannot modify the site’s design
- Read: Enables users to view content but not add, edit, or delete it
- Limited Access: Grants access to specific lists, libraries, items, or documents without site-wide access
- View Only: Allow users to read content but not download documents
By default, these permission levels are grouped into three main SharePoint groups:
- Owners (Full Control)
- Members (Contribute)
- Visitors (Read)
Knowing these default permissions will allow you to have a better grasp of what custom permissions you might need to create.
Related: SharePoint Permissions Explained: How Permission Levels Work
Sign up for exclusive updates, tips, and strategies
When to Use Custom Permission Levels
You might be wondering:
“If SharePoint provides these default permission levels, why would I need custom ones?”
Here’s the thing:
Every organization is unique, with distinct workflows, security requirements, and user roles. The default permission levels might not cover the specific needs of your organization.
That’s where custom permission levels come in.
You should consider creating custom site permissions when:
- Your organization requires a unique set of permissions: Sometimes, you might find that the default permission levels don’t quite fit your organization’s requirements. For example, you might need a permission level that allows users to add and edit items, but not delete them—a nuance that the default Contribute permission doesn’t cover.
- Your organization has complex permission requirements: If you have various departments with different roles and responsibilities, custom permission levels will help you tailor permissions to each group. This way, every department gets access to what they need, and nothing more, minimizing the risk of accidental data modification or deletion.
- Your organization prioritizes security: By creating custom permission levels, you can ensure that users only have access to the information they need. This principle, known as the principle of least privilege, is a fundamental tenet of information security.
SharePoint is all about making collaboration and data management efficient, secure, and intuitive.
But if the default permission levels don’t perfectly align with your organization’s needs, don’t be afraid to create custom ones.
Creating a New Custom Permission Level
The bright side here is that creating these new user permissions won’t take you that long.
Step #1: Go to the advanced permissions settings
Navigate to the target site and do the following:
- Click the gear icon
- Click site permissions
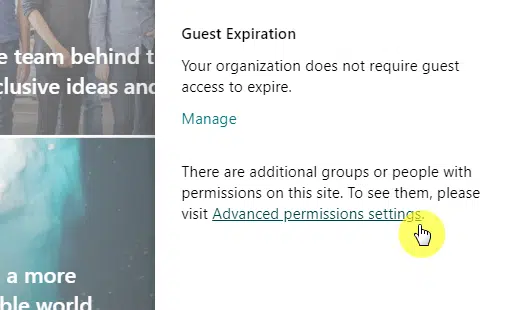
The panel will then show the basic permission settings.
Click advanced permissions settings near the bottom:
Step #2: Add a permission level
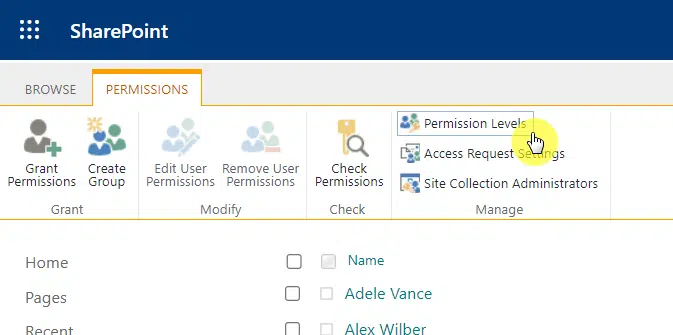
The next page will look like one of the classic SharePoint sites.
Click the permission levels button from the command bar:
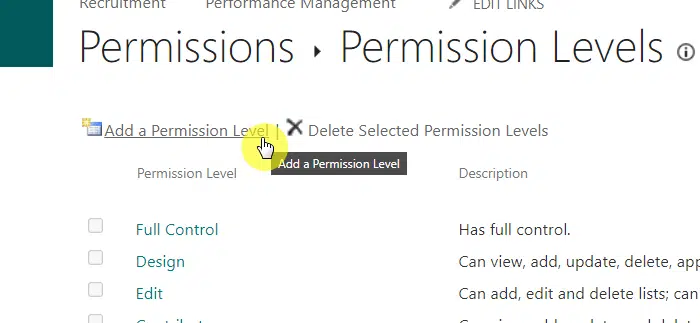
The next page will show you different permission levels and their description.
Clicking on one will allow you to edit each permission level on the SharePoint site.
Click the add a permission level button:
Step #3: Configure the new permission level
The next page is where you can adjust the permission level to your needs.
Start with the name and description. Only select all permissions if you want to create something similar to the owner level.
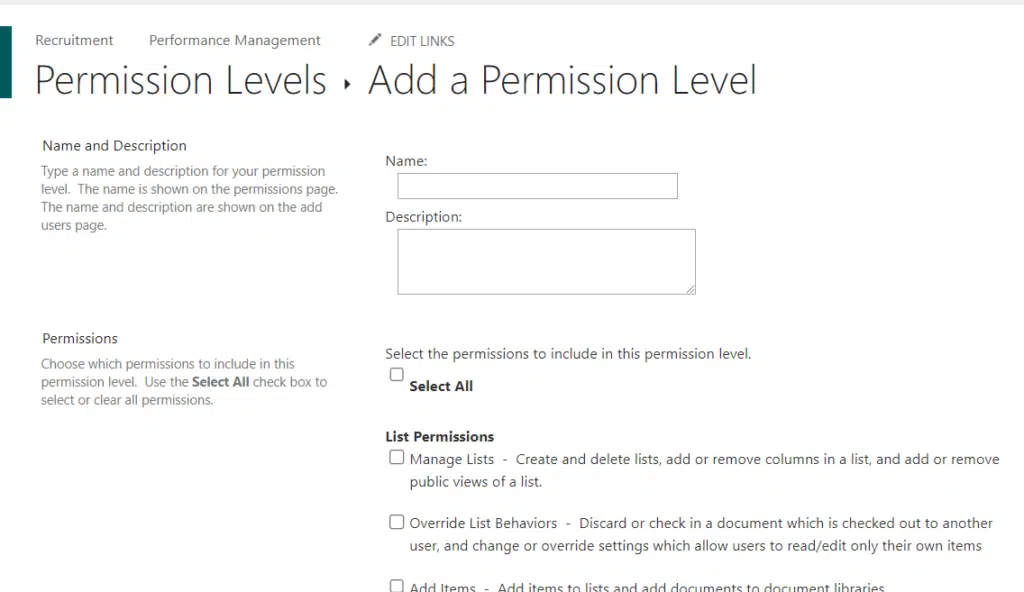
Permissions are divided into three categories here:
- List permissions
- Site permissions
- Personal permissions
Only select the necessary permissions that will accomplish the purpose of the permission level.
After that, click the create button at the bottom of the page.
Related: How to Check User Permissions in SharePoint Online (Guide)
Assigning the Custom Permission Level to Users or Groups
Creating the new permission level is only half the battle. You still need to assign it to users or groups.
From the home page, you will need to retrace the steps you took to arrive at the advanced permissions settings:
- Gear icon
- Site permissions
- Advanced permission settings
Now, you can either edit user permissions here or grant permissions to new ones.
Editing user permissions
To edit a user or group permission, select the user or group first and click edit user permissions:
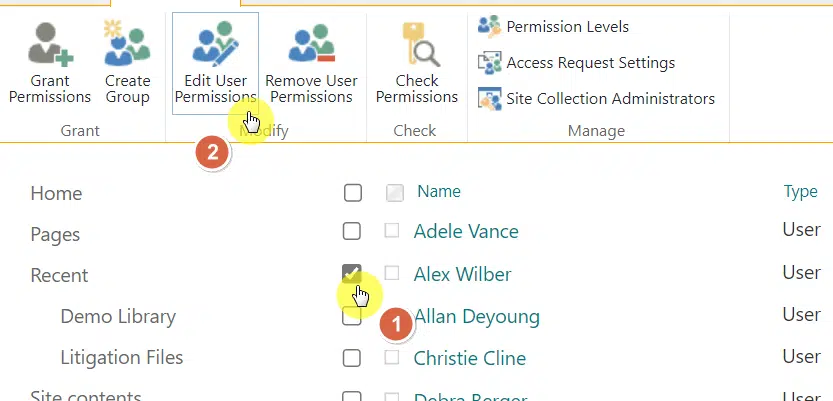
Note: Don’t click on the user or group itself but select it using the box beside the name.
If the option is greyed out, you’re probably trying to edit a default permission level on a site associated with a Microsoft group.
If that’s the case, edit the group permission first from the modern interface and then use the grant permission button (next section).
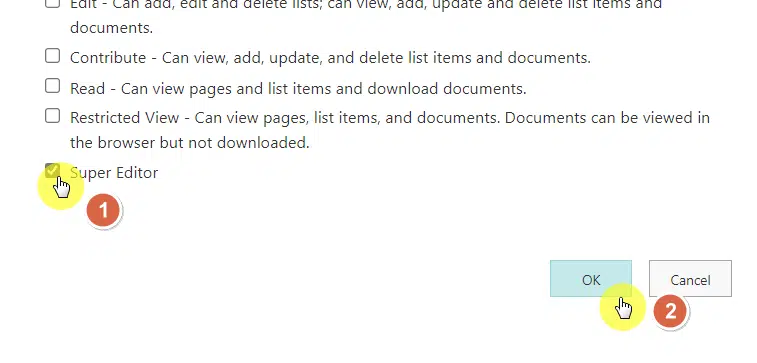
If the option is available, you can then change the permission of that user/group to the newly created permission level.
Hit the ok button once that’s done:
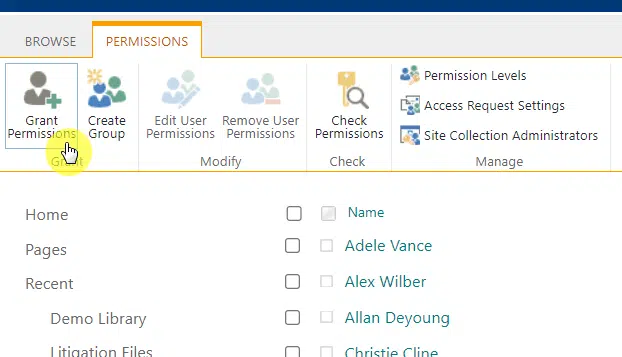
Granting permissions
If the user or group isn’t on the list here yet (meaning, they’re not invited to the group yet), you can simply grant them permission.
Click grant permissions:
A small window will appear where you can invite/share the SharePoint site.
Now do the following:
- Enter the name/email address of the recipients
- Show the options
- Select a permission level
- Click the share button

Using PnP PowerShell to Create a Custom Permission Level
It’s also possible to use PnP PowerShell to create a custom permission level.
For example, you can create a new permission level that has similar permissions to the edit level but can’t delete.
You can then use the following (credits here):
#Set variables
$SiteURL = "https://tenant.sharepoint.com/sites/yoursite"

#Connect to PnP Online
Connect-PnPOnline -Url $SiteURL -Credentials (Get-Credential)

#Get permission level to copy
$ContributeRole = Get-PnPRoleDefinition -Identity "Edit"

#Create a custom permission level and exclude delete from contribute
Add-PnPRoleDefinition -RoleName "Edit without Delete" -Clone $ContributeRole -Exclude DeleteListItems, DeleteVersions -Description "Edit without delete permission"
You can also add permissions to a custom permission level.
For example, you can add editing capabilities to a read permission level:
#Set variables
$SiteURL = "https://tenant.sharepoint.com/sites/yoursite"

#Connect to PnP Online
Connect-PnPOnline -Url $SiteURL -Interactive

#Create a custom permission level
$BasePermissionLevel = Get-PnPRoleDefinition -Identity "Read"

#Set Parameters for new permission level
$NewPermissionLevel= @{
    Include     = 'EditListItems'
    Description = "Read Permissions with Edit List Items"
    RoleName    = "Read with Contribute to List Items"
    Clone       = $BasePermissionLevel
}

#Create new permission level
Add-PnPRoleDefinition @NewPermissionLevel
Common Mistakes to Avoid When Creating Custom Permission Levels
Here are some common mistakes you should avoid when creating custom permission levels:
1. Granting excessive permissions
It’s tempting to give users more permissions “just in case” they need them.
But this can lead to security risks and unintended changes. Always think carefully before deciding to edit permissions.
Follow the principle of least privilege:
Users should only have the permissions they need to do their jobs. Nothing more, nothing less.
SharePoint utilizes an inheritance model for permissions, where subsites inherit permissions from their parent site.
Misconfigurations in your site settings, like breaking inheritance, could result in inaccessible site areas or expose sensitive information.
Ensure you fully understand inheritance before making changes.
3. Neglecting to communicate changes
Communication is key when adjusting permissions.
Sudden access issues or unexpected abilities can cause confusion and operational inefficiency for your users.
Always communicate changes to your users, explaining why they’re necessary and what they mean.
4. Creating unnecessary custom permission levels
While it can be beneficial to create custom permission levels, doing so without cause can complicate your permission structure and make it harder to manage.
Ensure there’s a justifiable need before creating a new custom permission level.
5. Not reviewing and updating permission levels regularly
Business needs and personnel change over time, and your permission levels should reflect these changes.
Regular reviews ensure your permission levels remain accurate and secure. Don’t “set it and forget it”—continually revisit and revise your permission structure as needed.
6. Forgetting to document your custom permission levels
Documenting custom permission levels is valuable for future reference during onboarding and security audits.
It’s much easier to manage your site’s permissions when you have a clear record of why each one exists.
Frequently Asked Questions
Here are frequently asked questions related to custom permission levels:
SharePoint custom permission levels are sets of permissions that you define according to your organization’s specific needs.
They allow you to grant a unique set of permissions that aren’t covered by the default permission levels offered by SharePoint.
No, SharePoint does not allow you to modify the default permission levels to prevent breaking fundamental functionalities.
However, you can create custom permission levels to cater to your unique needs.
When should I consider creating custom permission levels?
You should consider creating custom permission levels when:
- Your organization requires unique permissions that aren’t covered by the default levels
- You have complex permission requirements due to varied user roles
- Security is a high priority, and you want to adhere to the principle of least privilege
Can I assign a custom permission level to a specific user?
Yes, you can assign custom permission levels to specific users, as well as to user groups.
It depends on your organization’s needs and how you have structured your user roles.
How often should I review and update my custom permission levels?
Regular reviews of your custom permission levels are crucial for maintaining security and efficiency.
No universal frequency fits all organizations, but a general guideline is to review permissions when significant changes occur, such as job role or responsibility changes.
What if I make a mistake when creating a custom permission level?
If you make a mistake when creating a custom permission level, don’t worry — you can edit it or delete it entirely.
Just remember to communicate any changes to the relevant users and document these changes for future reference.
Got stuck while creating and assigning the new custom permission level? Tell me more about it in the comments.
For any business-related questions and concerns, you can reach out to me directly using the contact form here. I’ll reply asap.


Hi, thanks this is one of the most complete and clear texts on this matter!
One question remains for me: it is possible to define a custom permission level for the entire tenant so it is automatically available when a new site is created?