

Last Updated on February 1, 2023
Want to make your columns look more interesting?
In this article, I will show you how to apply column formatting, some examples, and how it differs from formatting with the field customizer.
Let’s get started.
Table of Contents:
SharePoint Online is an excellent platform for creating intranets and using them to house data through lists and documents.
If you didn’t know, SharePoint went through an evolution that gave its users a new experience, especially with how things look inside.
With that came different formatting options available in SharePoint Online:
- Column formatting
- View formatting
- Form formatting
Column formatting allows you to customize or change how the column fields in SharePoint lists and libraries look like.
View formatting allows you to customize or change how the items in SharePoint lists and libraries look like.
Form formatting allows you to customize the header, body, and footer of a SharePoint list form using JSON.
Note: For more info on form formatting, check this out: How to Use JSON to Customize a SharePoint List Form.
Sign up for exclusive updates, tips, and strategies
It’s easy to apply column formatting in a SharePoint list or document library.
Simply follow these steps:
- Click on the column header (of the target column)
- Go to column settings > format this column

A right panel will then appear.
Go to the format columns tab and you will see the choices available for the column type.
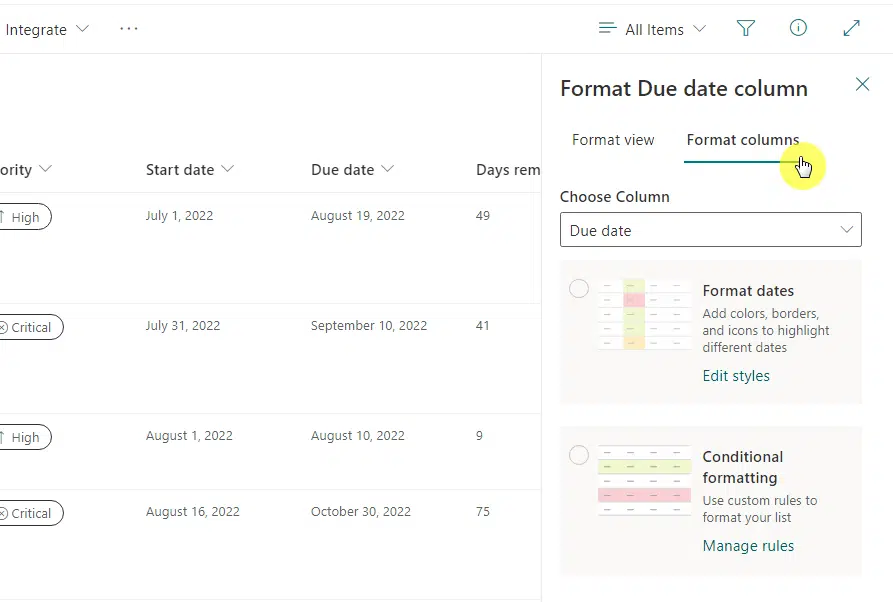
From there, all you have to do is select an available formatting option.
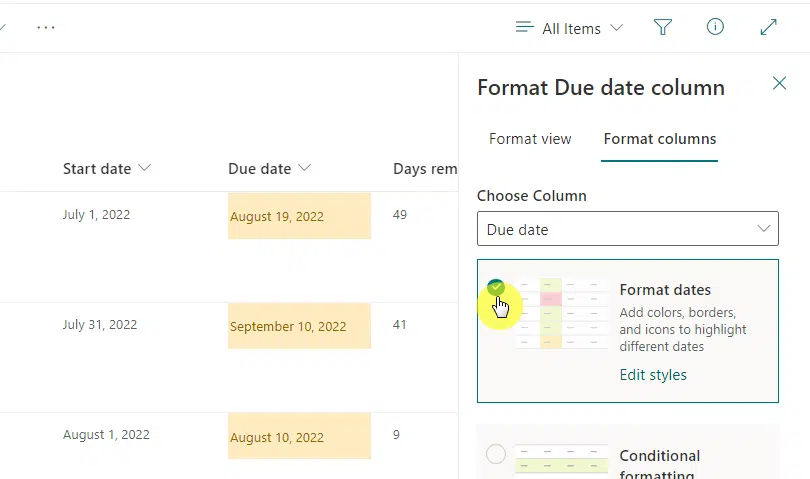
For example, for a date column, like the one I selected above, there is a format dates option that will add colors, borders, and icons.
If I click on it, formatting will be applied to the column:
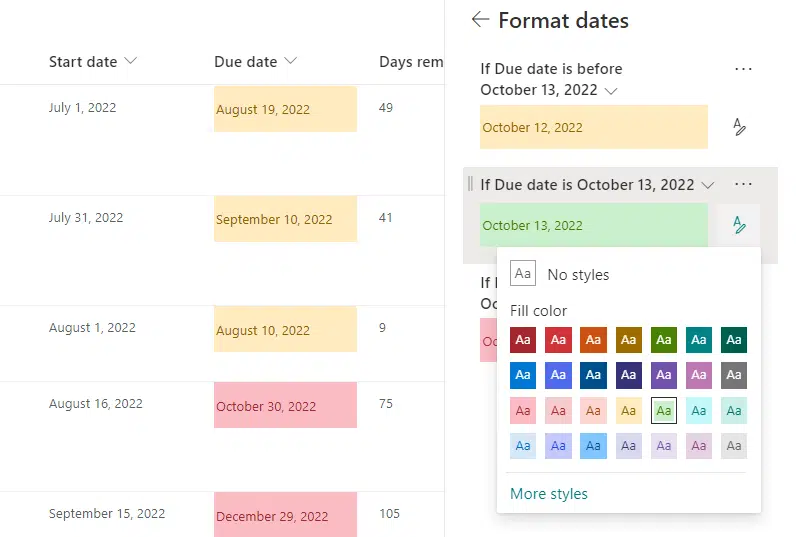
By default, dates before the day you applied the formatting will be highlighted in yellow, today is green, and red for a future date.
You can always change the colors and the date involved in the formatting through the edit styles link.
Not all column types will have their own specific formatting option.
But all of them will have conditional formatting based on rules that you can specify.
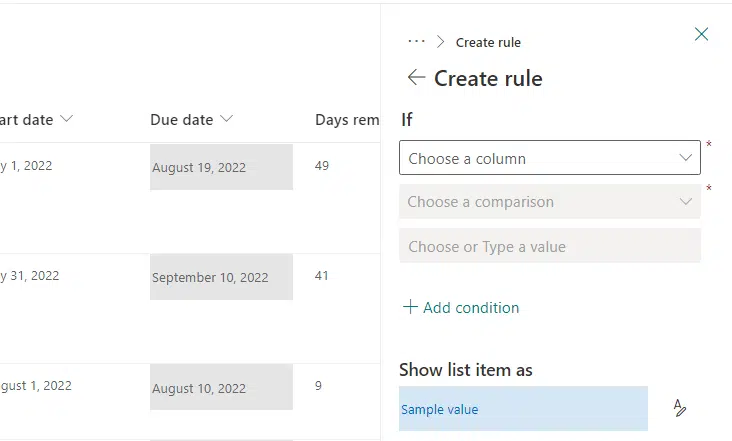
If you’re familiar with Excel-style expressions, then you know how to use IF statements to create rules.
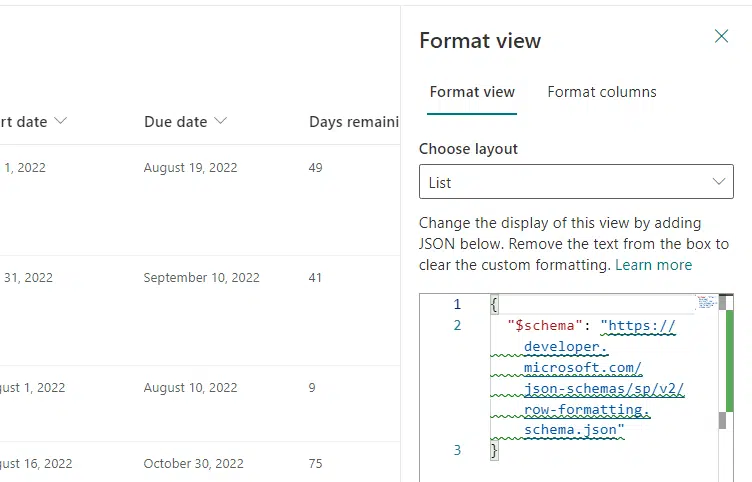
Besides that, you can also create a JSON object that describes the elements that are shown in the field and what styles are applied.
In the format column panel, there is an advanced mode button at the bottom:
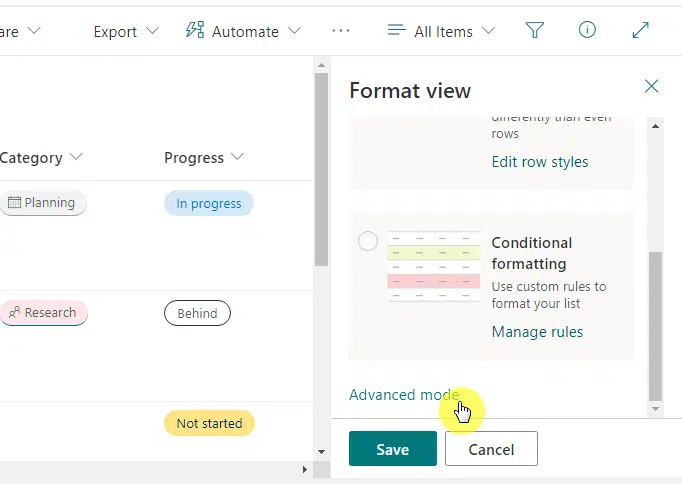
You will then see a box where you can add a text format called JSON below.
Take note that if you switch to design mode from there (back to the formatting options), the formatting JSON will be discarded.
Difference of column formatting with field customizer
Both of these features will allow you to customize how the fields in the column or SharePoint list will look like.
The basic difference here is that column formatting is much simpler and easier to use while field customizer is more powerful.
Unfortunately, column formatting is less flexible since it doesn’t allow you to use custom code — only predefined elements and attributes.
If you’re confused, this is the basic rule you can use:
- For simple formatting, use column formatting
- For advanced or complex formatting, use the field customizer
Make your columns more informative and fun
Column formatting is a good way to spice things up in your list or library.
As you know, they are only visuals for the users and will not in any way change the data in the list item or file.
So what kind of data will you be using column formatting for? For questions, kindly drop them in the comment section.
For business inquiries, send me a message through the form found here and I’ll get back to you as soon as possible.


