
Last Updated on April 29, 2024
Do you use Microsoft Planner in your business?
Planner is a gem from Microsoft. It’s got the right mix when it comes to task management.
In this article, I’ll share with you some of the Microsoft Planner best practices that I know of so you can use the app to its maximum.
Let’s get started
Table of Contents:
- What are the Microsoft Planner best practices to implement?
- 1. Create your own task templates
- 2. Add plans to an existing group
- 3. Add the Planner tab in Microsoft Teams
- 4. Always fill out assigned to and due dates
- 5. Add Planner to Outlook calendar
- 6. Use filtering and grouping functions together
- 7. Always fill out the priority field
- 8. Track the progress of your tasks
- 9. Check out available Power Automate templates
- 10. Make use of comments, notes, and attachments
What are the Microsoft Planner best practices to implement?
If you’re not familiar with Planner, it’s basically a task management app with a lot of extra features.
It’s something close to Trello due to its kanban board, with each plan associated with a Microsoft 365 group.
Note: For more information about Planner, check out this article here: What is Microsoft Planner? How to use it? (Beginner’s Guide).
1. Create your own task templates
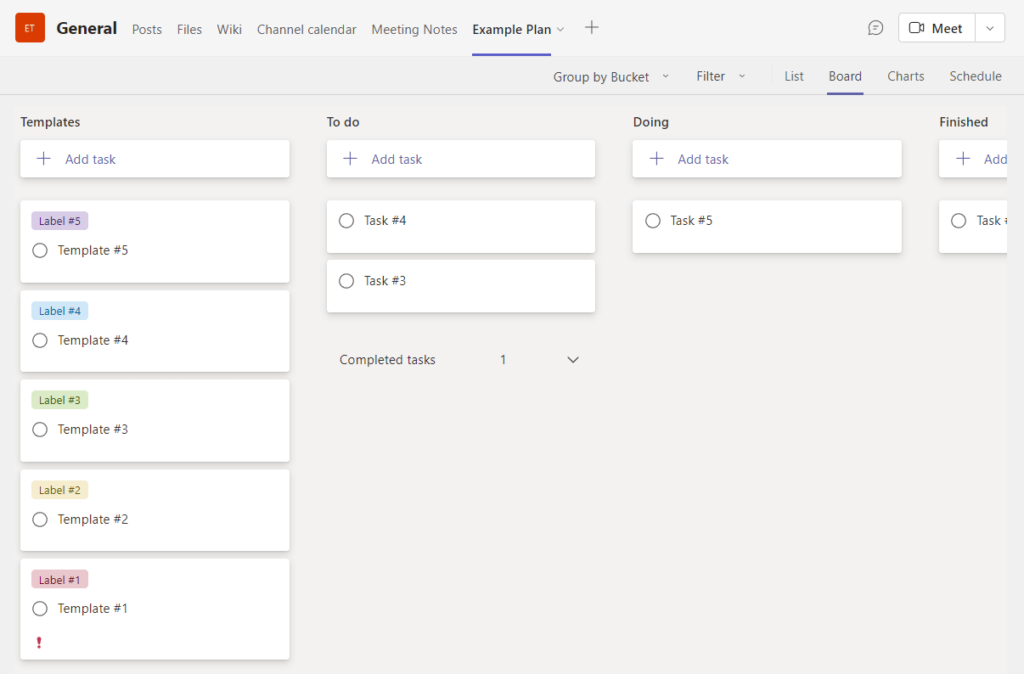
If you want to save time creating new tasks, one way to do it is by creating templates or saving a copy of repetitive tasks.
Currently, Planner has no templating feature. Because of this, you have to manually create the template first.
Here’s an example:
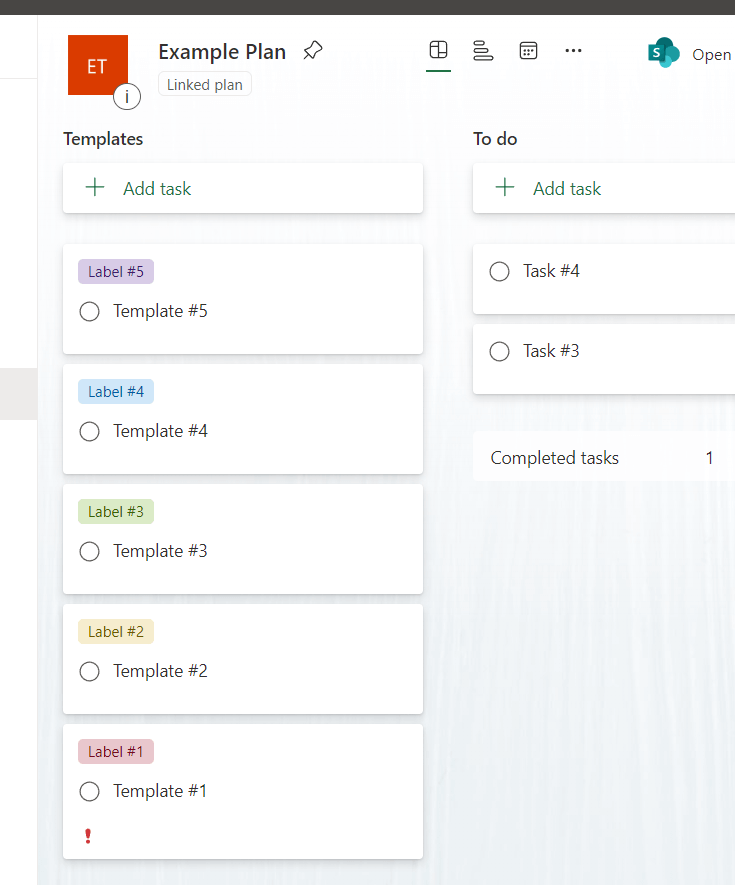
Your templates may evolve over time. As much as possible, try adding as many repeating details as possible.
This will save you time since all you need to do is copy the templated task instead of creating a new one and setting up everything over again.
2. Add plans to an existing group
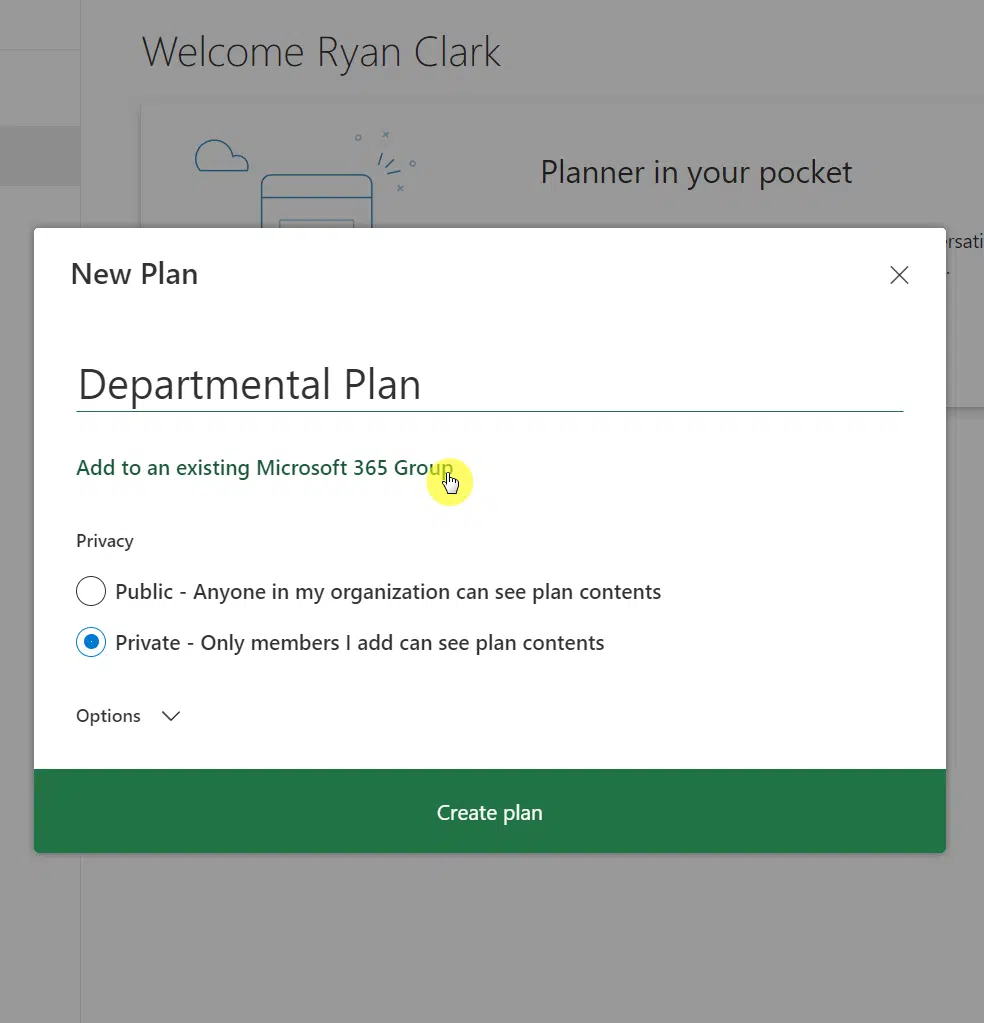
When you create a new plan, you also create a new Microsoft 365 group complete with all its assets like a site, calendar, etc.
But truth be told, a new plan doesn’t always mean a new group. More often, you want a new plan within the same group.
For that, simply click the add to an existing Microsoft 365 group button when creating a new plan:
In addition to this, you might want to practice creating a master plan and sub plans for the same group.
Think of it as similar to creating a team in Microsoft Teams and then creating channels within the team.
This way, you will be able to divide the project into different small plans. This isn’t required. But this helps in organizing your project.
Note: For more information on creating a new plan in Microsoft Planner, check out this article: How to Make a New Plan in Microsoft Planner (+No New Group).
3. Add the Planner tab in Microsoft Teams
Do you find yourself switching through Teams and Planner in your browser or desktop?
Well, though it takes only a few seconds, the process sometimes takes you out of your train of thought.
The solution to this is to add a new tab within Microsoft Teams for Planner:
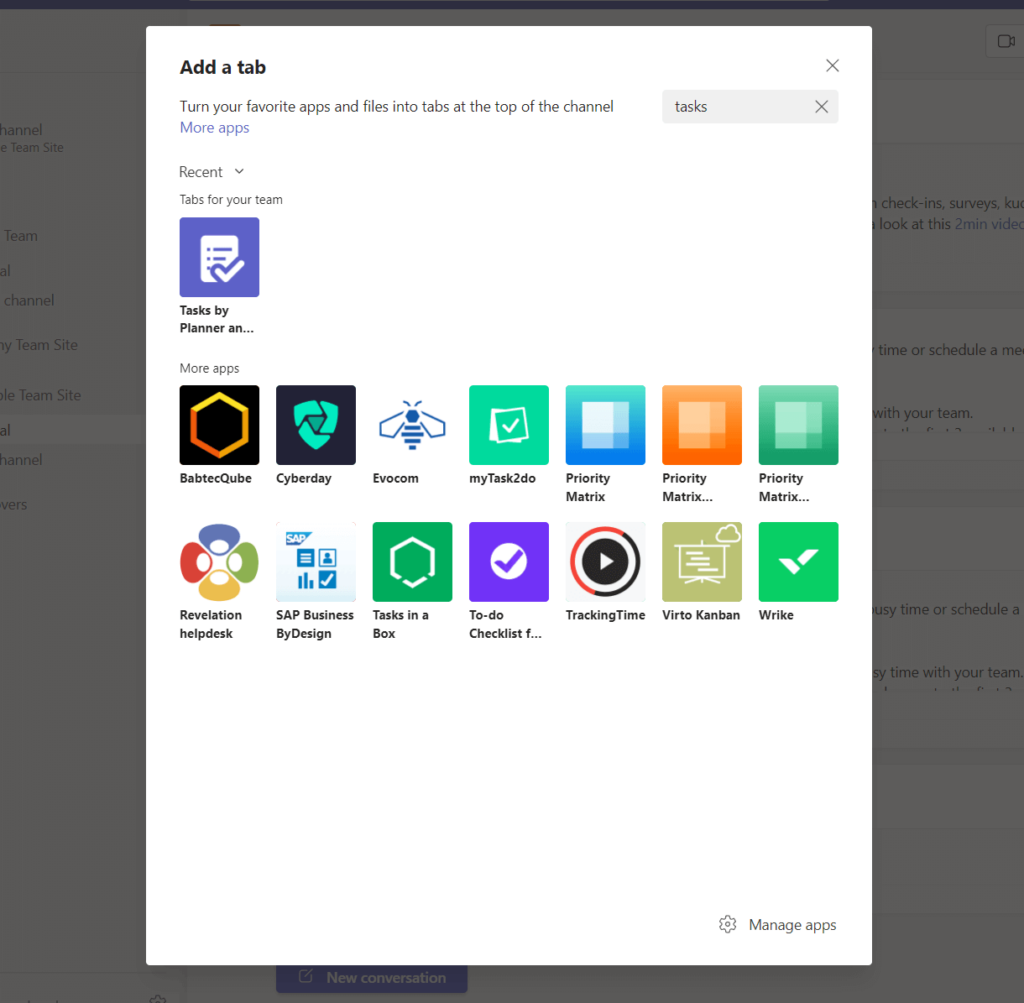
You will have to set it up a little bit. But it should be easy enough since all you have to do is to either create a new plan or select an existing one.
Similar to using Planner in SharePoint, using it within Microsoft Teams as a tab feels native enough:
This is one of the best practices that I explained in Microsoft Teams. Check here for more info: Microsoft Teams Best Practices Guide: Focus and Management.
4. Always fill out assigned to and due dates
Since we’re talking about Planner best practices, it’s ideal that you indicate who a task is assigned to and when is the due date.
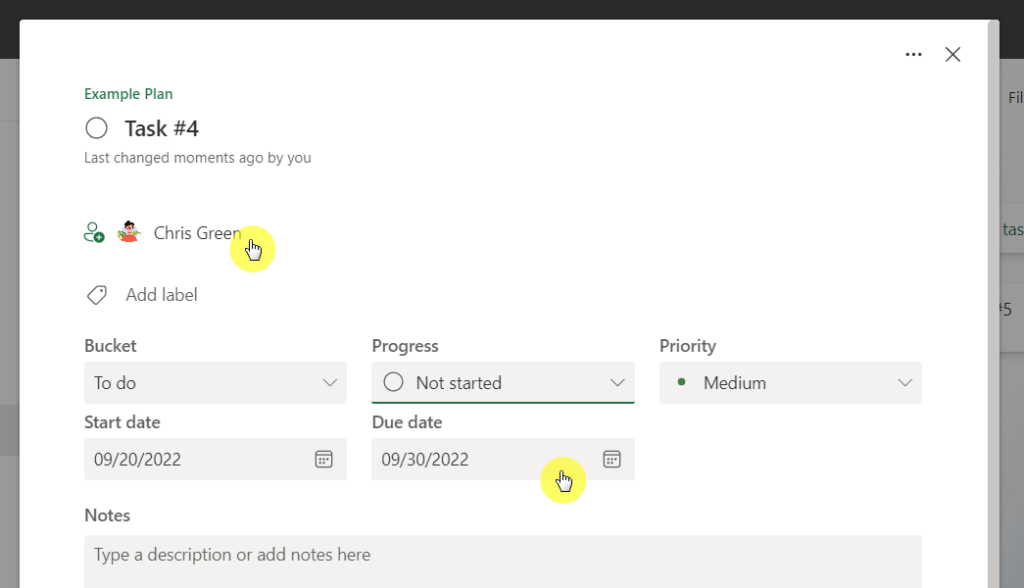
Even if this may not always apply to the tasks, make sure to do this when applicable.
This helps in accountability and making sure the task isn’t ignored or forgotten. The due date is also there so you don’t get behind schedule.
5. Add Planner to Outlook calendar
By default, Microsoft Planner has a feature where you can add the plan to your Outlook calendar.
There is an add plan to Outlook calendar button inside the ellipsis button in the command bar of Planner:
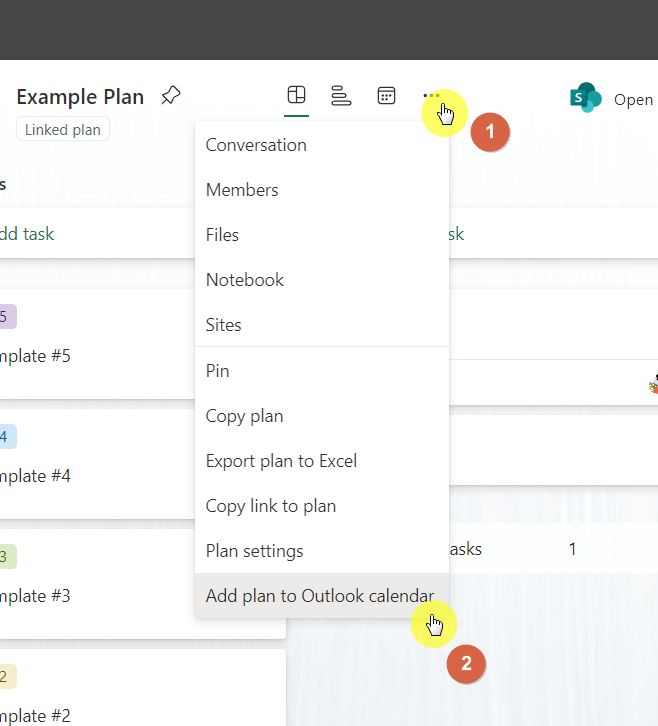
You will then have the option of either keeping the calendar private or sharing it with anyone through the iCalendar link.
With this, you can make sure that you’re up to date with the task schedule in Microsoft Planner without going to the app itself.
Note: For more information about the calendar options in Microsoft 365, check out this article: [List] Calendar Options in SharePoint and Microsoft 365.
6. Use filtering and grouping functions together
Finding a task is easy if you only have a few of them. But what if you have 50+ active tasks?
The solution for that is to use the filtering and grouping functions in Microsoft Planner:
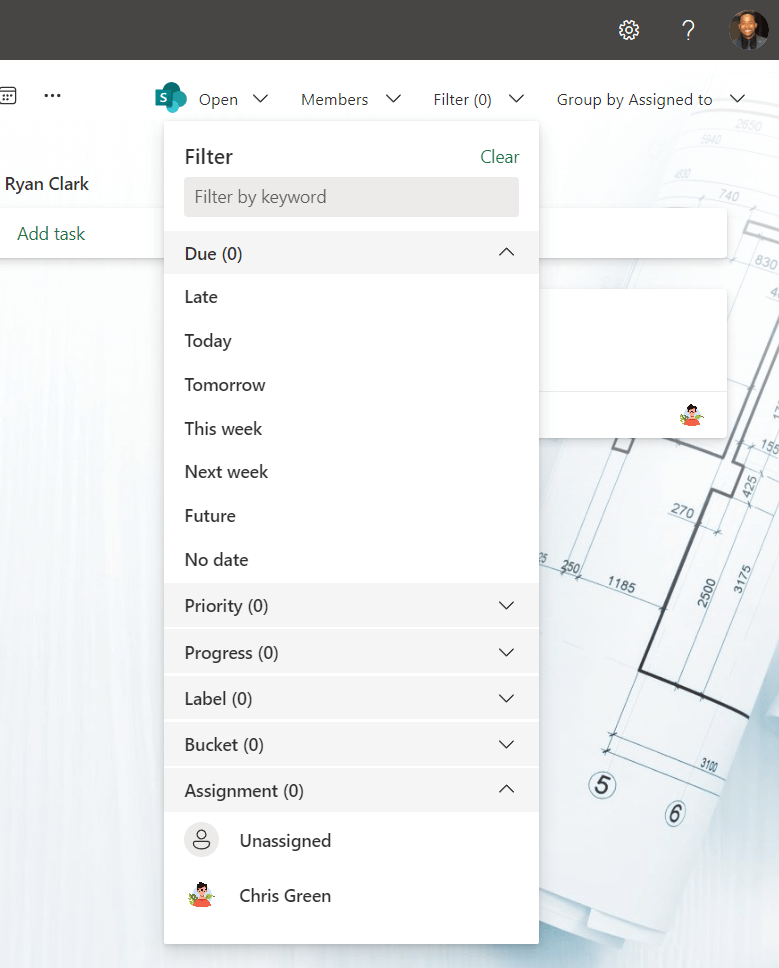
This is one of the things that I like about Planner. The filter options include all the fields in the task except for the notes.
The groupings also appear at the end of the filtering options. Great when you need to find specific tasks that fit specific criteria.
7. Always fill out the priority field
Another great feature of Planner is the priority field. This way, you can prioritize the tasks according to urgency and importance.
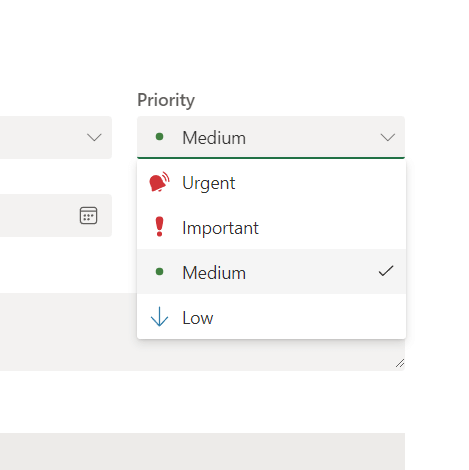
What I like about this is that you don’t have to waste adding new labels that are already present in this field.
On the other hand, if you have some other way to prioritize tasks, you can always use labels (you can use more than one label).
For example, you may want to prioritize your tasks in Microsoft Planner according to how much effort it takes to finish each one.
8. Track the progress of your tasks
Besides the board view, Microsoft Planner includes two additional views:
- Charts
- Schedule
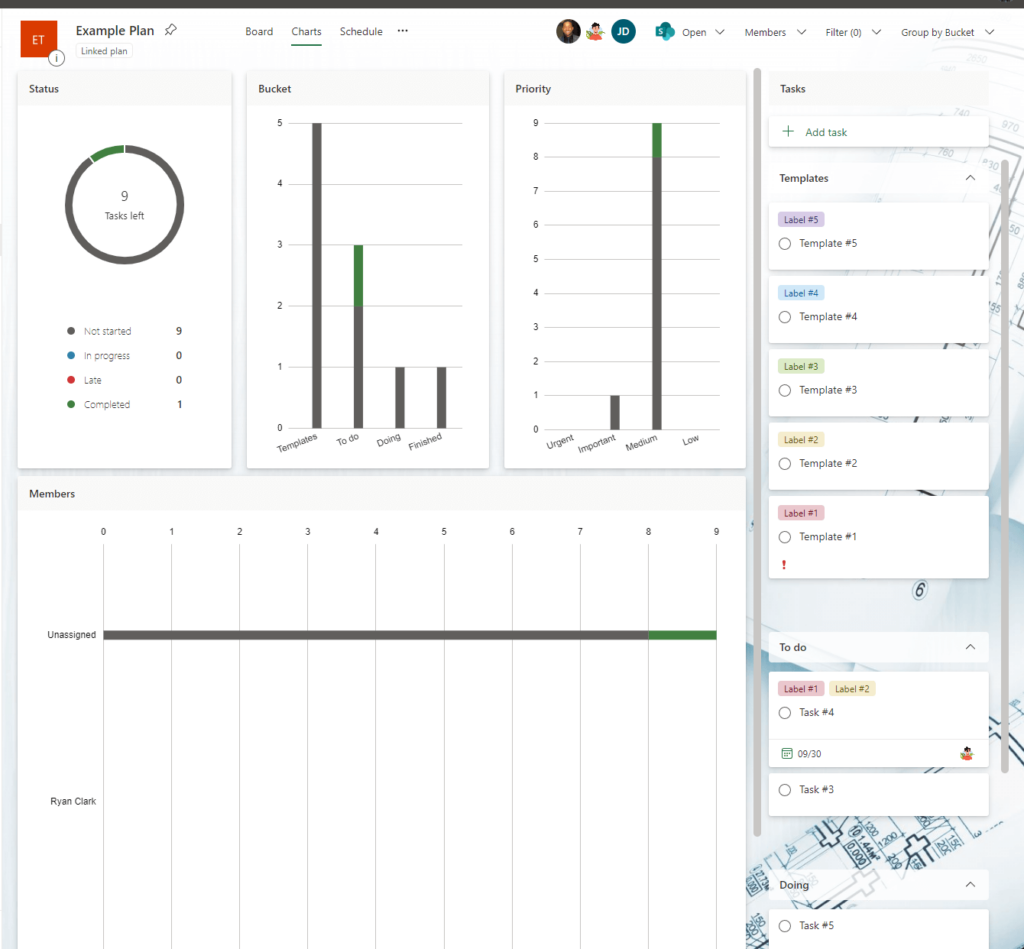
The chart view shows you different charts about the status of your tasks according to status, buckets, priority, and members.
The schedule view provides you with a picture of what your month looks like according to the start date and due date of the tasks.
Use these views to see a high-level view of your plan’s progress.
Related: Microsoft To Do vs Planner: The Better Tool
9. Check out available Power Automate templates
Managing a project and creating tasks can be daunting especially if the scope is quite large.
Thankfully, there is Flow, which is a business process automation from Microsoft that involves a sequence of tasks or events.
This deserves its own post. However, there are a few templates available for you to start with so you don’t have to start from scratch.
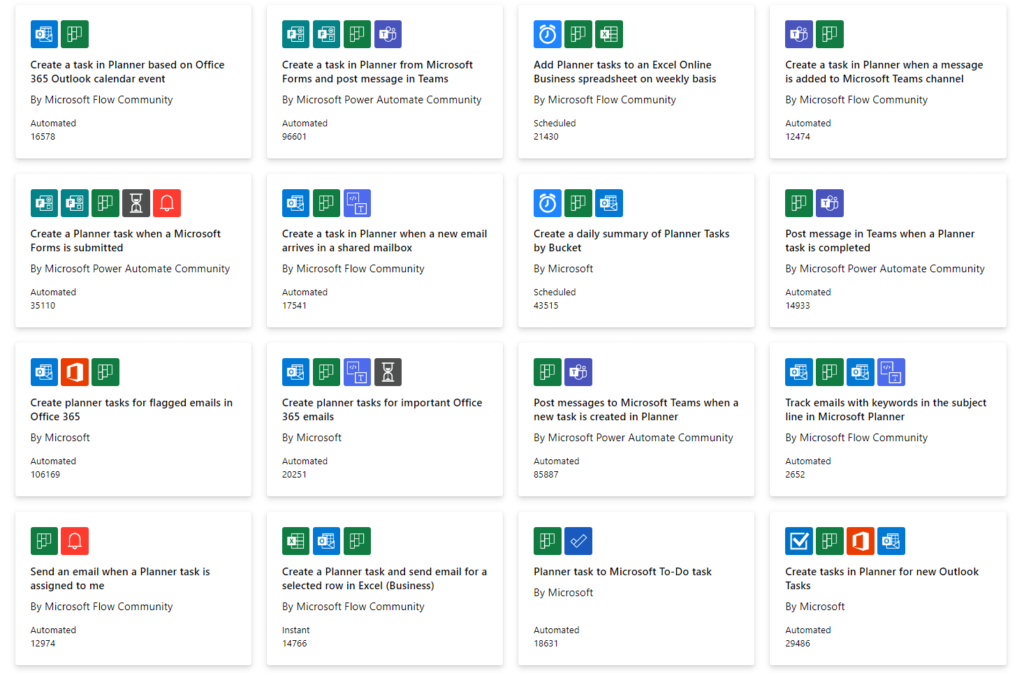
You can also go directly to Power Automate and create your own custom flow from there.
But you may need a bit more knowledge if you want to design your own flow since it’s a little more complicated.
Notes: For more information on Power Automate, check out this article: Introduction to Microsoft Power Automate.
10. Make use of comments, notes, and attachments
Lastly, don’t forget about the comments and notes.
If you’re confused about which one to use, here’s some advice:
- Use notes for additional instructions about the task
- Use comments for communicating further progress/report about the task
When you use comments, Microsoft Planner sends an email notification to the team members assigned to the task.
Team members can then reply by either going to the Planner app or from the email itself.
For the attachments, you can pretty much attach any kind of file to the task:
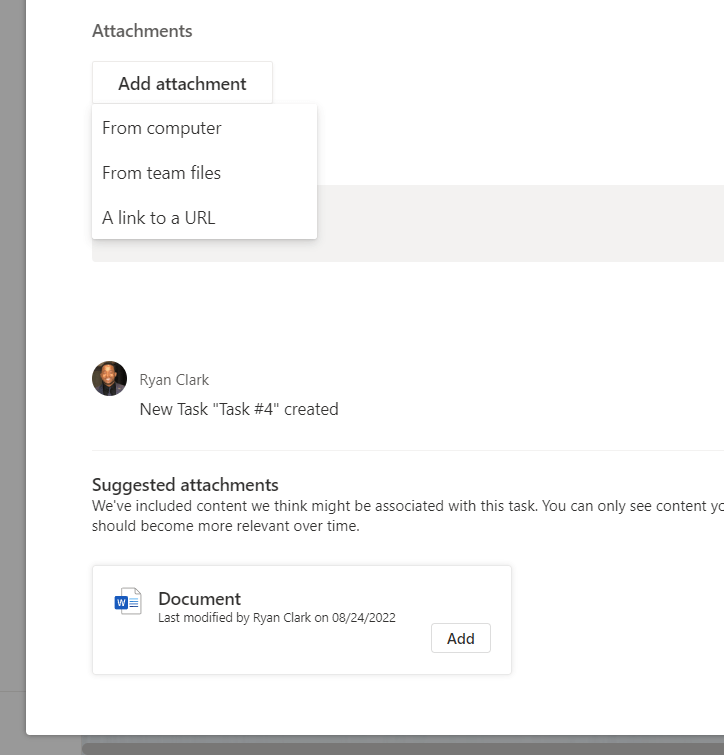
There is a limit though of up to nine attachments per task. On the bright side, you can show the primary attachment to show in the card.
What’s even more awesome is that there is a suggested attachments section at the bottom of the task, which is system-generated for you.
Do you have any questions regarding Microsoft Planner best practices? Let me know in the comments.
For business inquiries, please send me a message using this form here and I’ll get back to you asap.


Hello! Is it possible to exclude lables in my planner? For instance, lets say I have 2 lables “Email” and “VIP-Customers”. If I filter on “Email” AND “VIP-Customers” I want only to see tasks that have both, and exclude tasks that have only one of them.
This is not possible currently.
Setting up a bucket for task templates as you’ve suggested is really helpful and saves time, but is there a way for the template task cards to not be included in the data in the charts view. Is this only achieved by filtering/grouping?
Hello, I created a master plan that I want to use as my template. When I copy that plan and add it to channels within a team, anytime I make revisions to the copied-over master template within a channel, it makes revisions to the other channel’s template. Is there a way around this?
Matt, I did the same thing and of course i deleted the stuff I didn’t want in the ‘copy’ tab. Only it deleted the same data in all the tabs. I lost 80% of my work